Record your Screen under Mac OS X
1. Introduction
I was asked by a friend how I would record the screen on a Mac, so I looked for some solutions on the web. I wrote also the usage of those. And as these are pretty useful, I publish everything here.
Please note that we look only at the free and open source solutions.
2. Helpful Tools
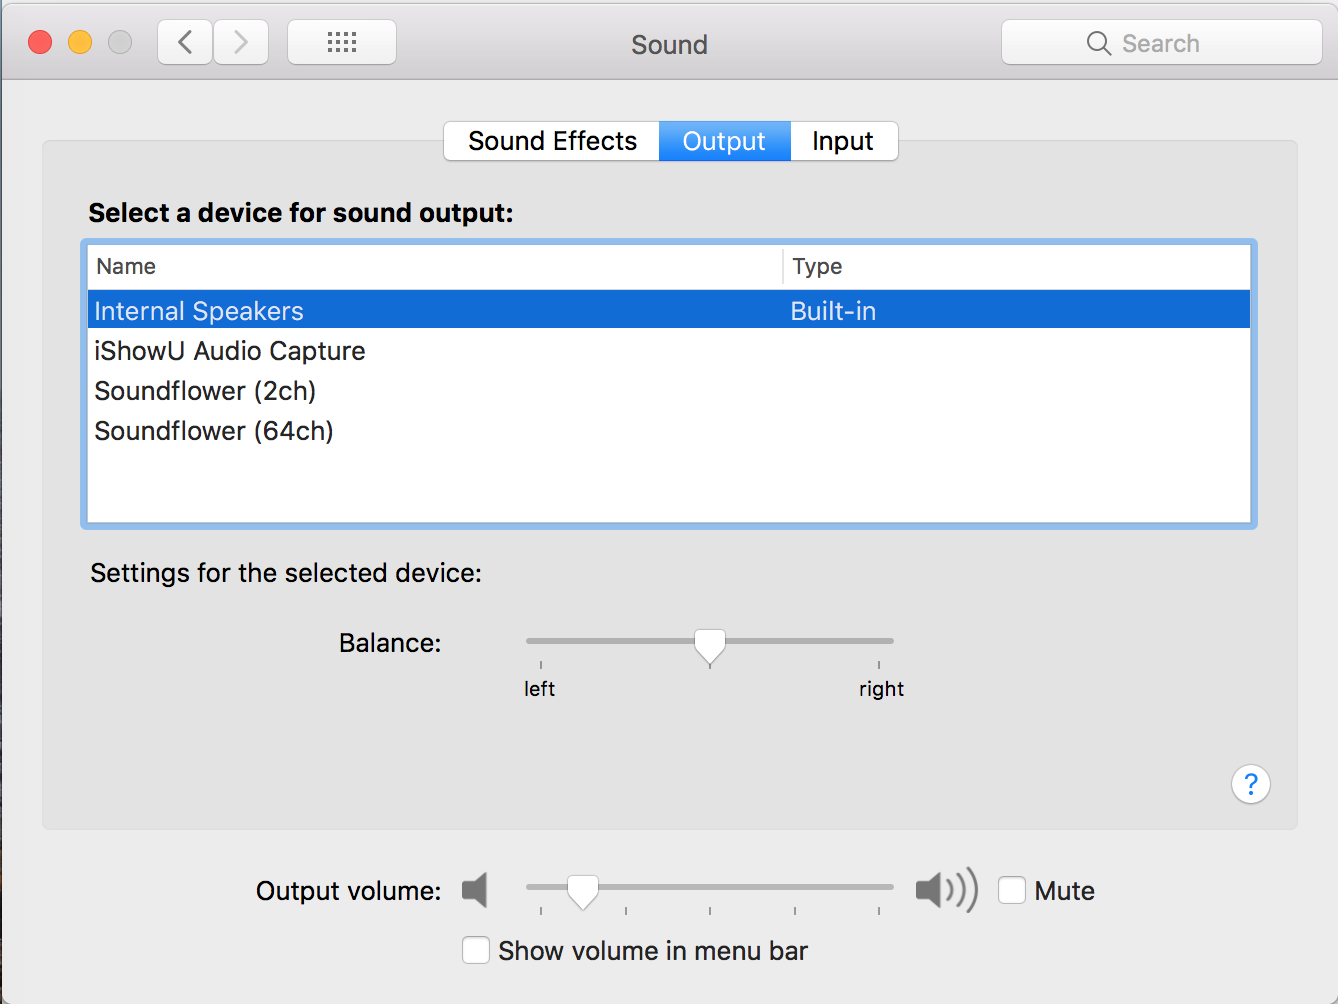
Recording the computer sound directly isn’t possible natively under OS X for basic apps (not needed for OBS). Therefore we need an external tool.
Such a tool adds a new device to the sound output and input possibilities as shown in the System Preferences:
2.1 Soundflower
I still use the old but good Soundflower, because it’s open source.
Get it here: https://github.com/mattingalls/Soundflower/releases/tag/2.0b2 and follow the installation instructions.
2.2 IShowU Audio Capture
Free software.
Get it here: https://support.shinywhitebox.com/hc/en-us/articles/204161459-Installing-iShowU-Audio-Capture and follow the installation instructions.
Please note that the uninstallation of this tool is not so easy!
2.3 Audio MIDI Setup
This comes with every Mac. It can be found under Applications > Utilities.
We will use this one to create a multiple output device. Like this, we will be able to hear the computer sounds and to record it.
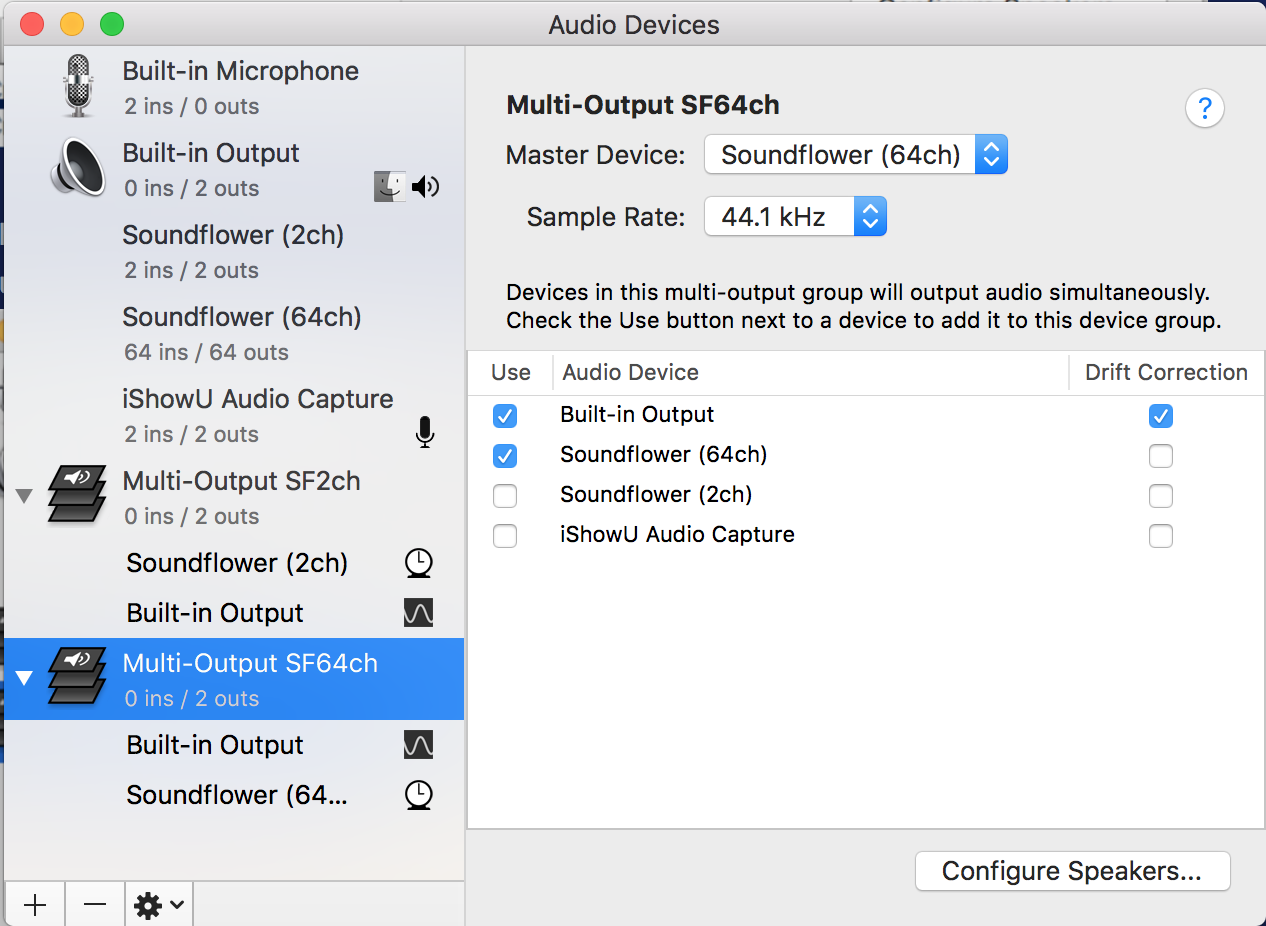
Create a Multi-Output Device:
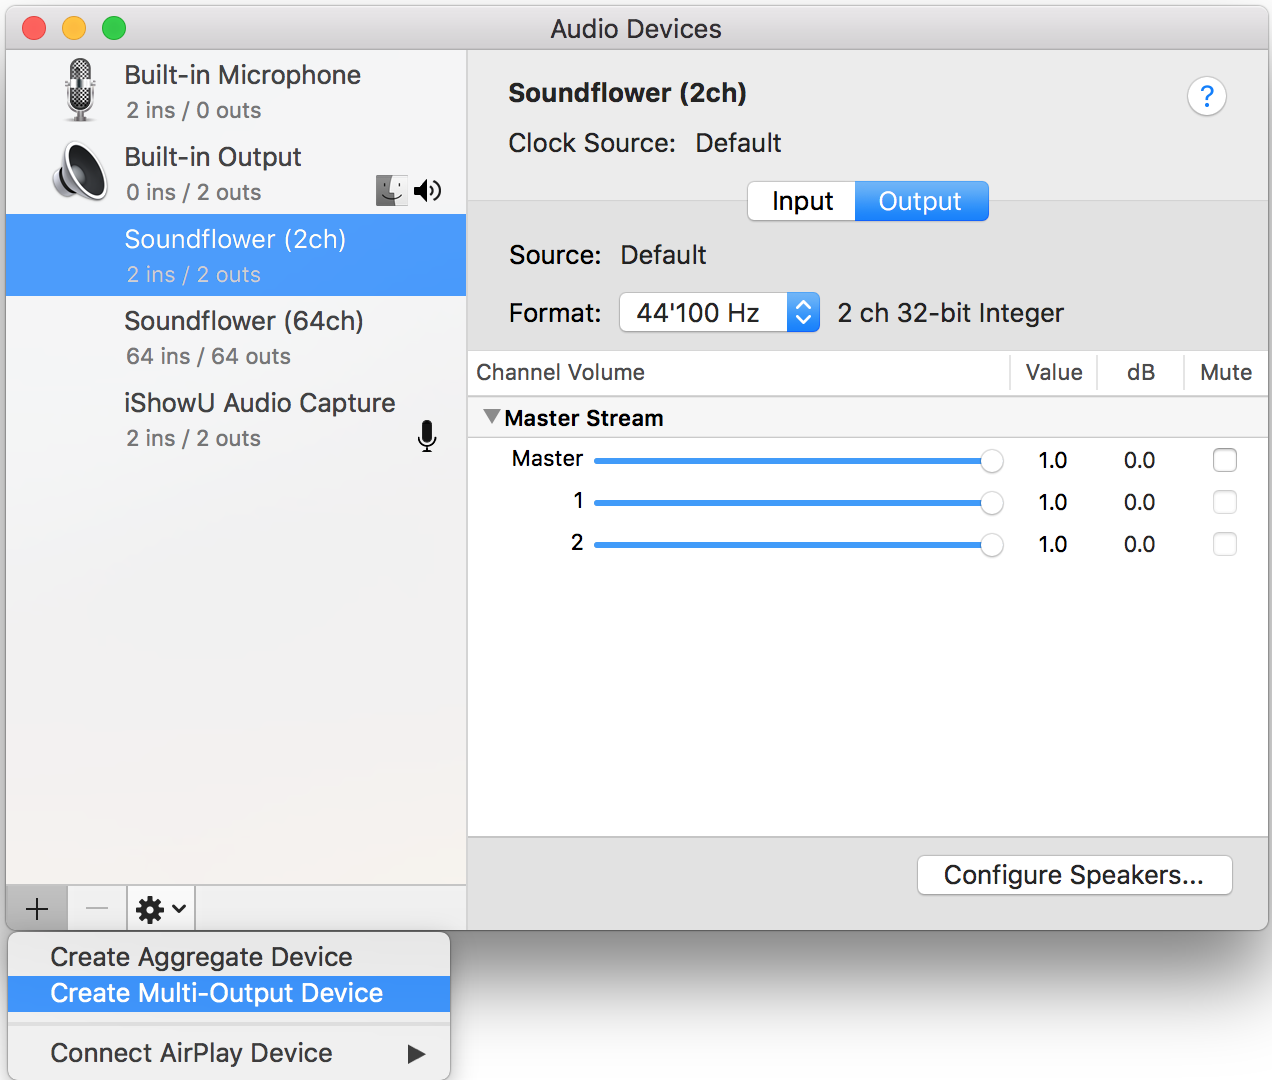
Select the Built-in and one of the installed devices. To change the multi-output name, click on it and rename it.
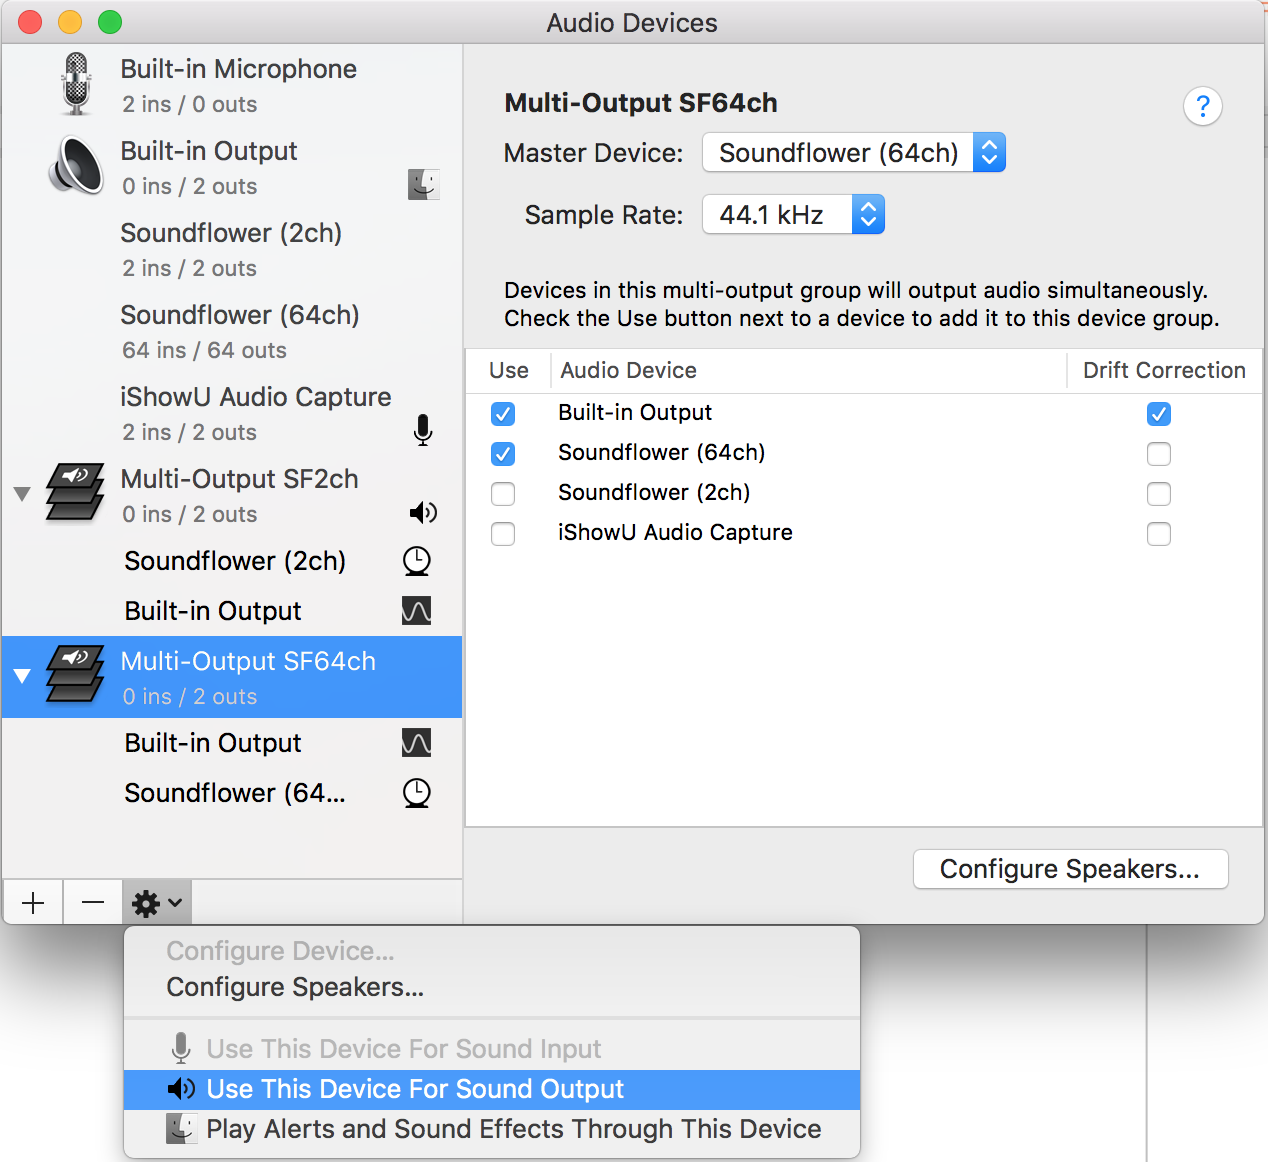
Select which device should be used to output the sound. Note that this option has the same effect as changing it in System Preferences > Sound.
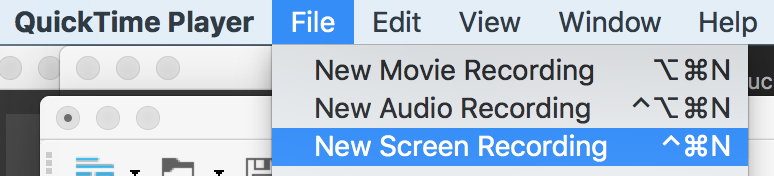
3. QuickTime Player
Free software.
Launch QuickTime Player.
Click File > New Screen Recording.
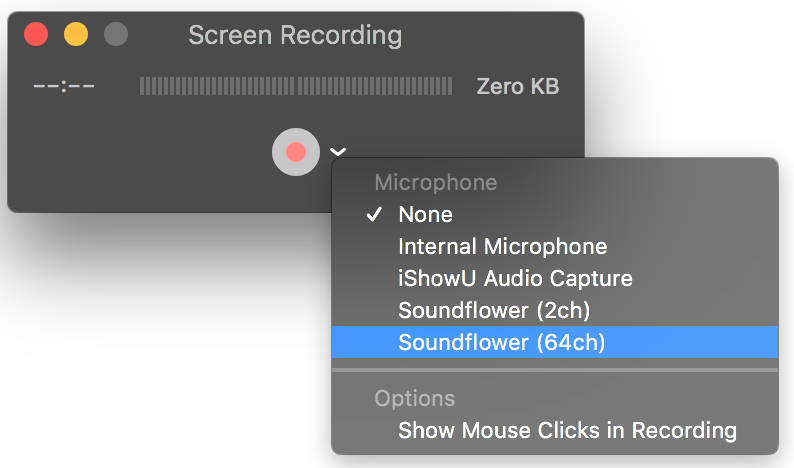
The record dialog pops up. Choose which sound source you want to record (it must be the same than the one set in Audio MIDI Setup). Note that only one source can be selected.
Click the record button. Select what should be recorded.

End the recording by pressing the record button in the menu bar: ![]()
Click File > Save as to save the video to disk. Only the MOV format is possible.
4. OS X Mojave
Under Mojave, Shift-Command-5 allows to record the screen.
As I’m not under this OS, I can’t test it, but ddg.gg will give you some answers.
5. Kap
Open Source.
Get it here: https://getkap.co/
When Kap is launched, it goes to the menu bar:
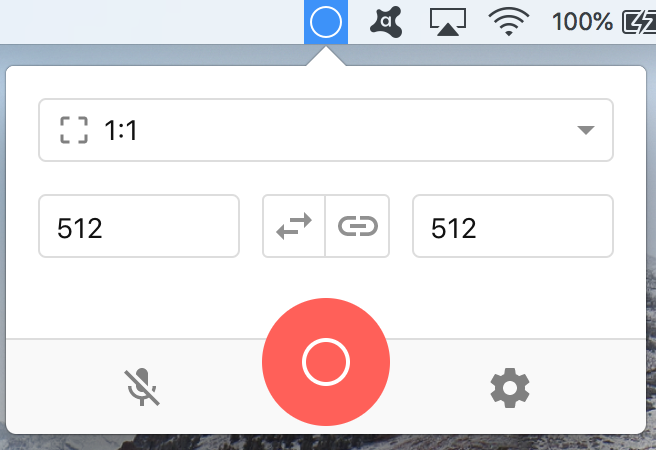
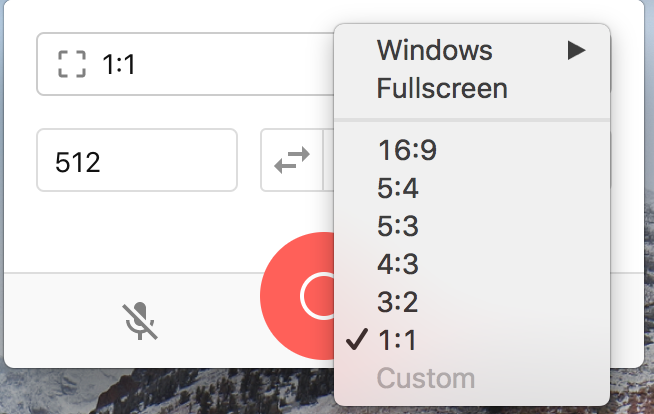
Configure the record window and/or its size:
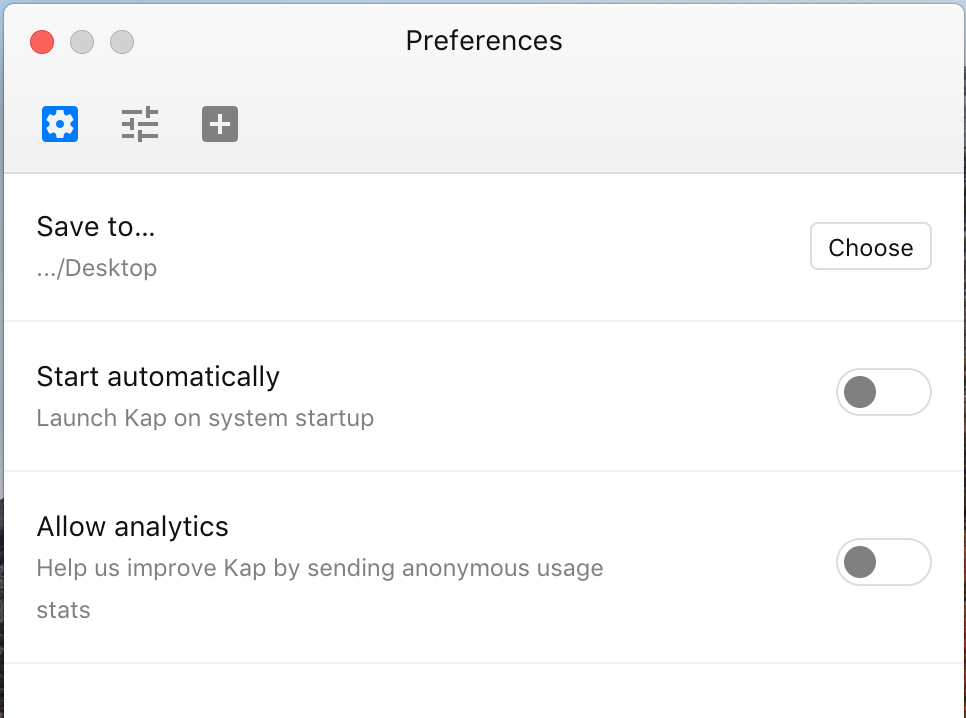
Set the save path in the Preferences:
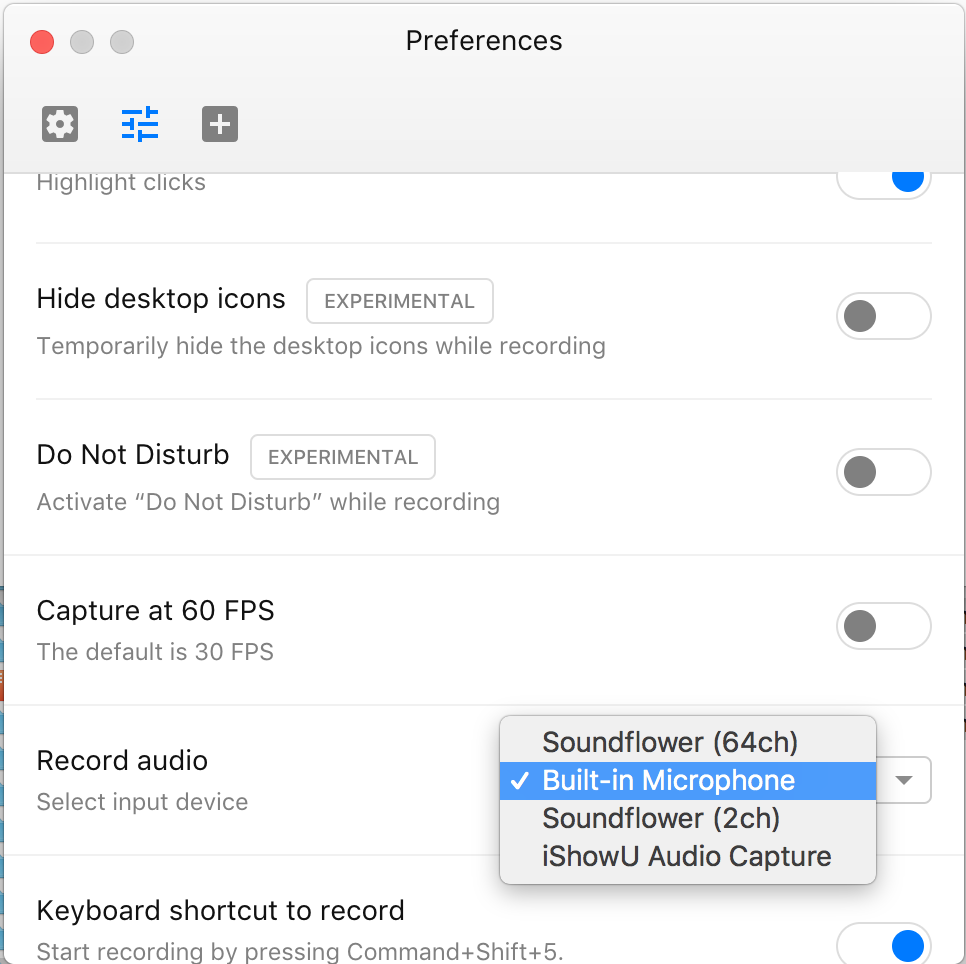
Set the sound channel in the Preferences (it must be the same than the one set in Audio MIDI Setup ). Note that only one source can be selected.
Once the recording is finished, you can save it with the following options:
![]()
6. OBS Studio
Open Source.
Get it here: https://obsproject.com/download and instal it.
It allows to stream and record at the same time. Only recording is also possible.
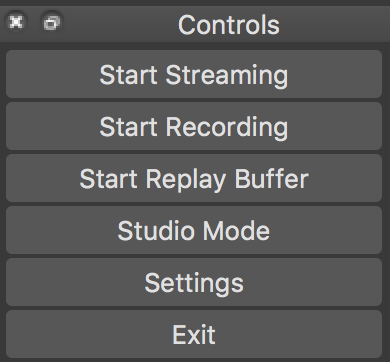
Launch OBS.
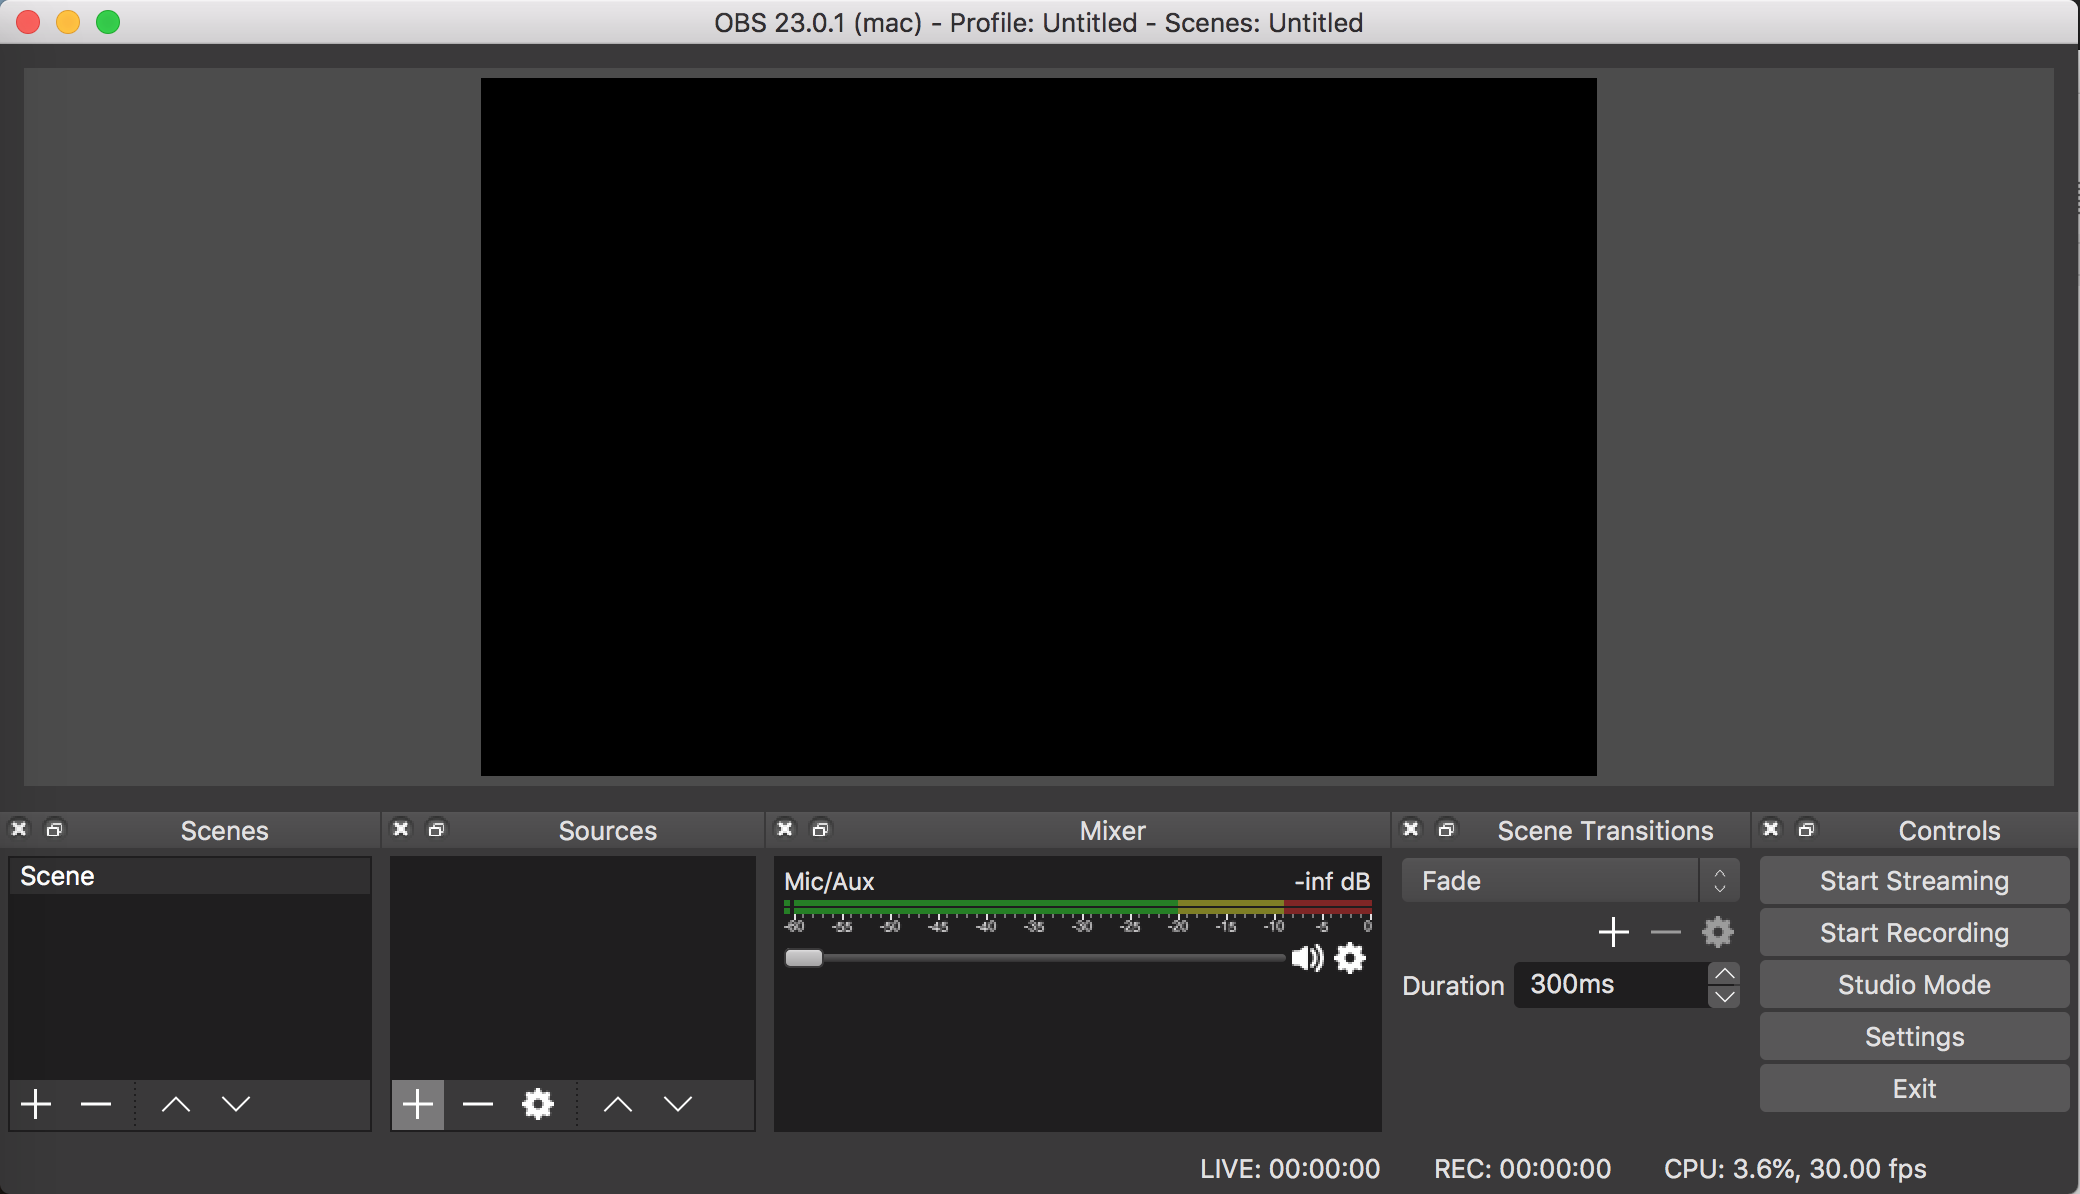
Let’s go to the settings: OBS > Preferences.
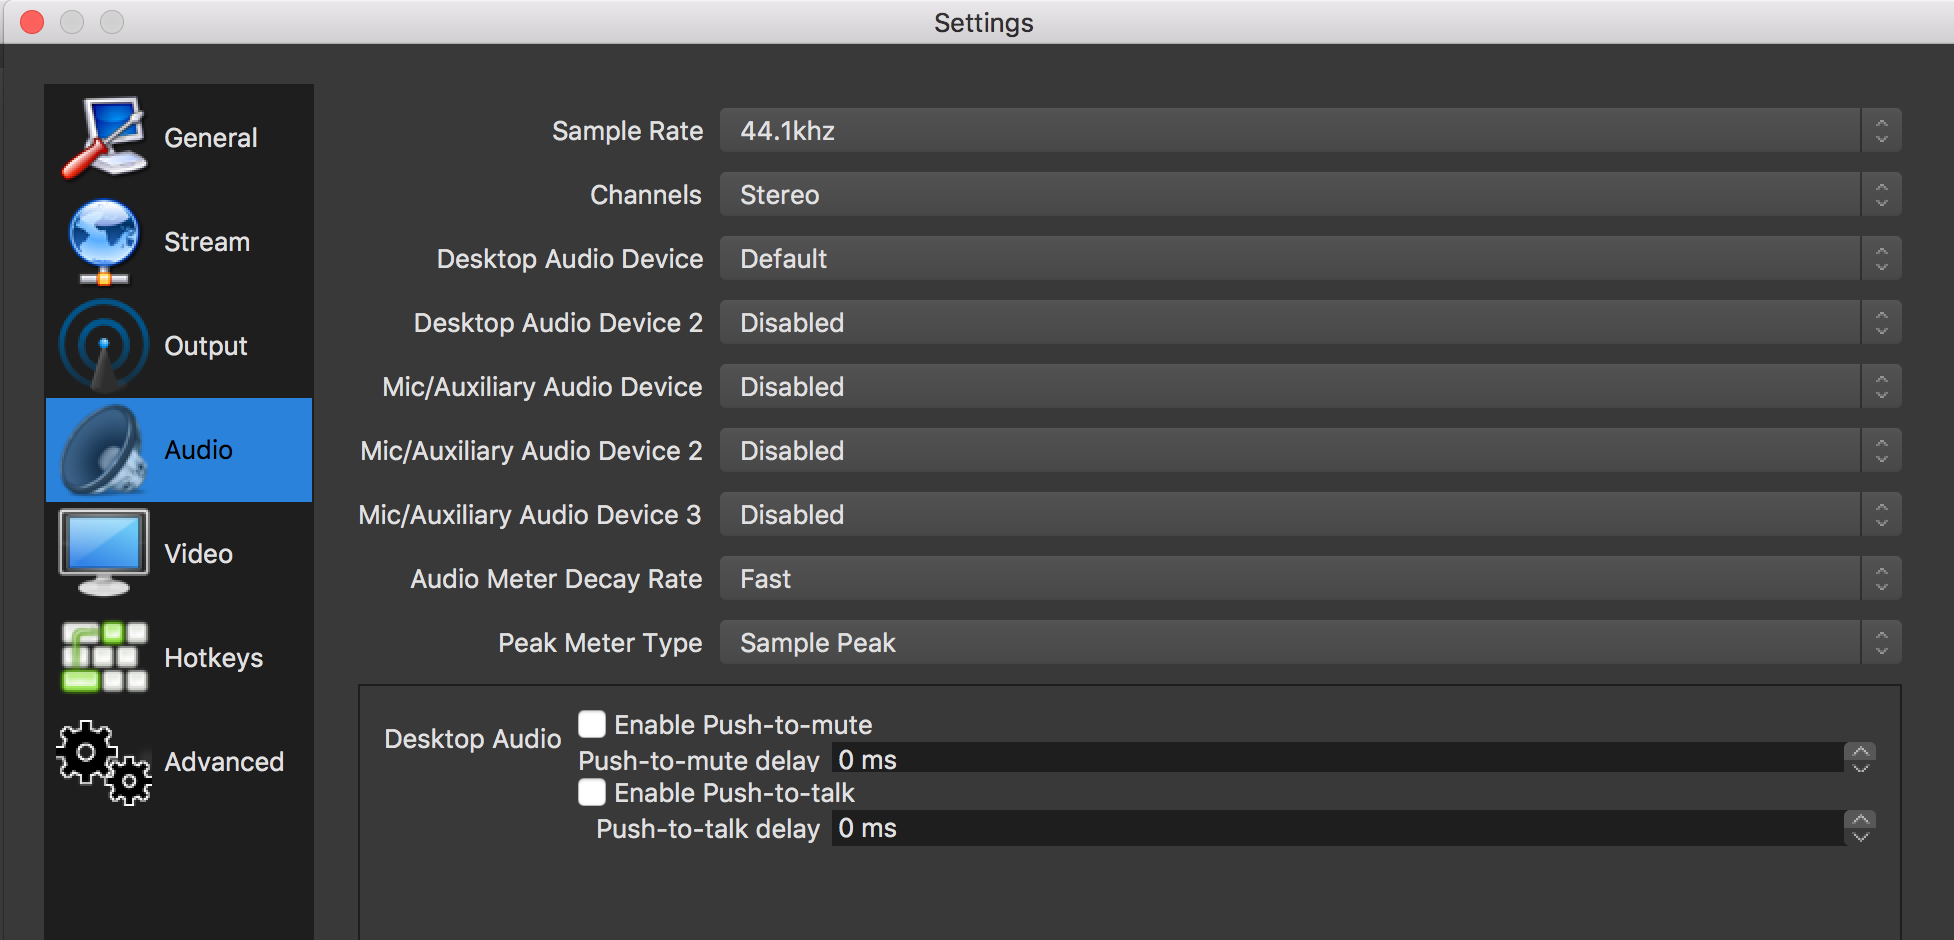
Under Audio, set the needed audio channels
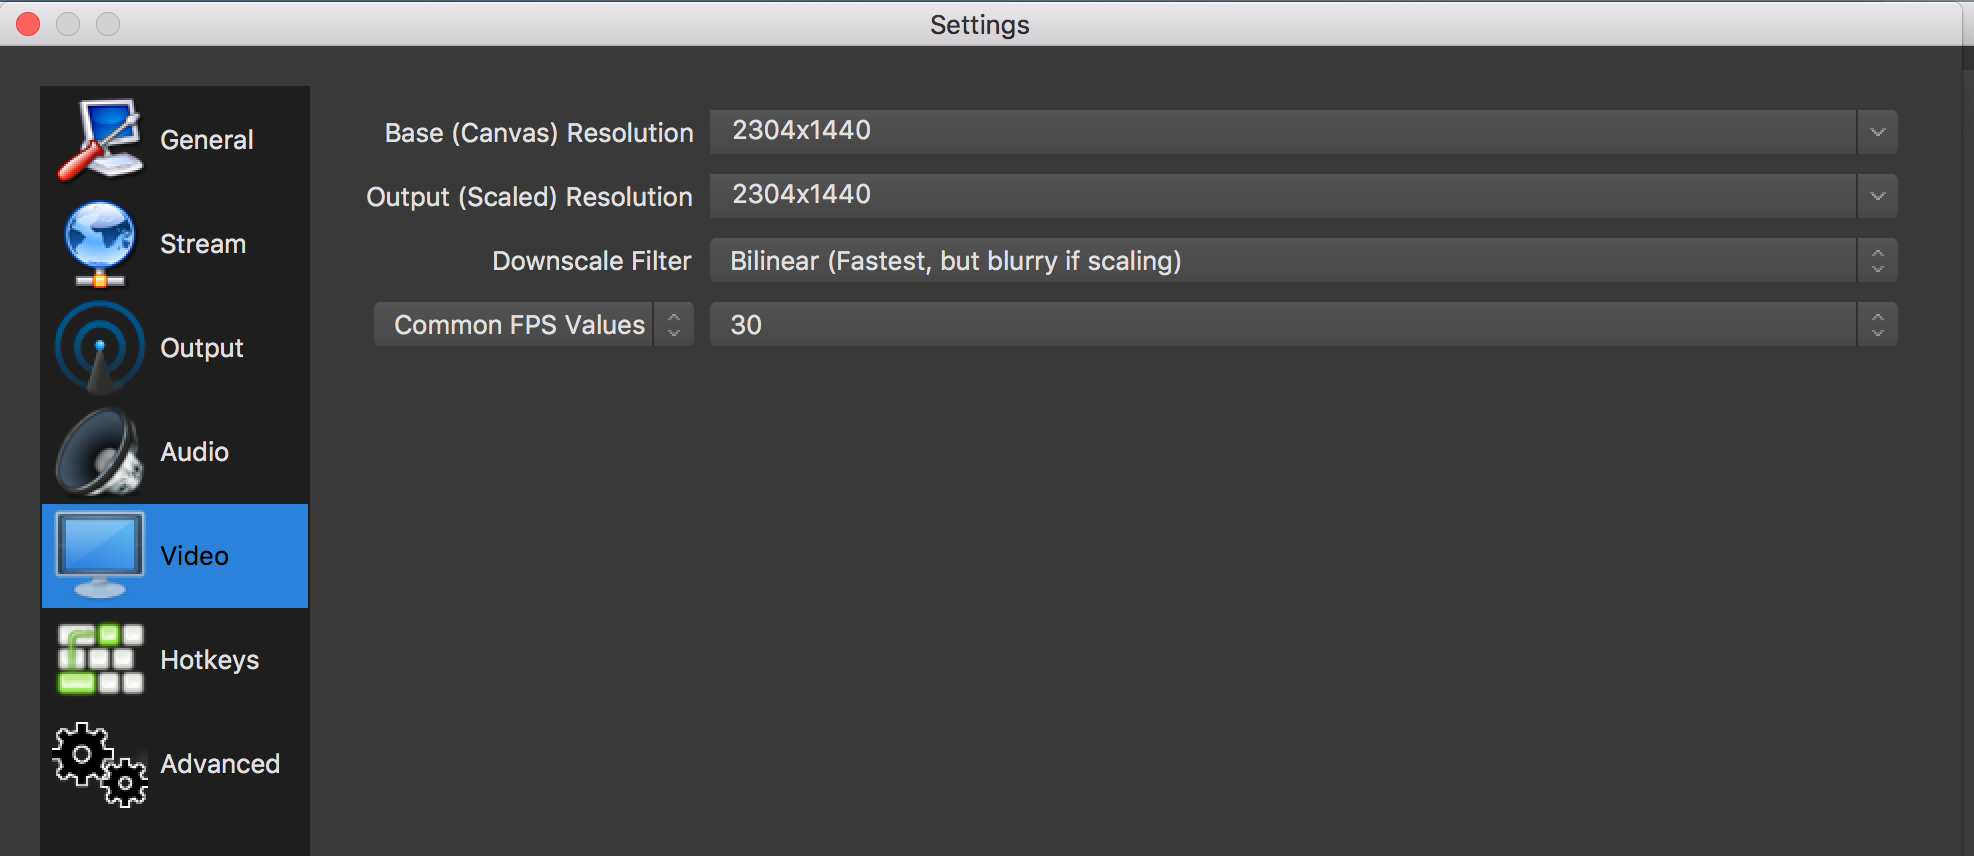
Under Video, set the size of the full screen (the highest default is often too small).
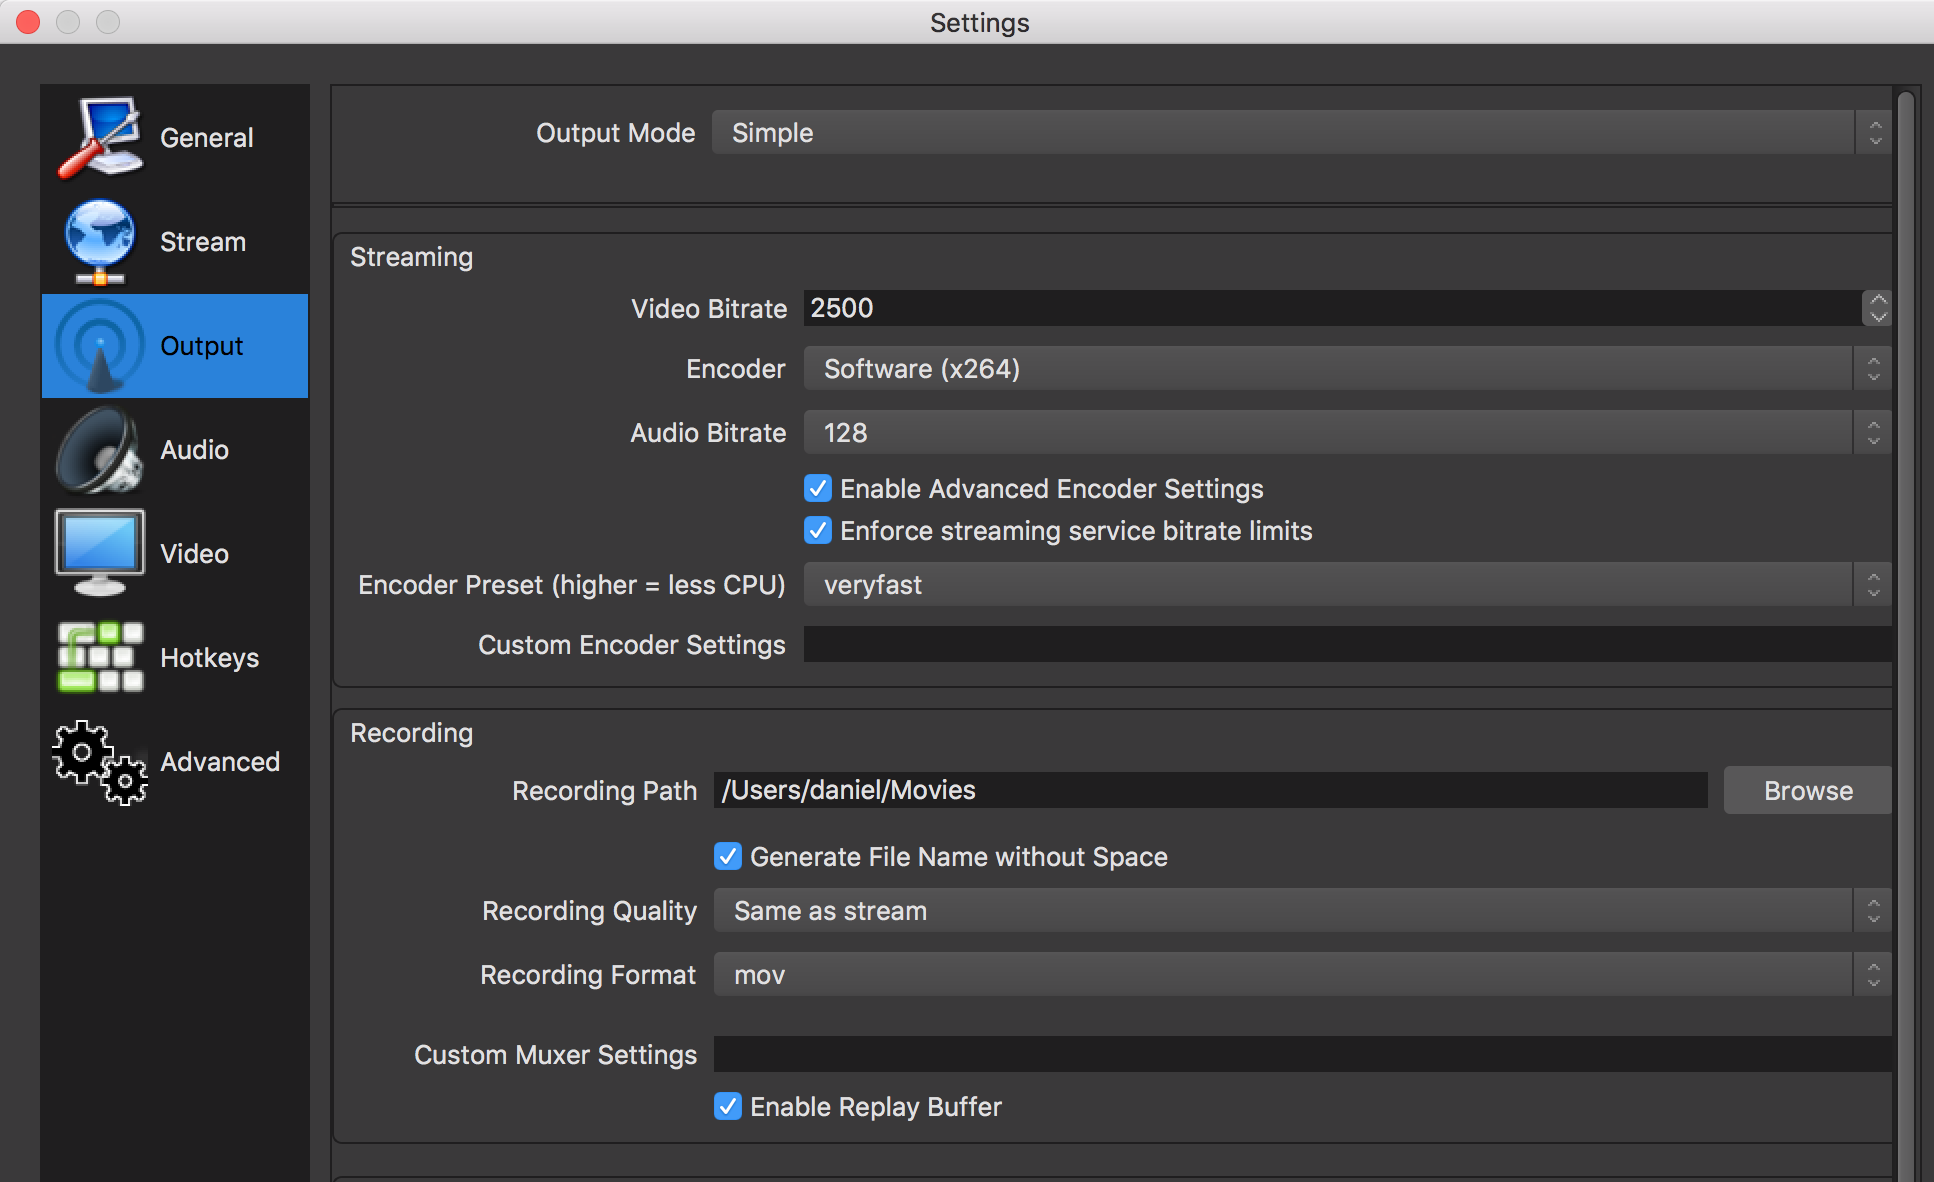
Under Output > Recording, set the recording path and the file format.
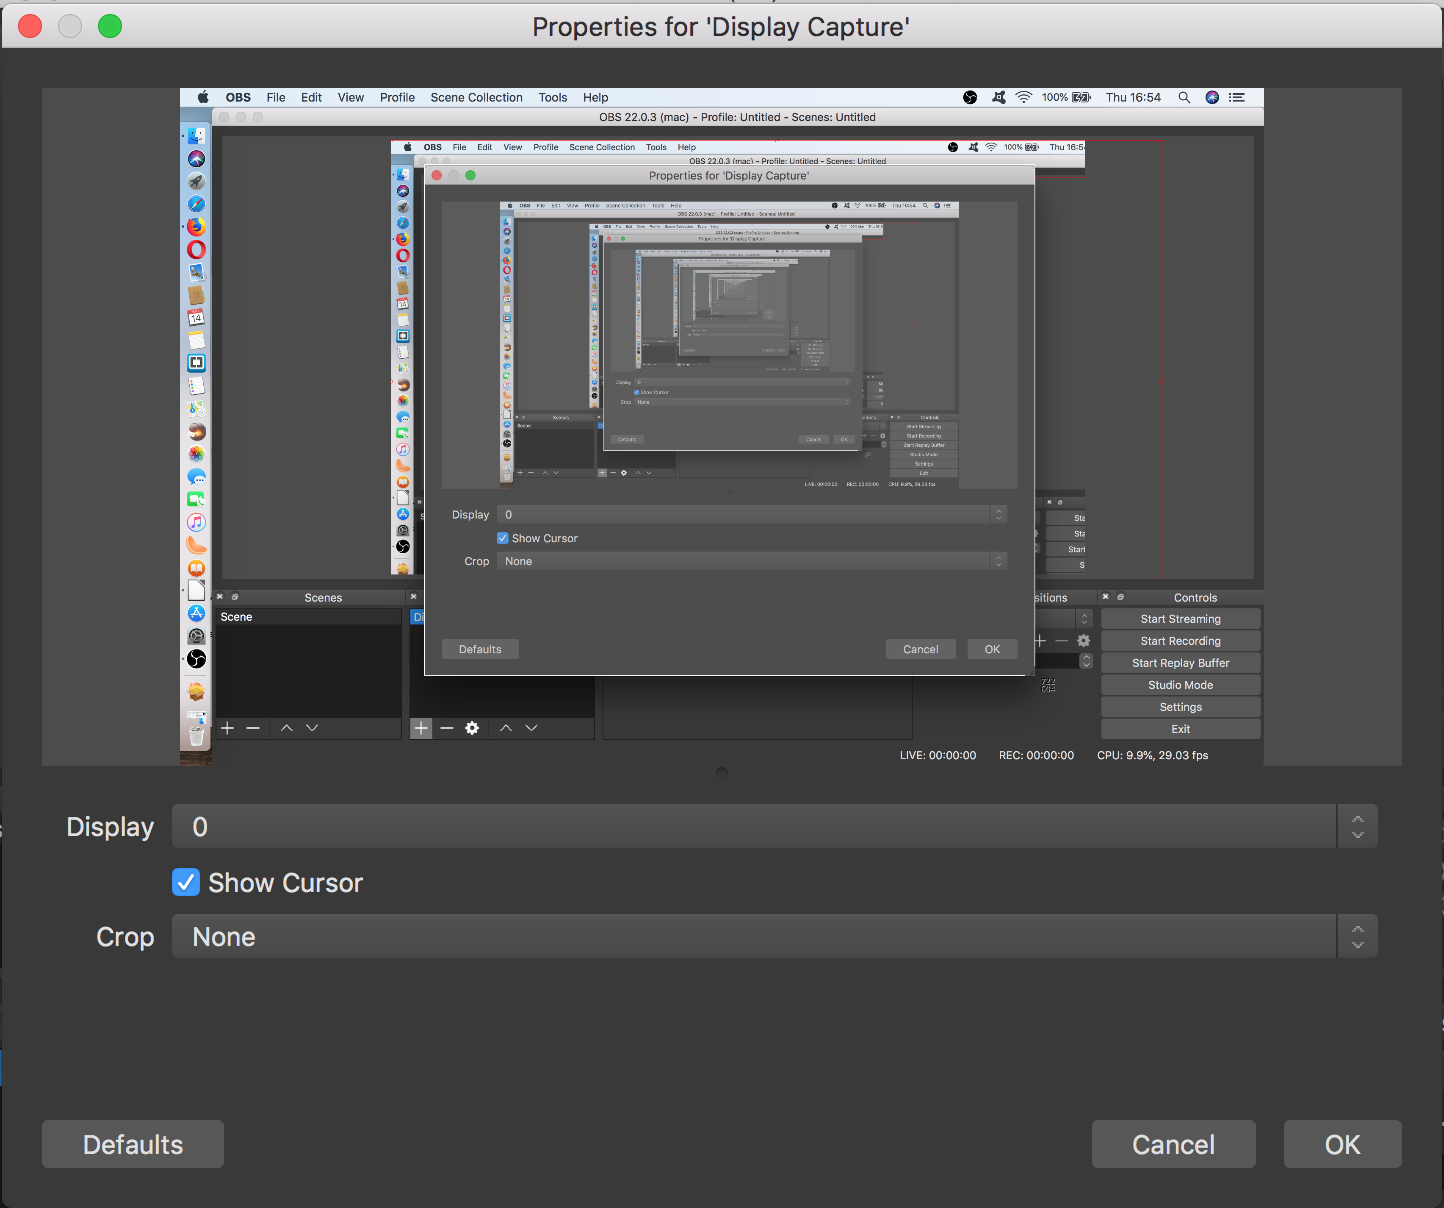
Back on the main screen, add Display Capture (or directly the software if available) under Sources.

Choose the screen to record (if multiple screens are available).
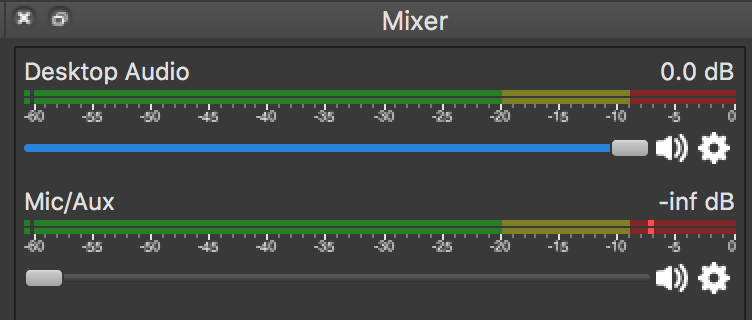
Under Mixer, set the different sound sources.
Finally start the recording.
The video file will be written after you pressed the stop button.
7. VLC
Open Source.
This one is really complex to configure.


