Create a 3D city from scratch in one day.
The idea is to show how easy it is to create a whole 3D environment in which the player can walk around. This could be used in the BIM world, to show a new construction project, and, more generally, for games or XR.
The browser WebGL demo can be seen here. Right now, it’s made for computers, as it uses some keyboard commands.
The following tools are needed:
Unity is cross-platform game engine developed by Unity Technologies.
There’s a free personal edition. Download it from here: https://store.unity.com/products/unity-personal. Once downloaded, install it and create your login.
This collection of assets, scripts, and example scenes can be used to kickstart your Unity learning or be used as the basis for your own projects. Download it from here: https://assetstore.unity.com/packages/essentials/asset-packs/standard-assets-32351. These assets can also be added directly from within Unity 3D.
This is useful to create the main menu.
Download it here: https://assetstore.unity.com/packages/essentials/unity-samples-ui-25468
For this example, I used several free city props:
The 3D models used in the city can be created in any 3D or architecture software (e.g. Blender, etc.).
These models can also be found in some assets. I used only free assets for this example.
Start Unity 3D and create a new 3D project.
Under Assets, get the assets described in chapter 2.2 and import these to the project.
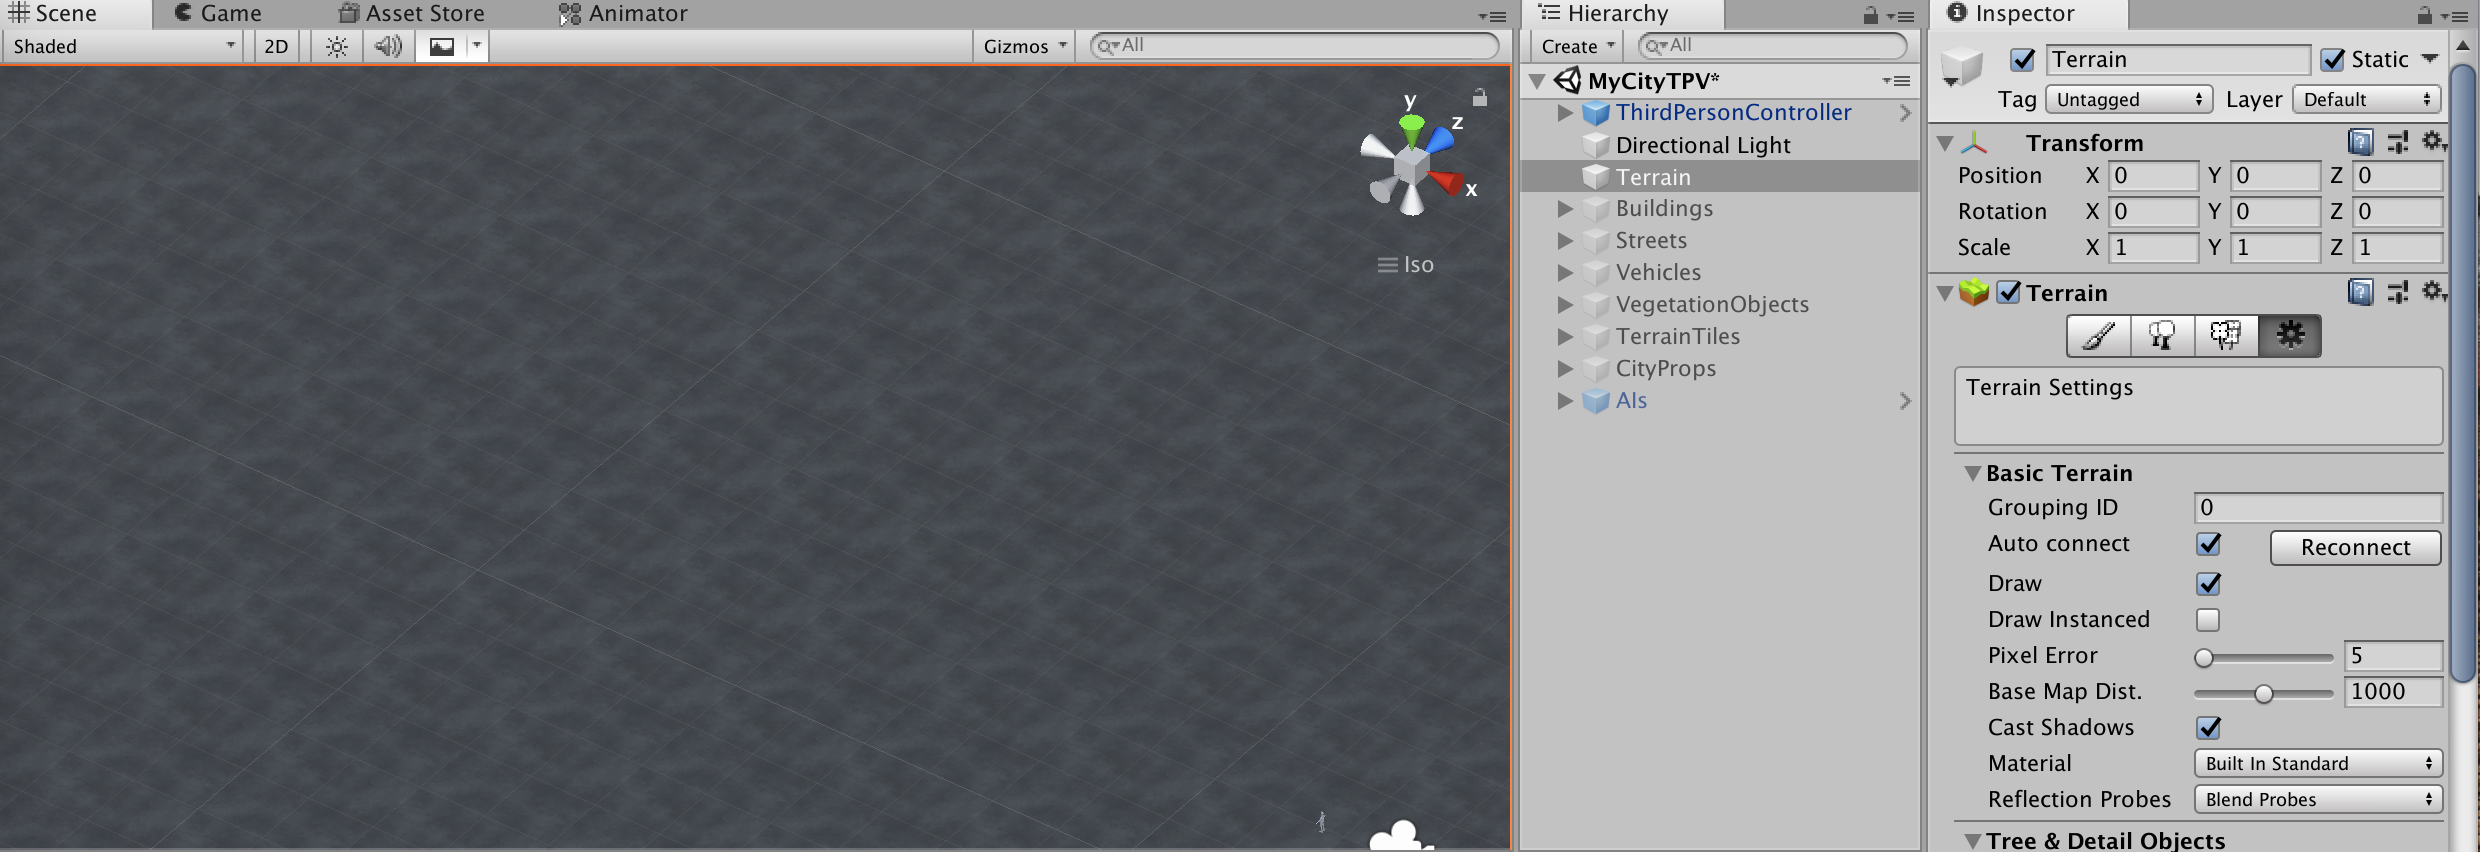
Create a new scene and name it MyCity.
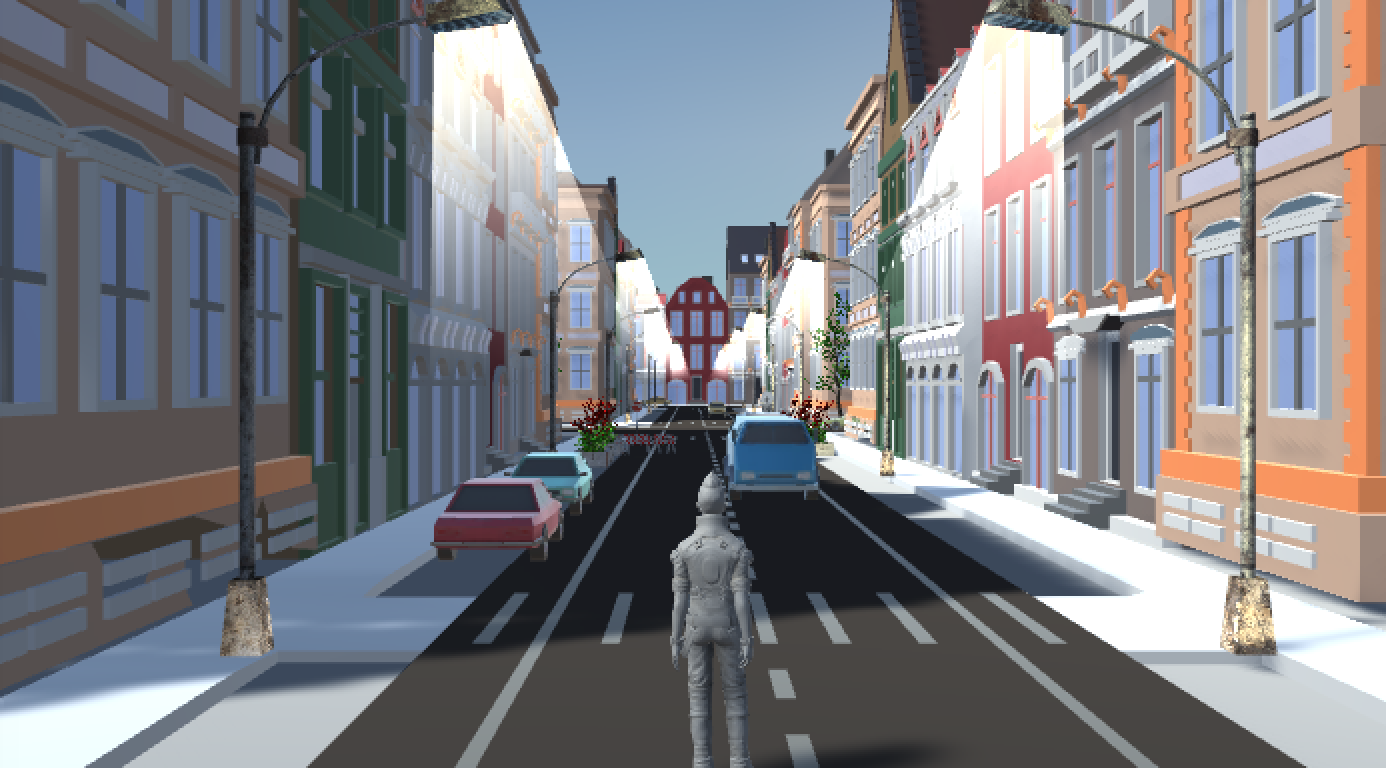
As we don’t import a 3D terrain, we need to create one from scratch. It will be flat and the texture is set to a Dark Concrete free texture.
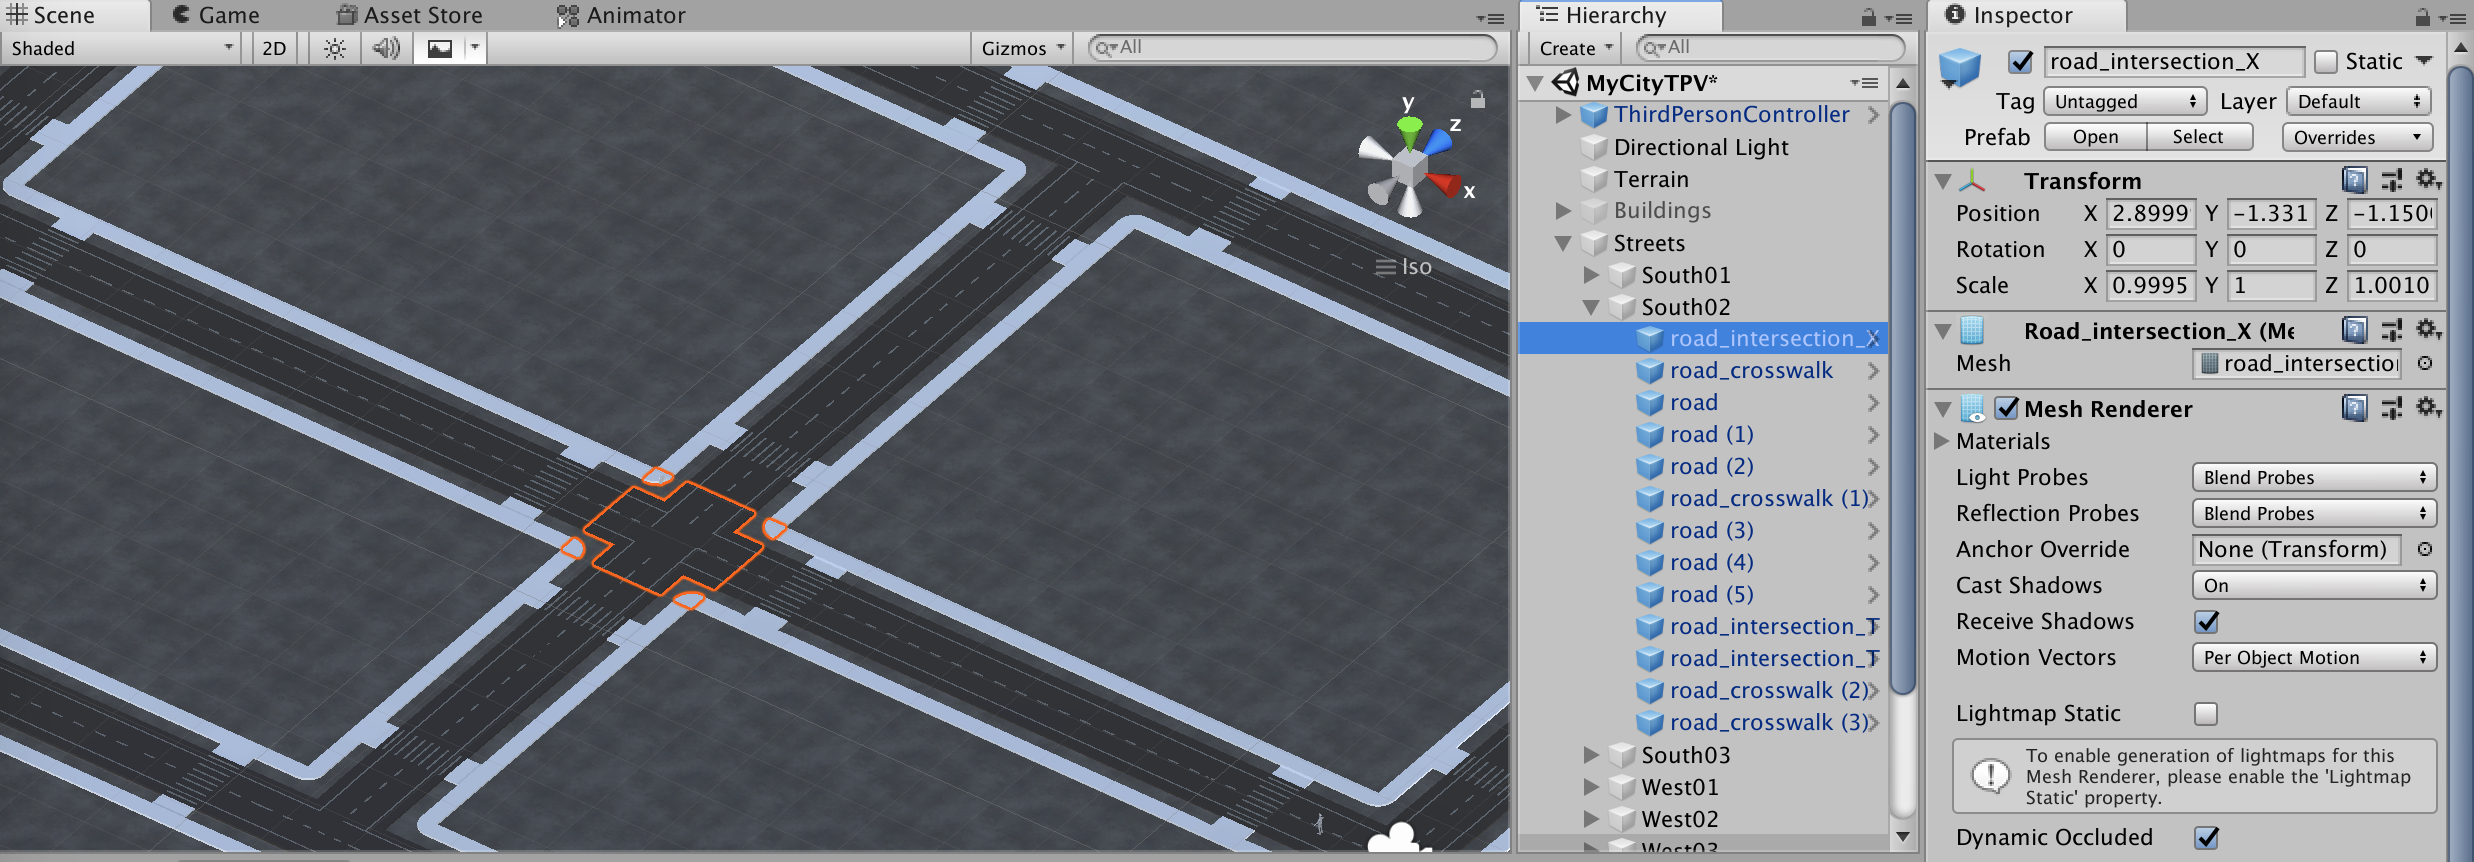
Add a streets system. Take some street tiles from the assets.
The tiles should be defined as children of streets; it makes it easier to manage those.
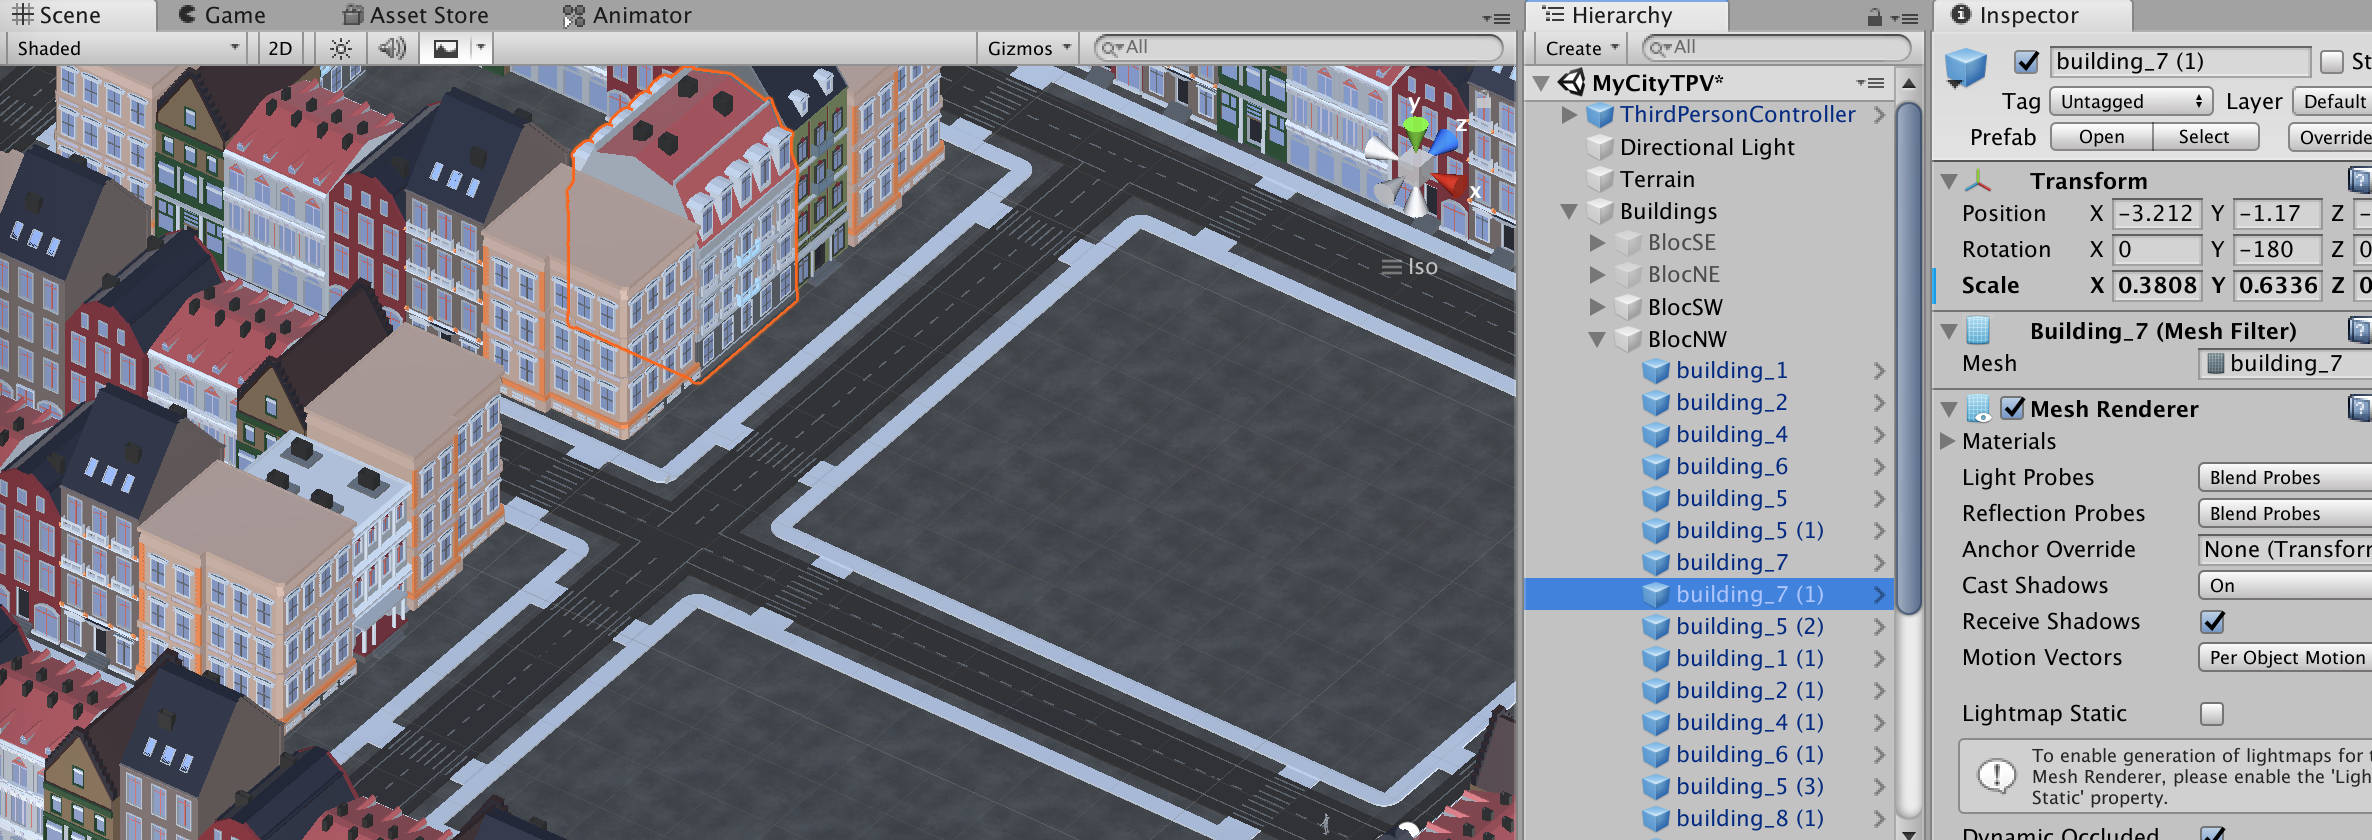
Add some buildings. Take the building 3D models from the assets.
The buildings should be defined as children of blocs of buildings; it makes it easier to manage those.
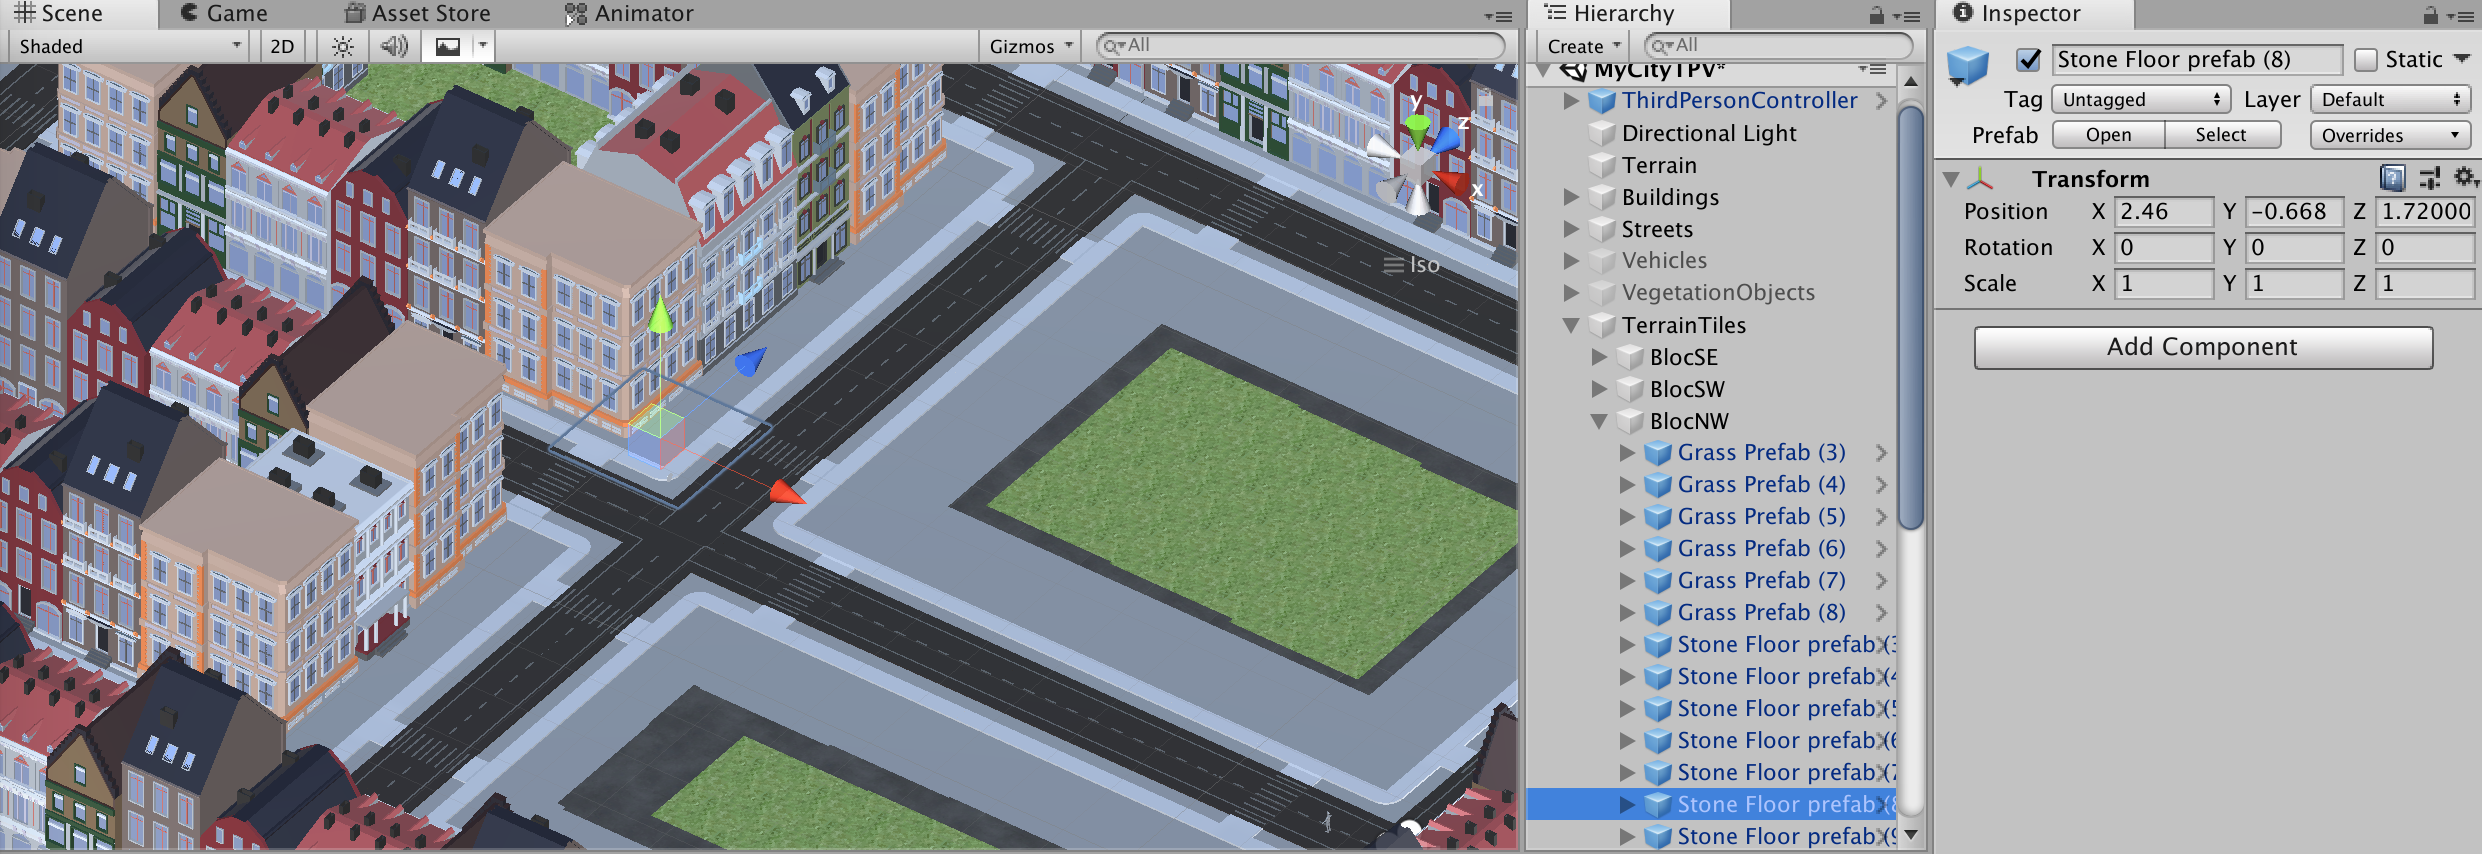
Add some terrain tiles. Take these tiles from the assets.
The tiles should be defined as children of terrain blocs (here we took the same blocs as for the buildings); it makes it easier to manage those.
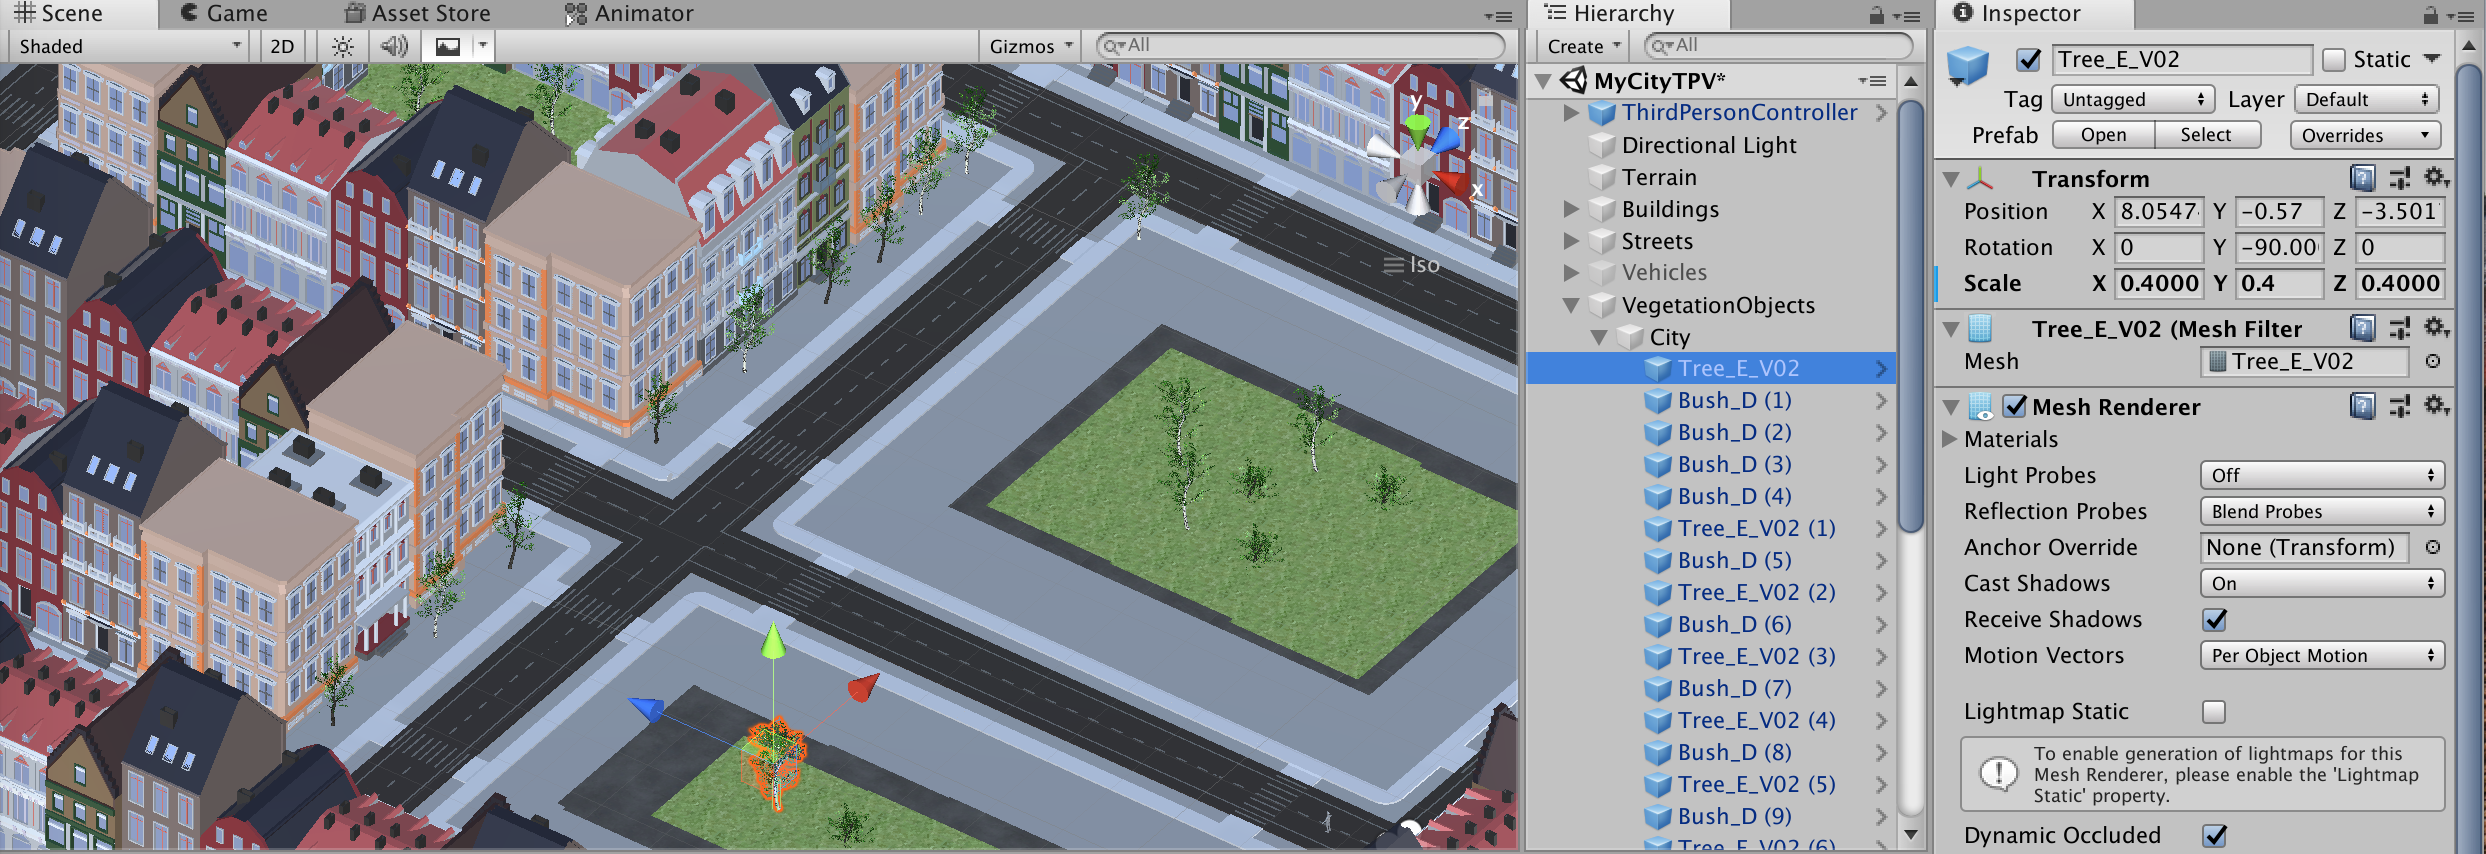
Add the vegetation. Take trees and bushes from the assets.
The objects should be defined as children of vegetation blocs; it makes it easier to manage those.
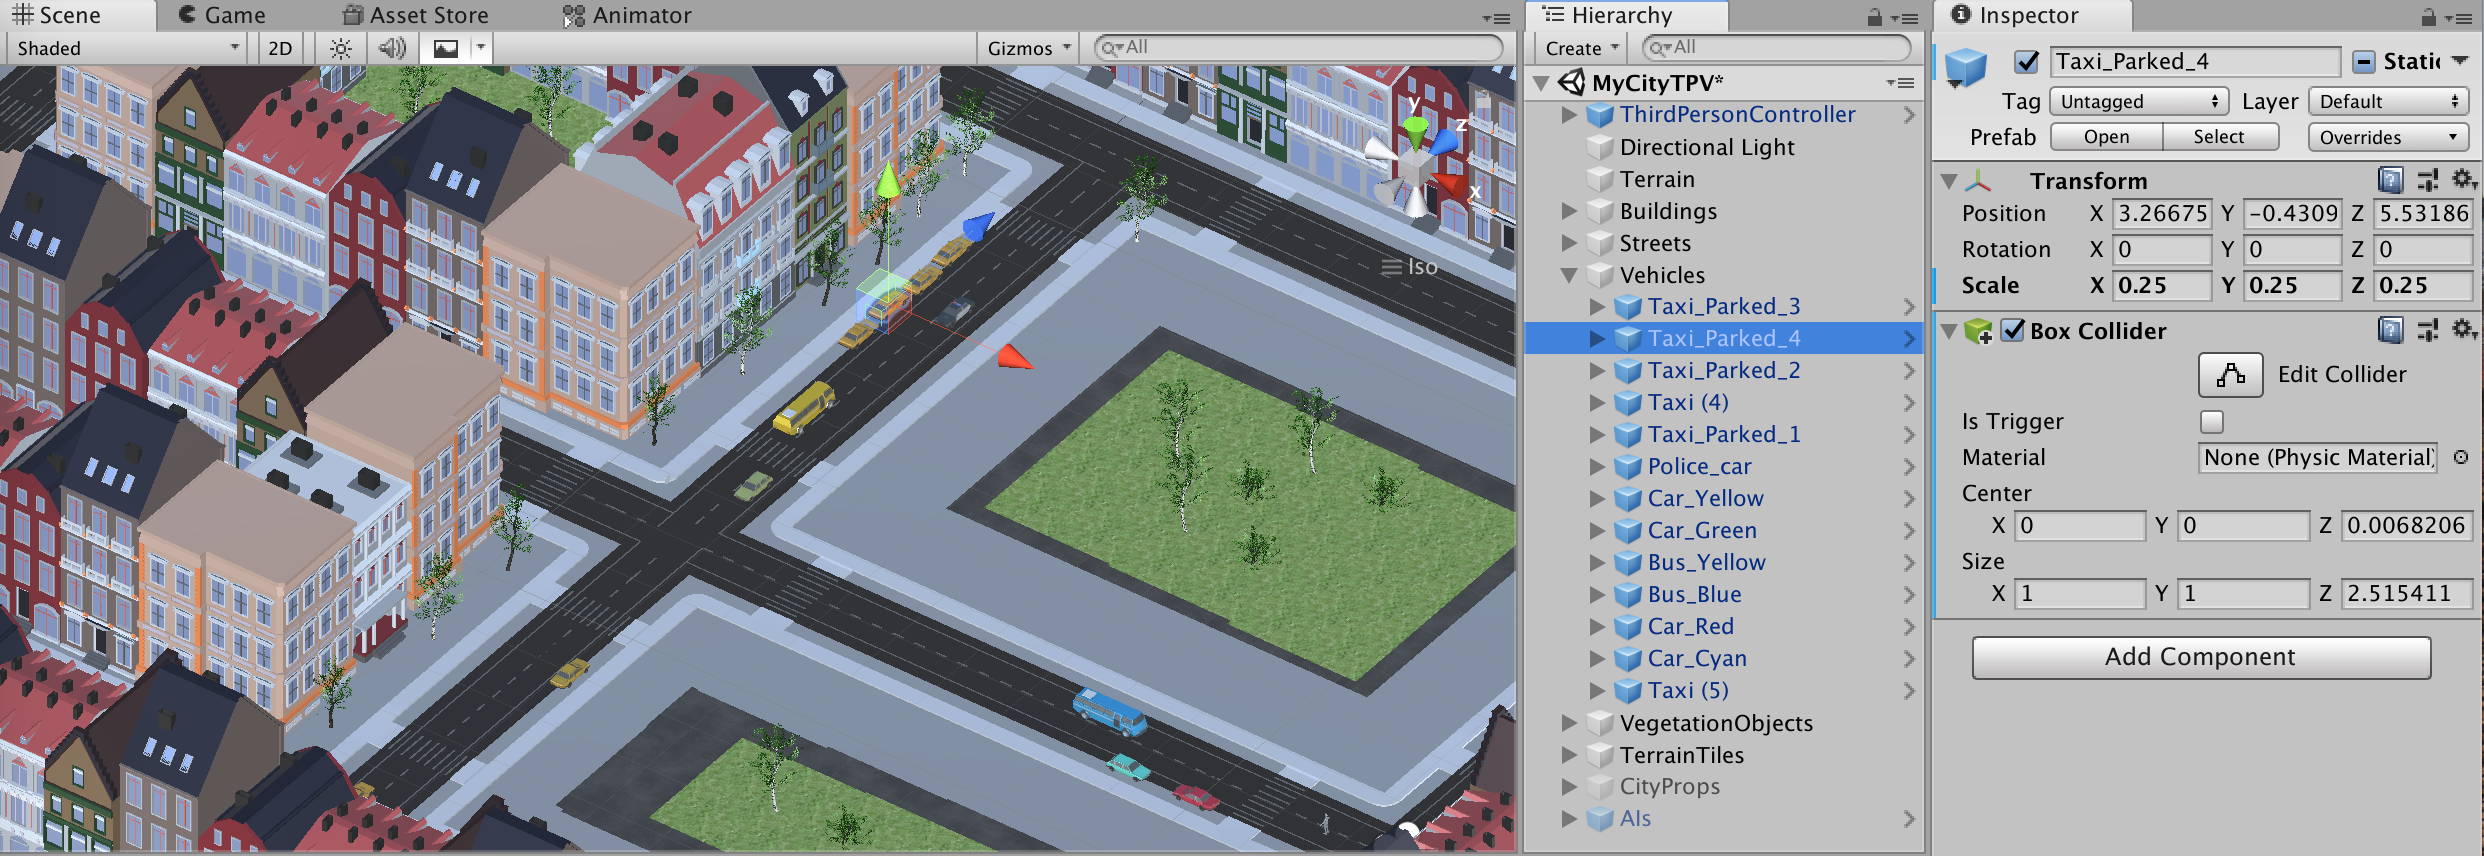
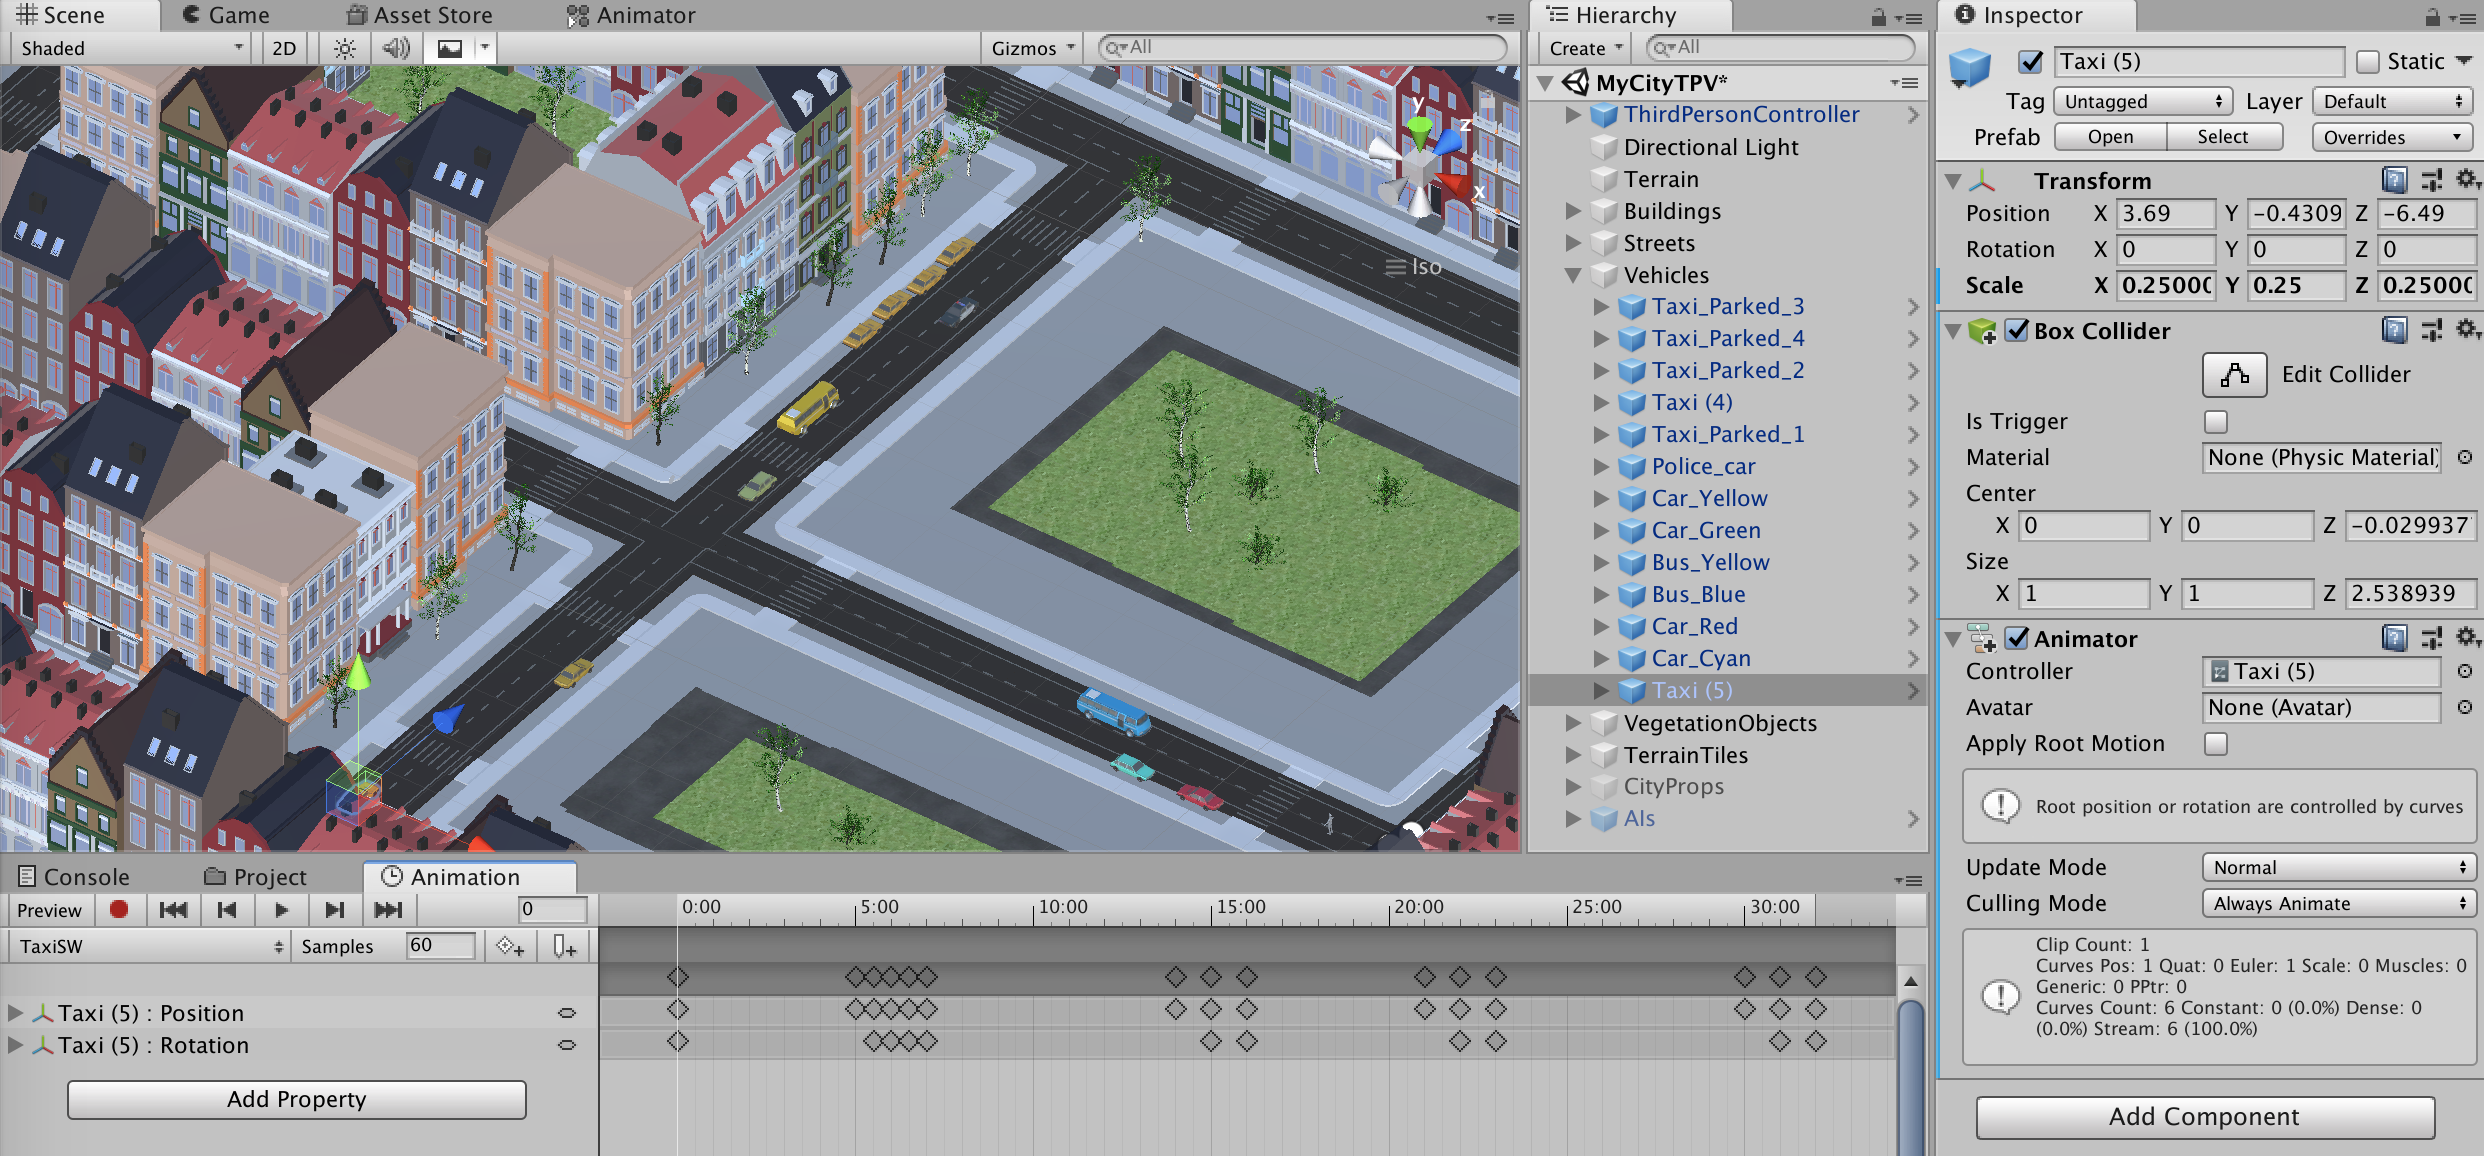
Add some vehicles to the streets. Take the vehicles from the assets.
We can add very basic animation to our vehicles:
Add an Animator component to the GameObject.
In the Animation tab, define the animation (position, rotation at given times).
In this example, a taxi drives around one bloc of houses. The animation is not really good...
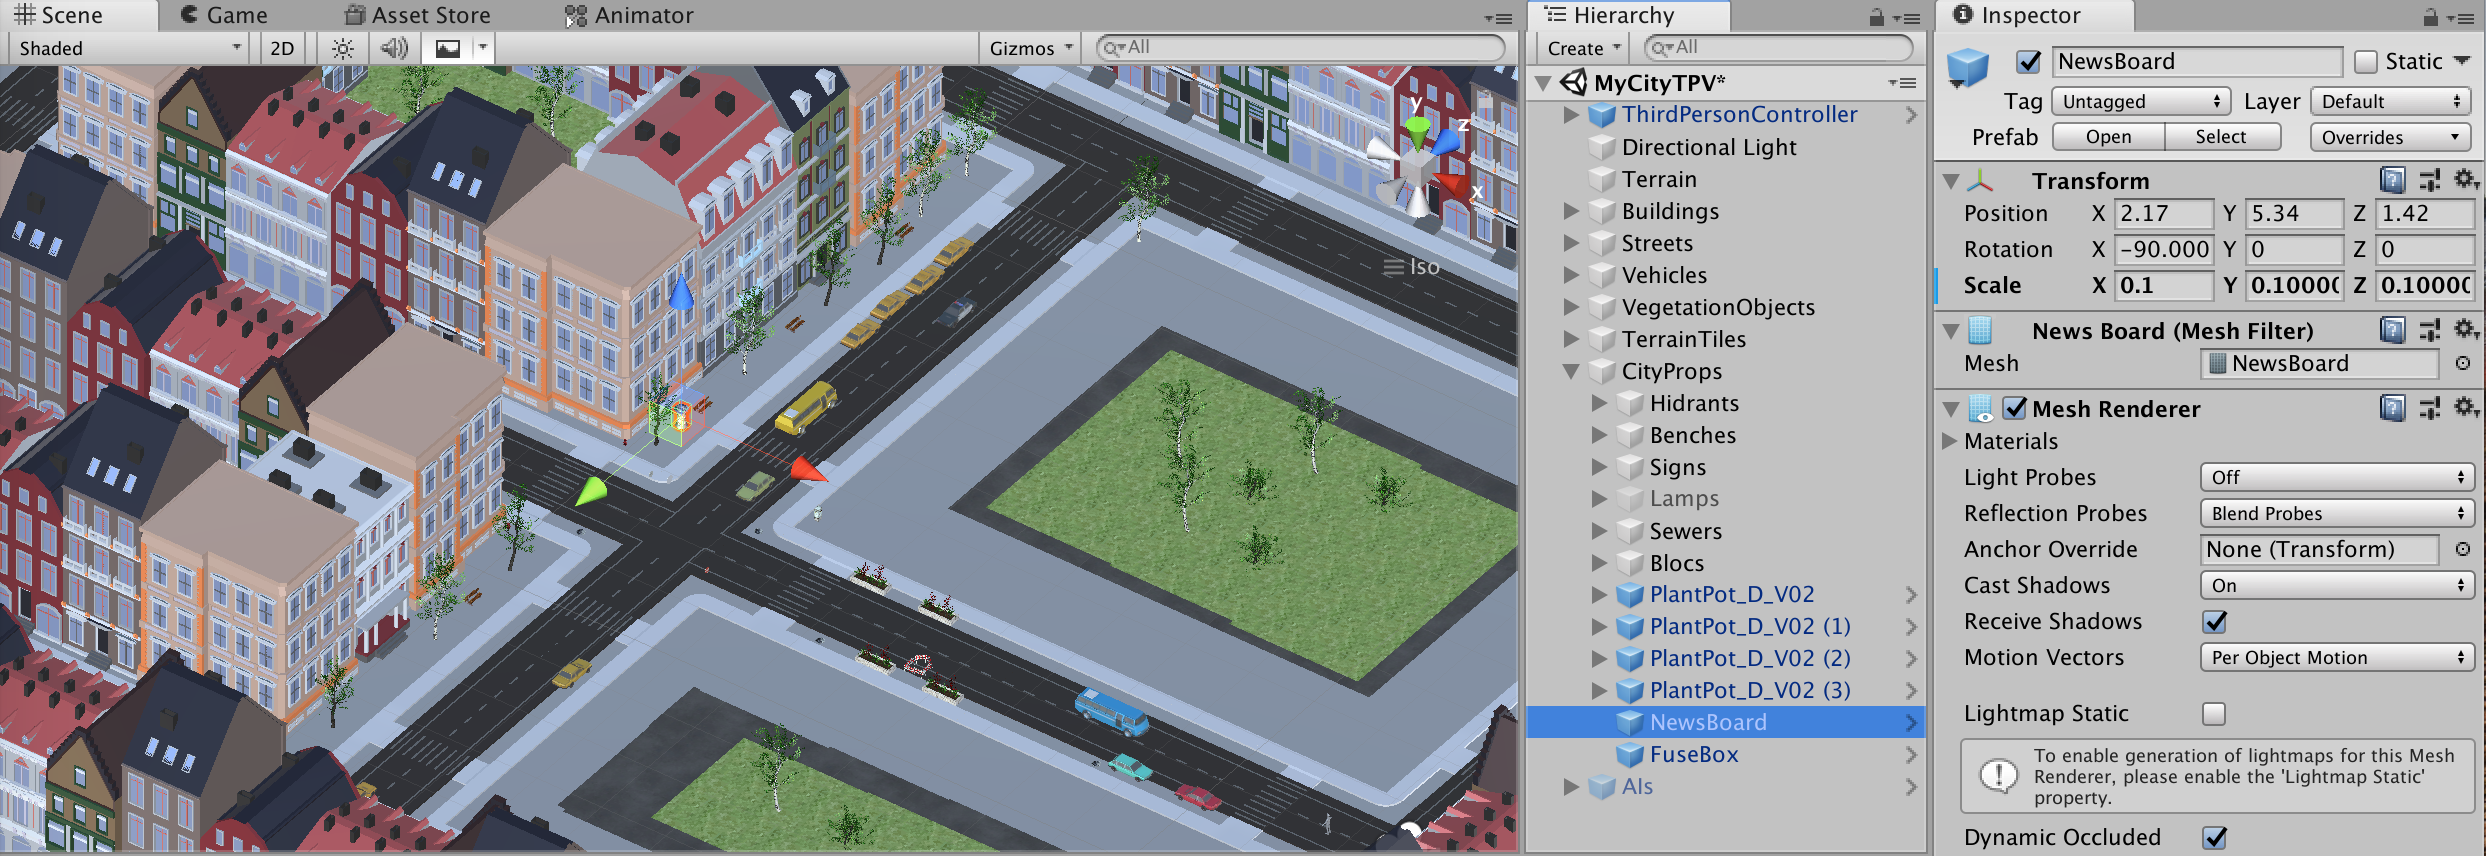
Several props can be found in the assets. Add some of those.
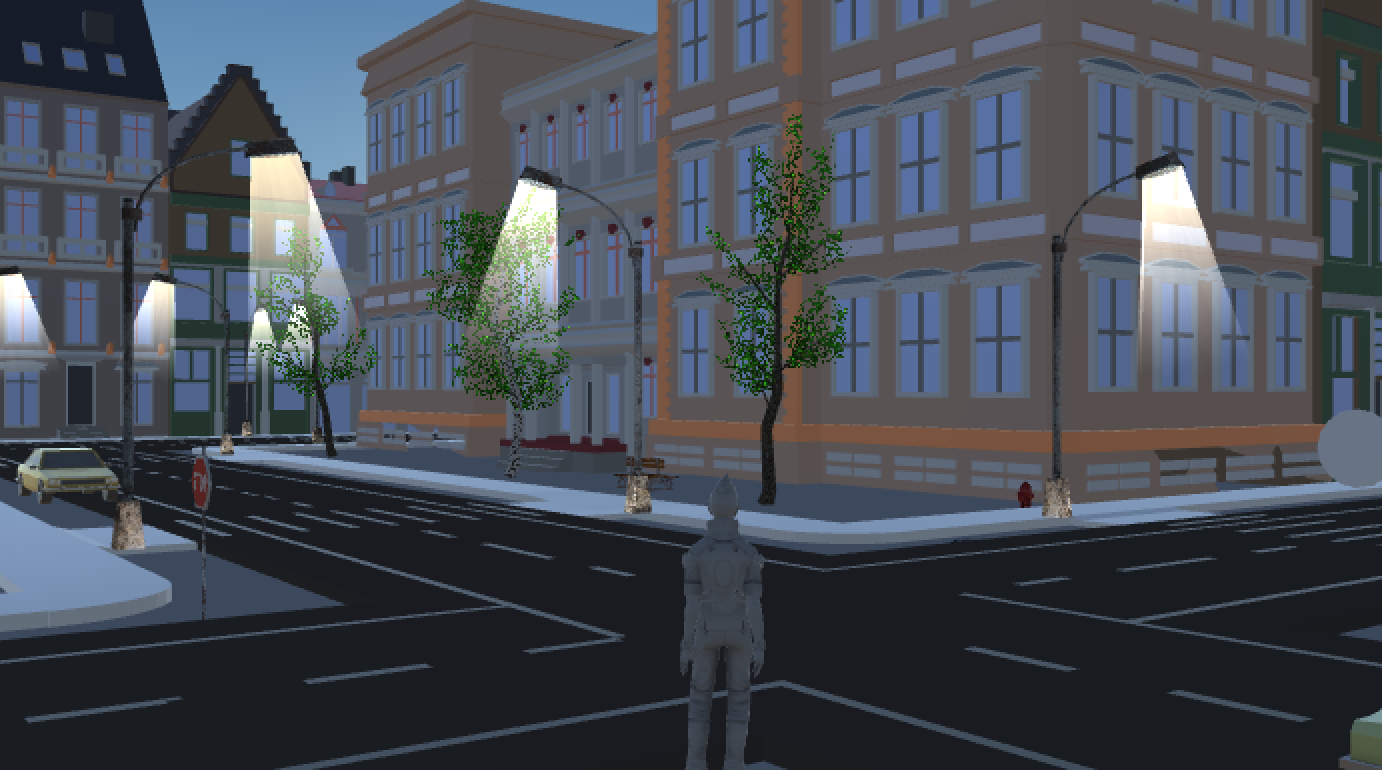
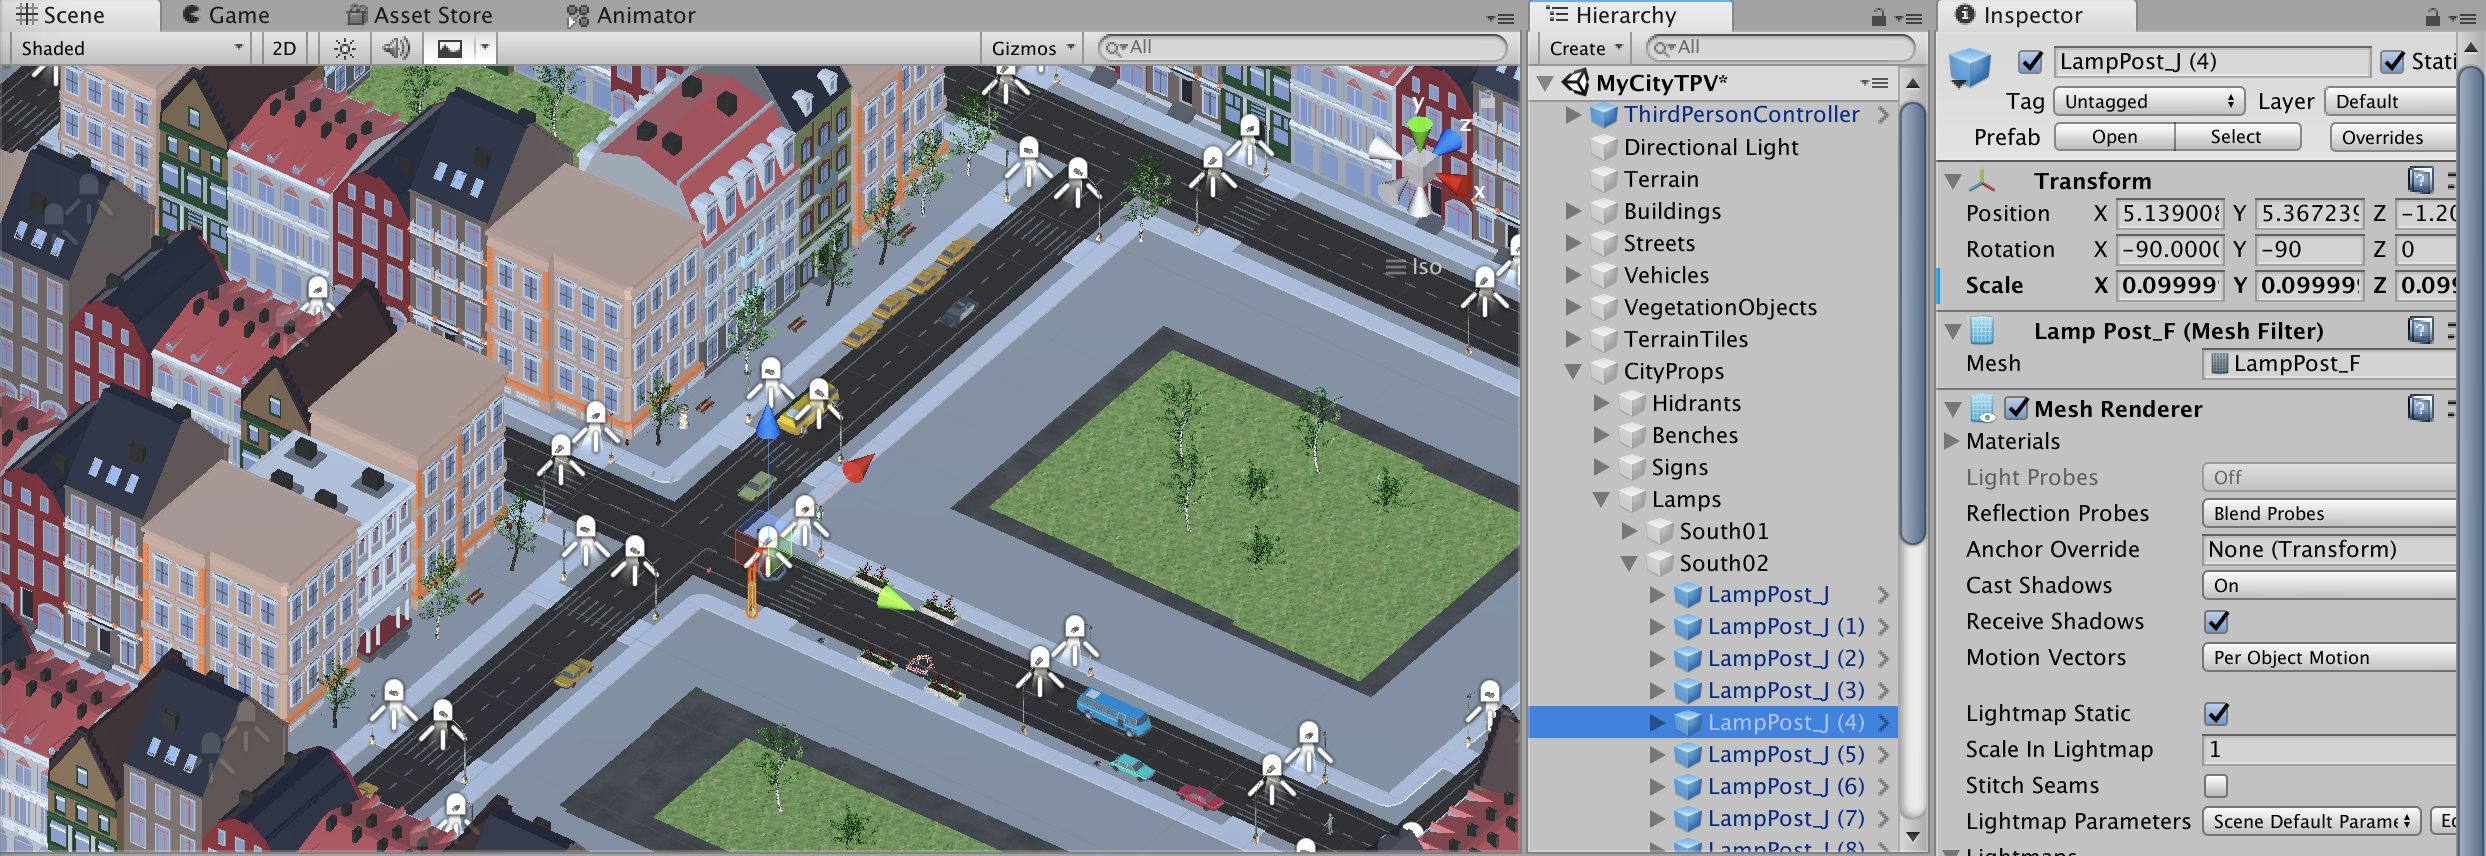
The lights are important elements in a city. It allows the player to see how the city looks in the night.
Add some lamps props (found in the assets).
To have some AI guys running in our city, we will need a navmesh.
Open the navmesh by the menu Window/AI/Navigation.
Define everything and click on Bake (please note that all the 3D objects should be visible before baking; here, part of the buildings are hidden to show what happens). All blue parts can be walked by our AIs.
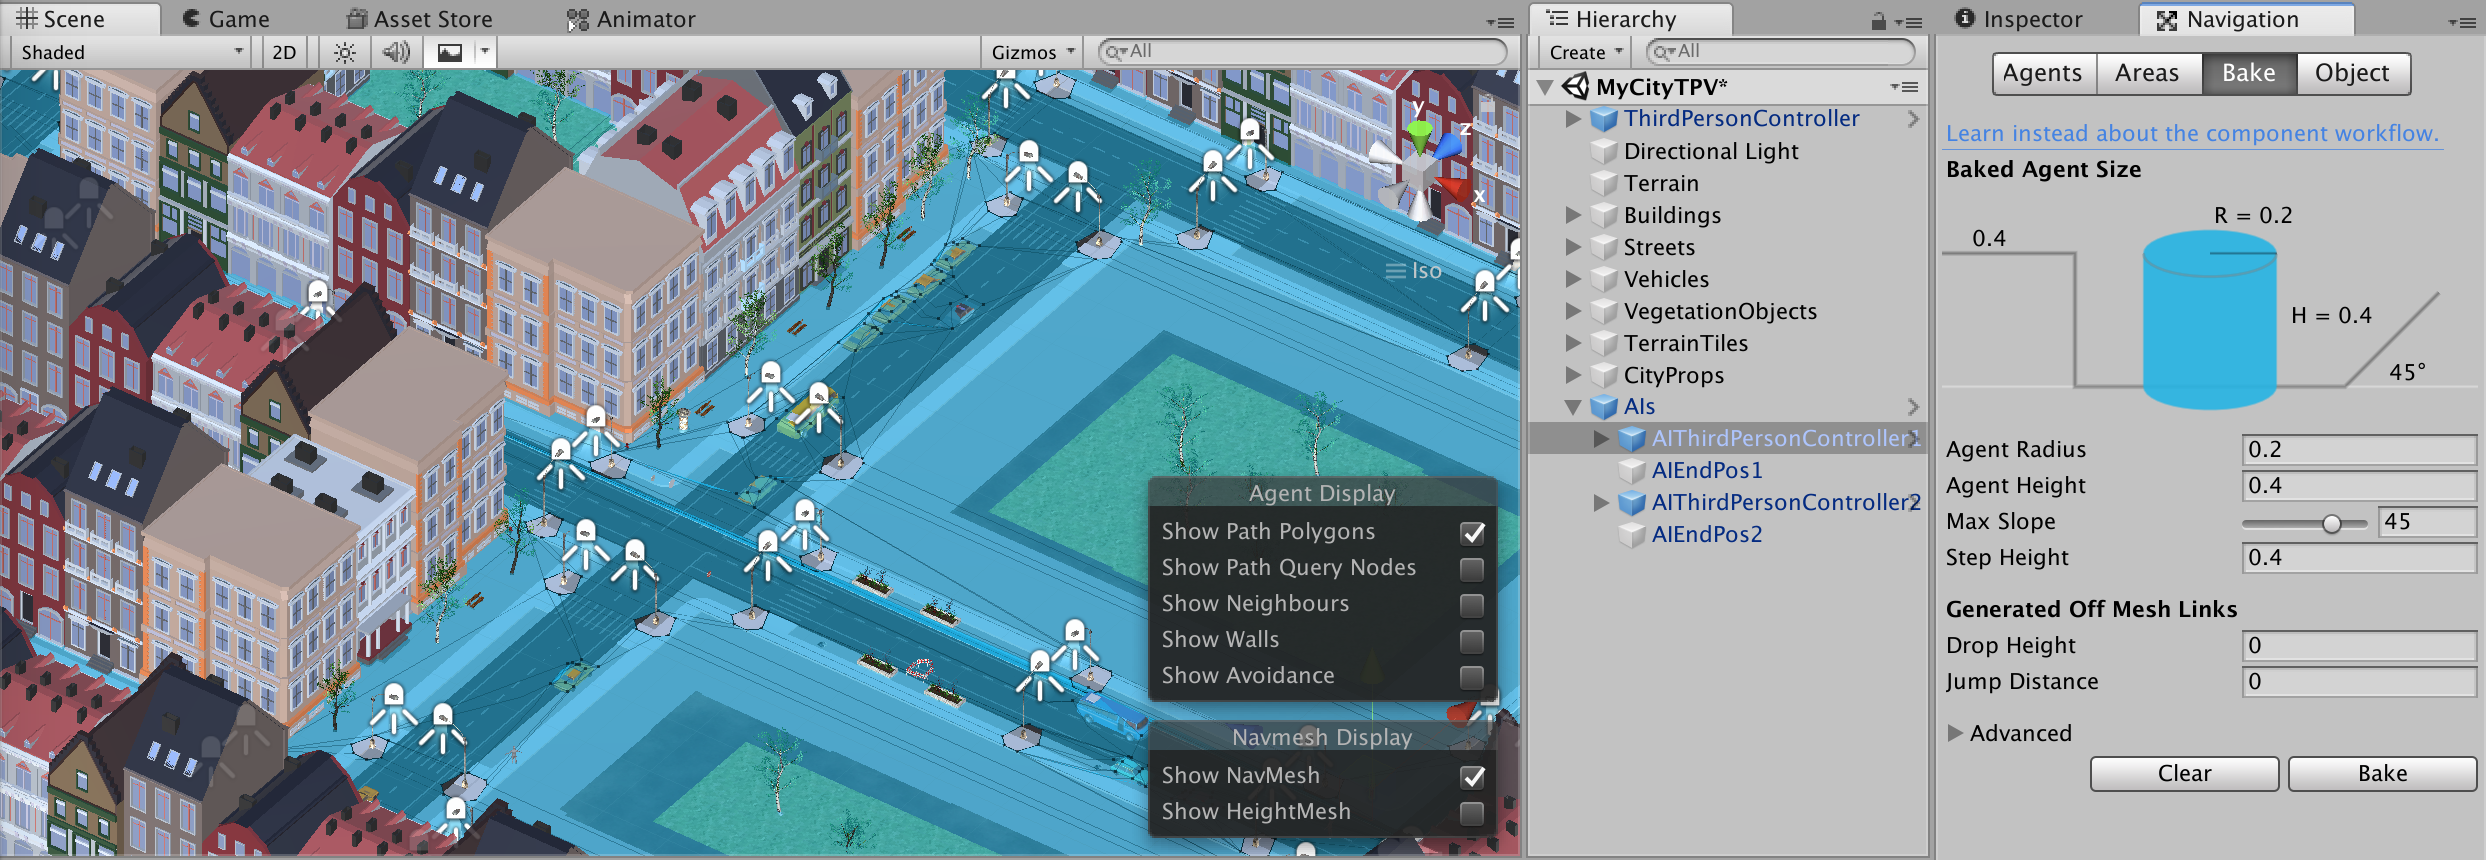
The AIThirdPersonController can be found in the Standard Assets. It will need an empty GameObject as a target to move towards. The whole character animation is predefined in the prefab and it is ready-to-use.

Once the city is ready to use, we need to duplicate the scene twice and name these:

To be able to go back to the main menu, we will need some scripting. We will also add a method to switch between night and day (actually, we enable or disable the sun).
Create a new script named MainMenuOnTab and add this code:
using System.Collections;
using System.Collections.Generic;
using UnityEngine;
using UnityEngine.SceneManagement;
public class MainMenuOnTab : MonoBehaviour
{
//light var for Day-Night toggle
private Light MyLight;
// Start is called before the first frame update
void Start()
{
//get the light component
MyLight = GetComponent<Light>();
}
// Update is called once per frame
void Update()
{
//Load the MainMenu
if (Input.GetKeyDown(KeyCode.Tab))
{
//This is used to be sure to unlock the UI cursor when leaving the scene
Cursor.lockState = CursorLockMode.None;
//This loads scene 0.
SceneManager.LoadScene(0);
}
//Day-Night toggle
if (Input.GetKeyUp(KeyCode.N))
{
MyLight.enabled = !MyLight.enabled;
}
}
}
Take the MyCityTPV scene and add the ThirdPersonController found in the Standard Asset.
To be able to follow your character, add the MainCamera as a child of the controller. In the MainCamera, you can set a SkyBox if needed.
Add the script MainMenuOnTab.
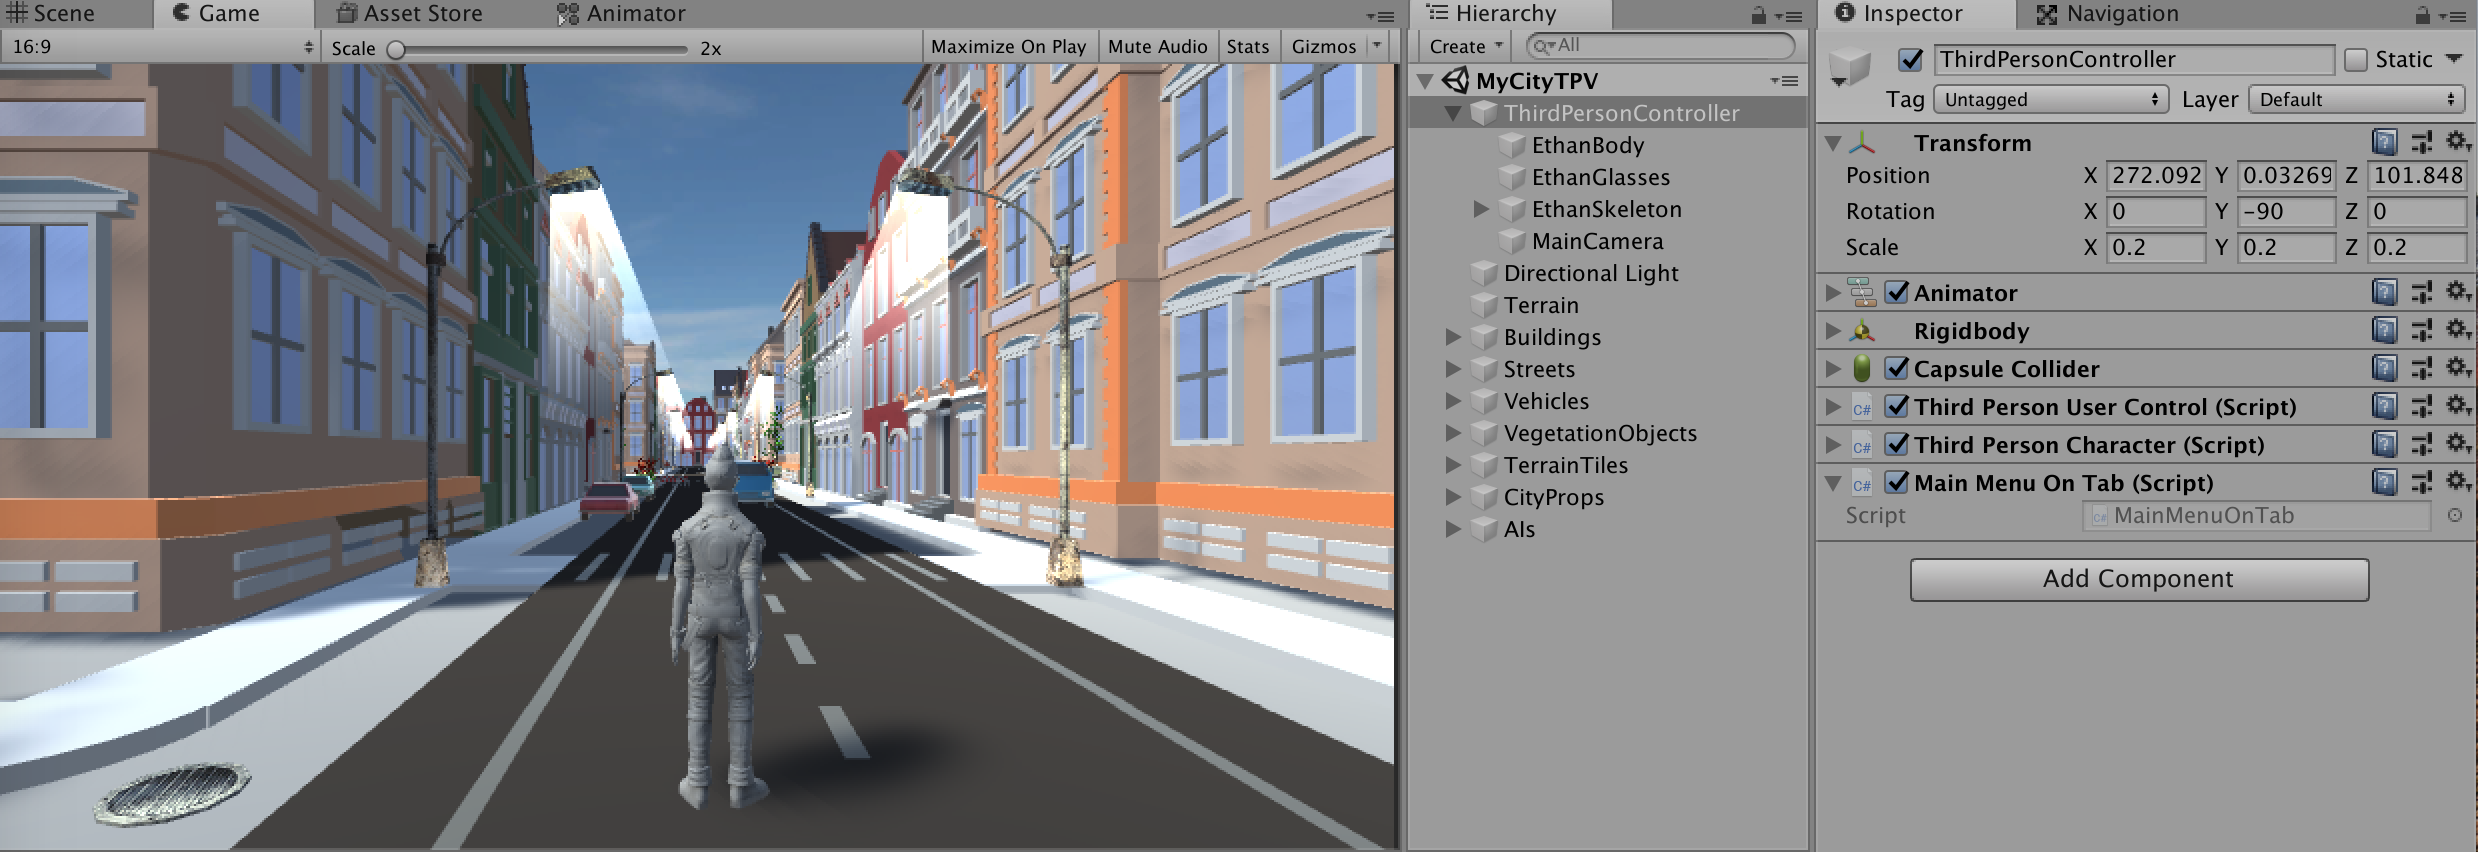
Hit Play to test your scene.
Take the MyCityFPV scene and add the RigidBodyFPSController found in the Standard Asset.
This character has already a camera, so remove the MainCamera from the scene. In the camera, you can set a SkyBox if needed.
Add the script MainMenuOnTab.
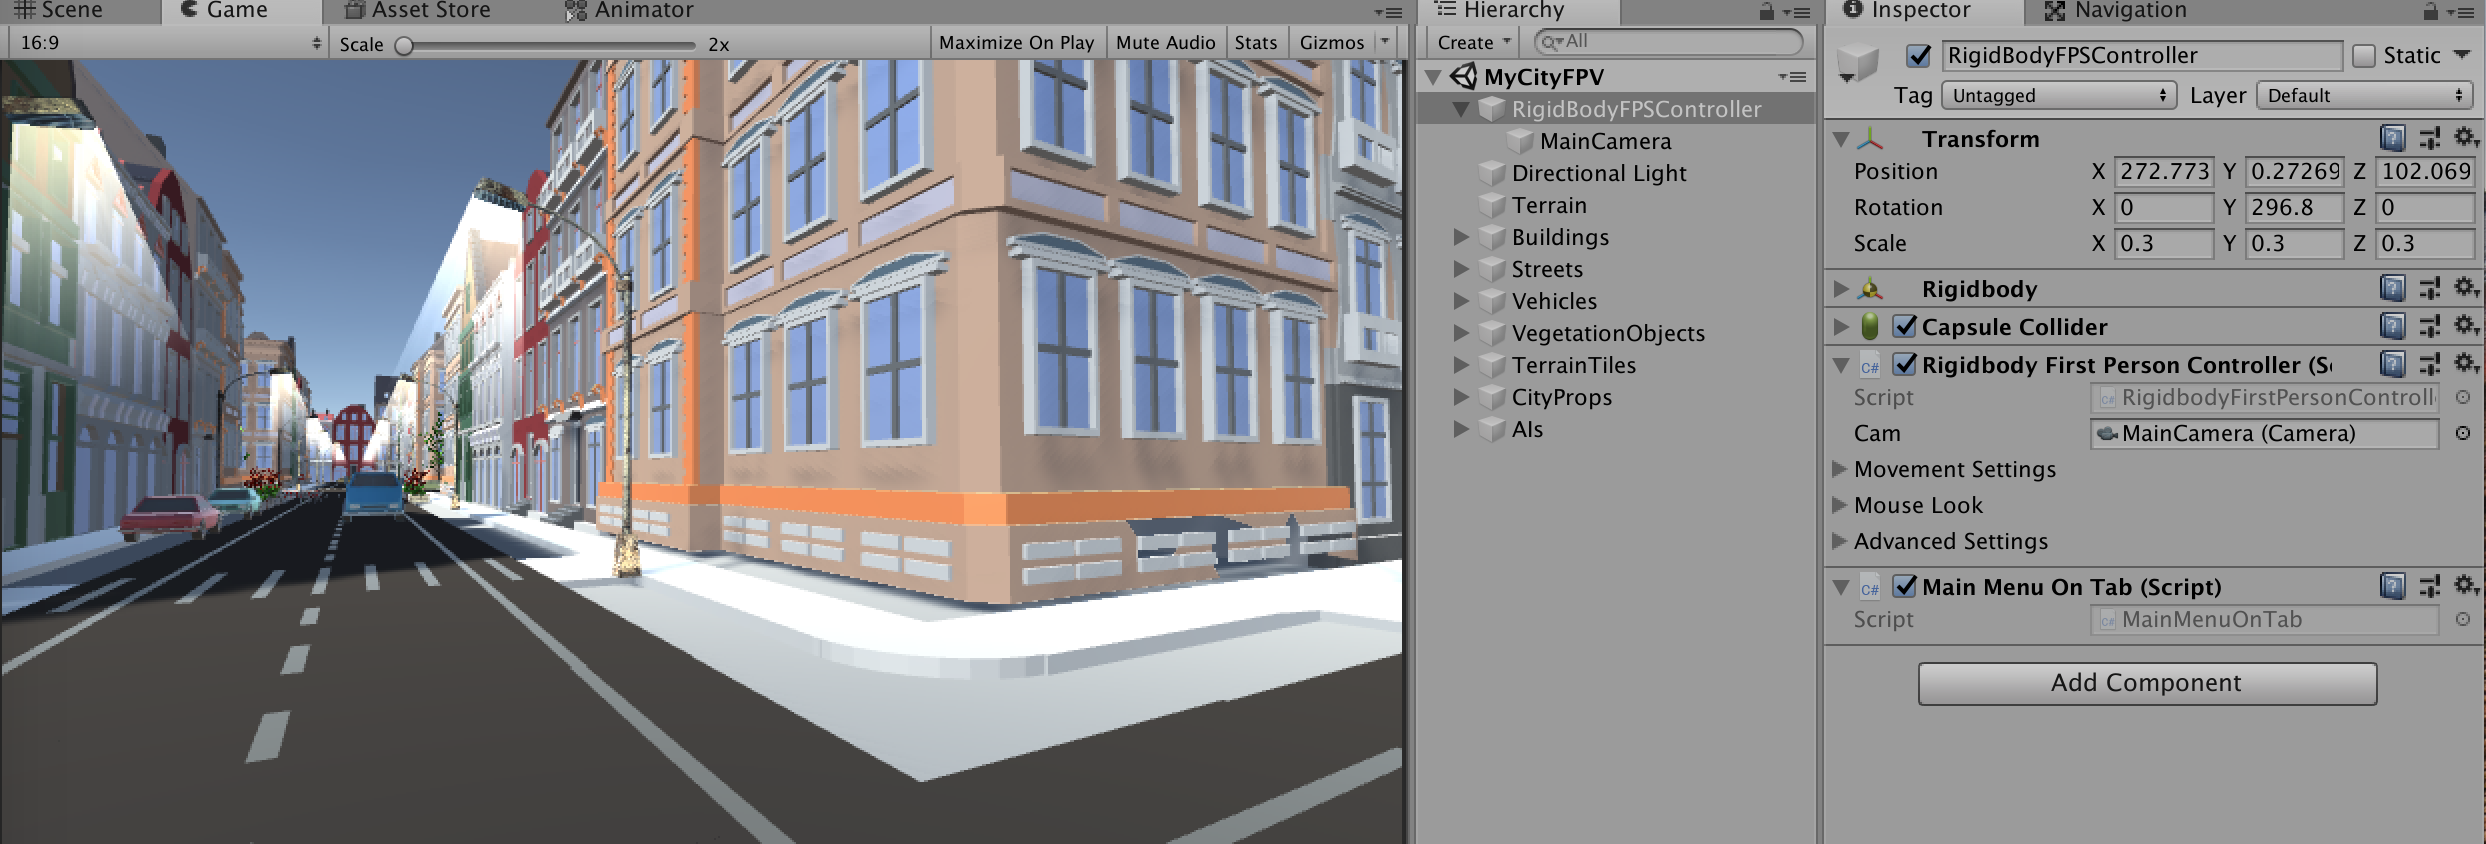
Hit Play to test your scene.
Create a new script named SceneLoaderBtn. This script will allow to load a scene by its name.
The code is this one:
using System.Collections;
using System.Collections.Generic;
using UnityEngine;
using UnityEngine.SceneManagement;
public class SceneLoaderBtn : MonoBehaviour
{
public string SceneToLoad;
public void NextScene()
{
//Load the scene by its name
SceneManager.LoadScene(SceneToLoad);
}
}
Create a new script named ShowCursorAtBegin. This script makes sure that the cursor is shown; this is mainly used when coming back from a First Person environment.
The code is this one:
using System.Collections;
using System.Collections.Generic;
using UnityEngine;
public class ShowCursorAtBegin : MonoBehaviour
{
// Start is called before the first frame update
void Start()
{
//Set Cursor to not be visible
Cursor.visible = true;
}
// Update is called once per frame
void Update()
{
}
}
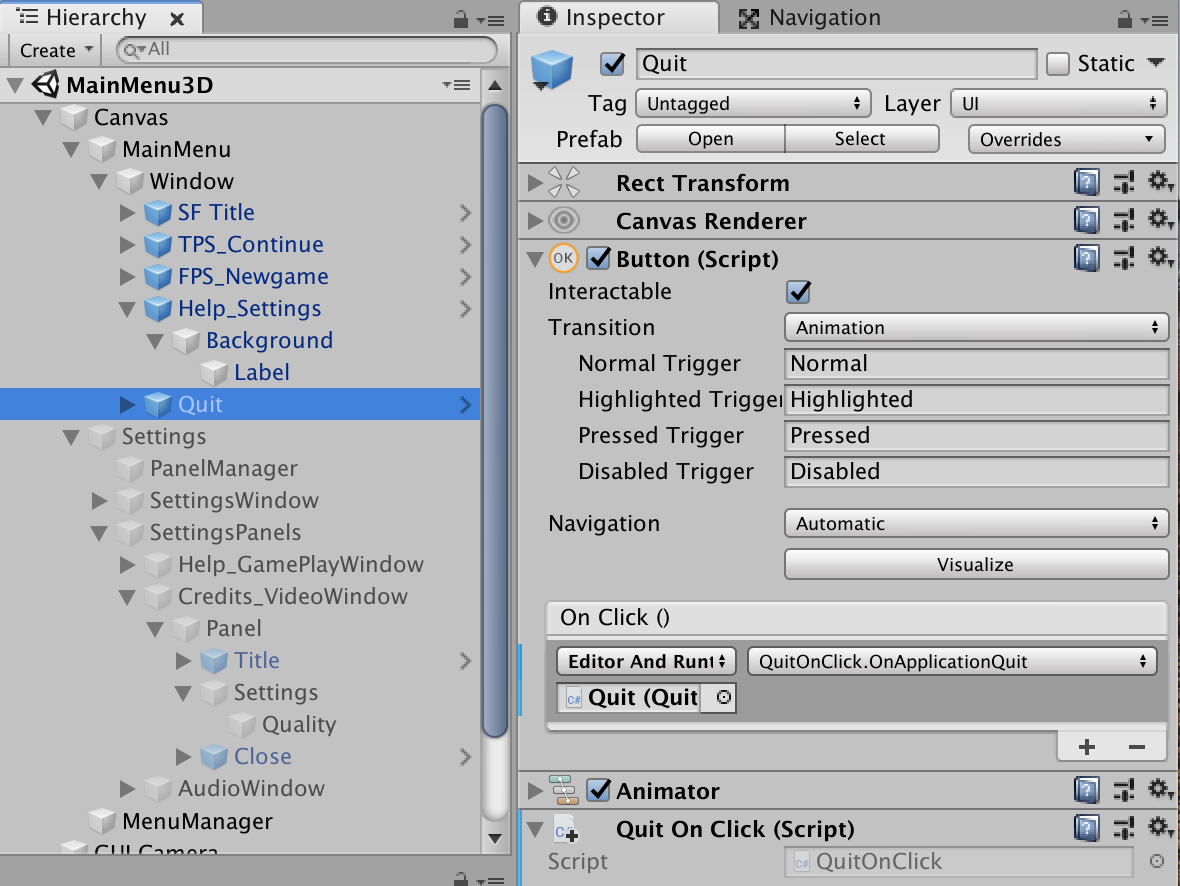
Create a new script named QuitOnClick. This script quits the app.
The code is this one:
using System.Collections;
using System.Collections.Generic;
using UnityEngine;
public class QuitOnClick : MonoBehaviour
{
public void OnApplicationQuit()
{
//we want an other behavior depending the runtime environment
//https://docs.unity3d.com/Manual/PlatformDependentCompilation.html
#if UNITY_EDITOR
UnityEditor.EditorApplication.isPlaying = false;
#elif UNITY_WEBGL
if(Screen.fullScreen == true)
{
Screen.fullScreen = !Screen.fullScreen;
}
Application.OpenURL("http://mountainpath.ch/cmsimplexh/index.php?Unity-3D");
#else
Application.Quit();
#endif
}
}
Under Unity UI Samples/Scenes duplicate the Menu 3D, rename it MainMenu3D and add it to your scenes.
Open the MainMenu3D and adapt it to our needs:
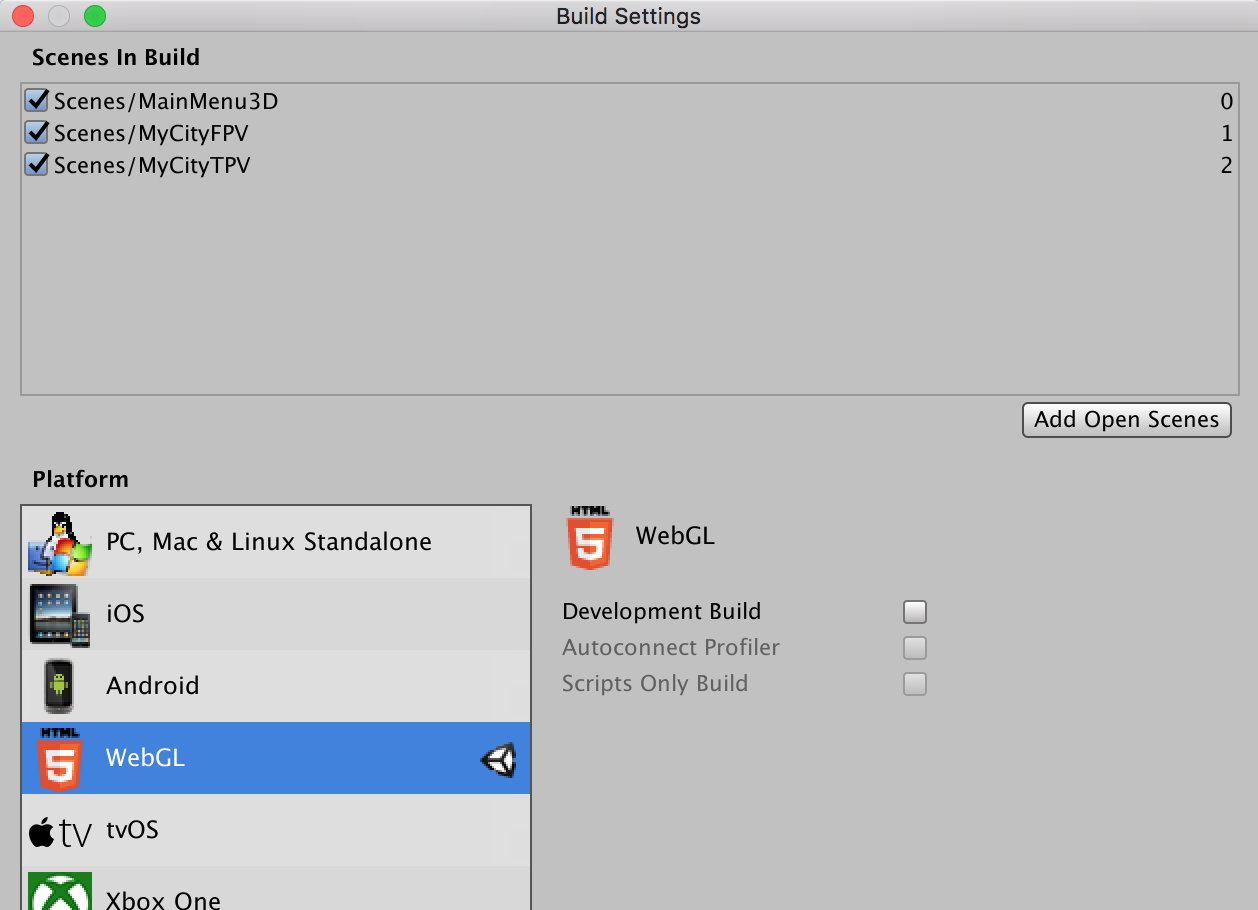
In the Build Settings, check that all scenes were added. Reorder the scenes to have the MainMenu3D scene at position 0.
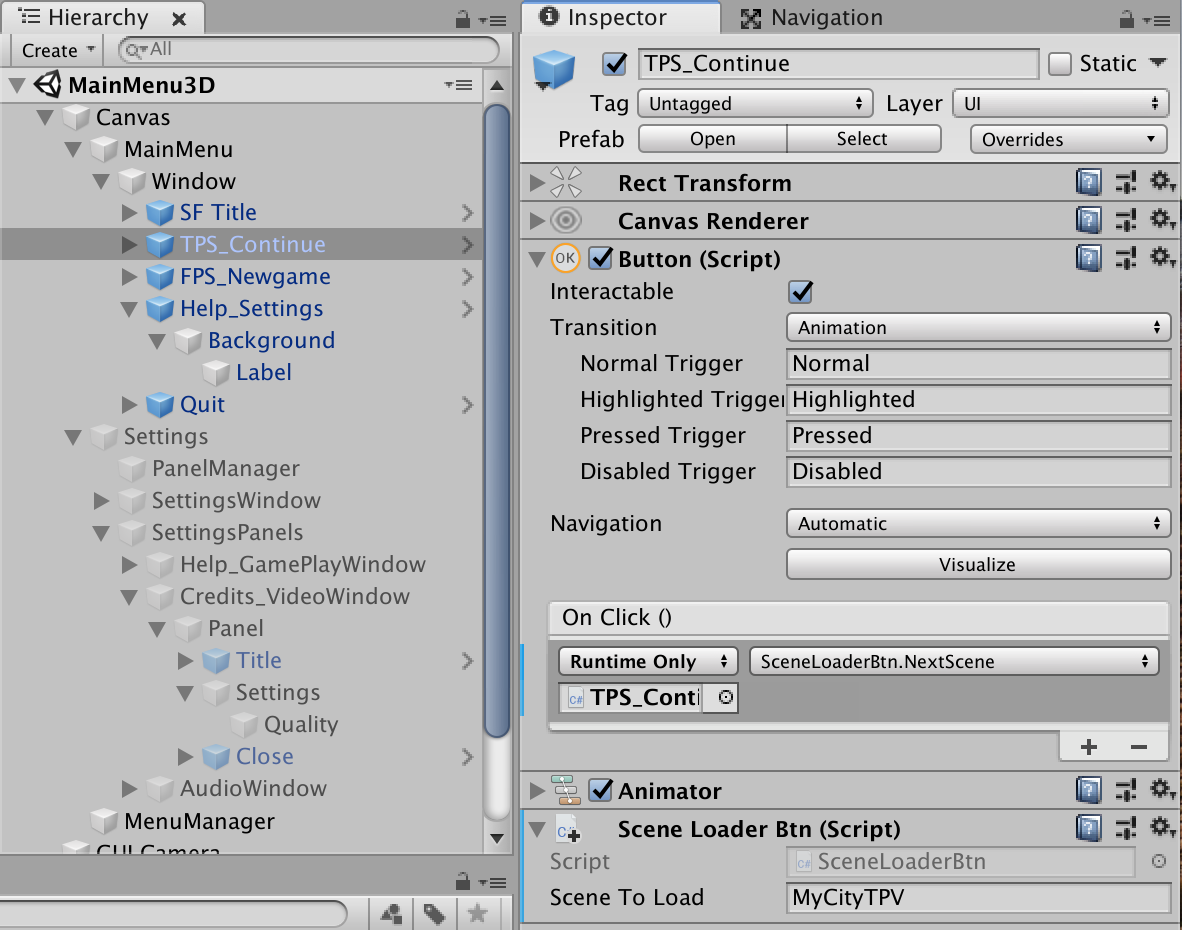
Link the two Play buttons to the other scenes:
Define the OnClick action in the Quit button:
Hit Play to test your project.
Build the app.