Create a breakout game
Table of content
2.2.1 Set up the working environment
3.1 Add sound effects and music
3.5 Improving the lives and score system
3.9 Improving the bonus system
3.12 Make a better Credits panel
1. Objective
Create a Breakout game using Unity.
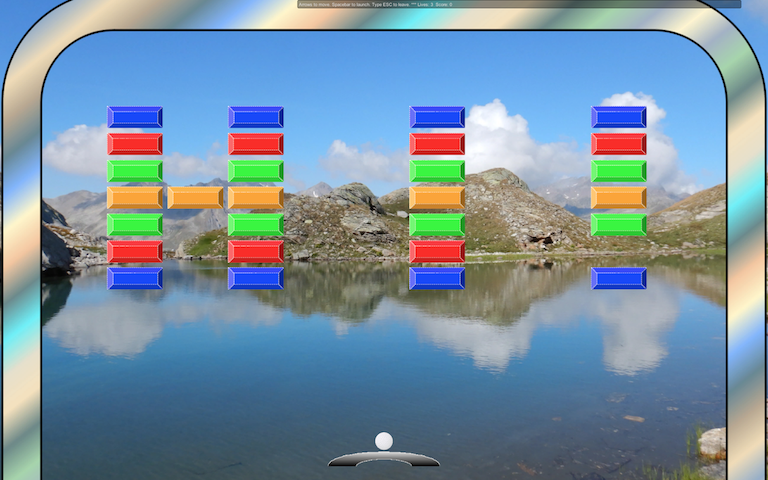
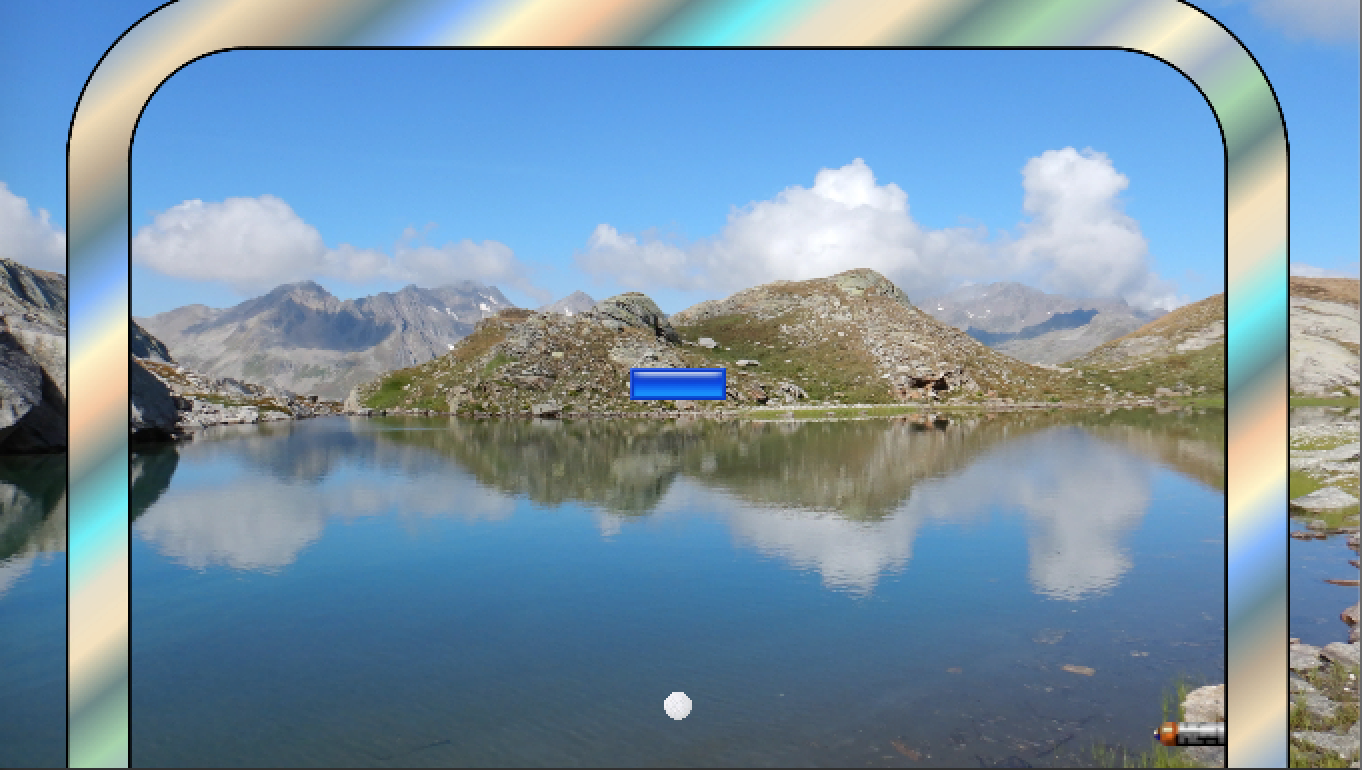
A breakout looks like the following picture. The objective of the game is to clear every level.
The WebGL demo is here.
This tutorial is partially based on https://gamedevelopment.tutsplus.com/series/build-arkanoid-with-unity—cms-590. The code was update to Unity 2018.3. Some enhancement were added as well.
2. How-To
2.1 Graphics and Sounds
We need the following graphics:
- backgrounds
- walls
- paddle
- ball
- bonus
We need the following sounds:
- background music
- sound effects: hit, lose, point
All that stuff can be found for free on the web.
2.2 Code the game
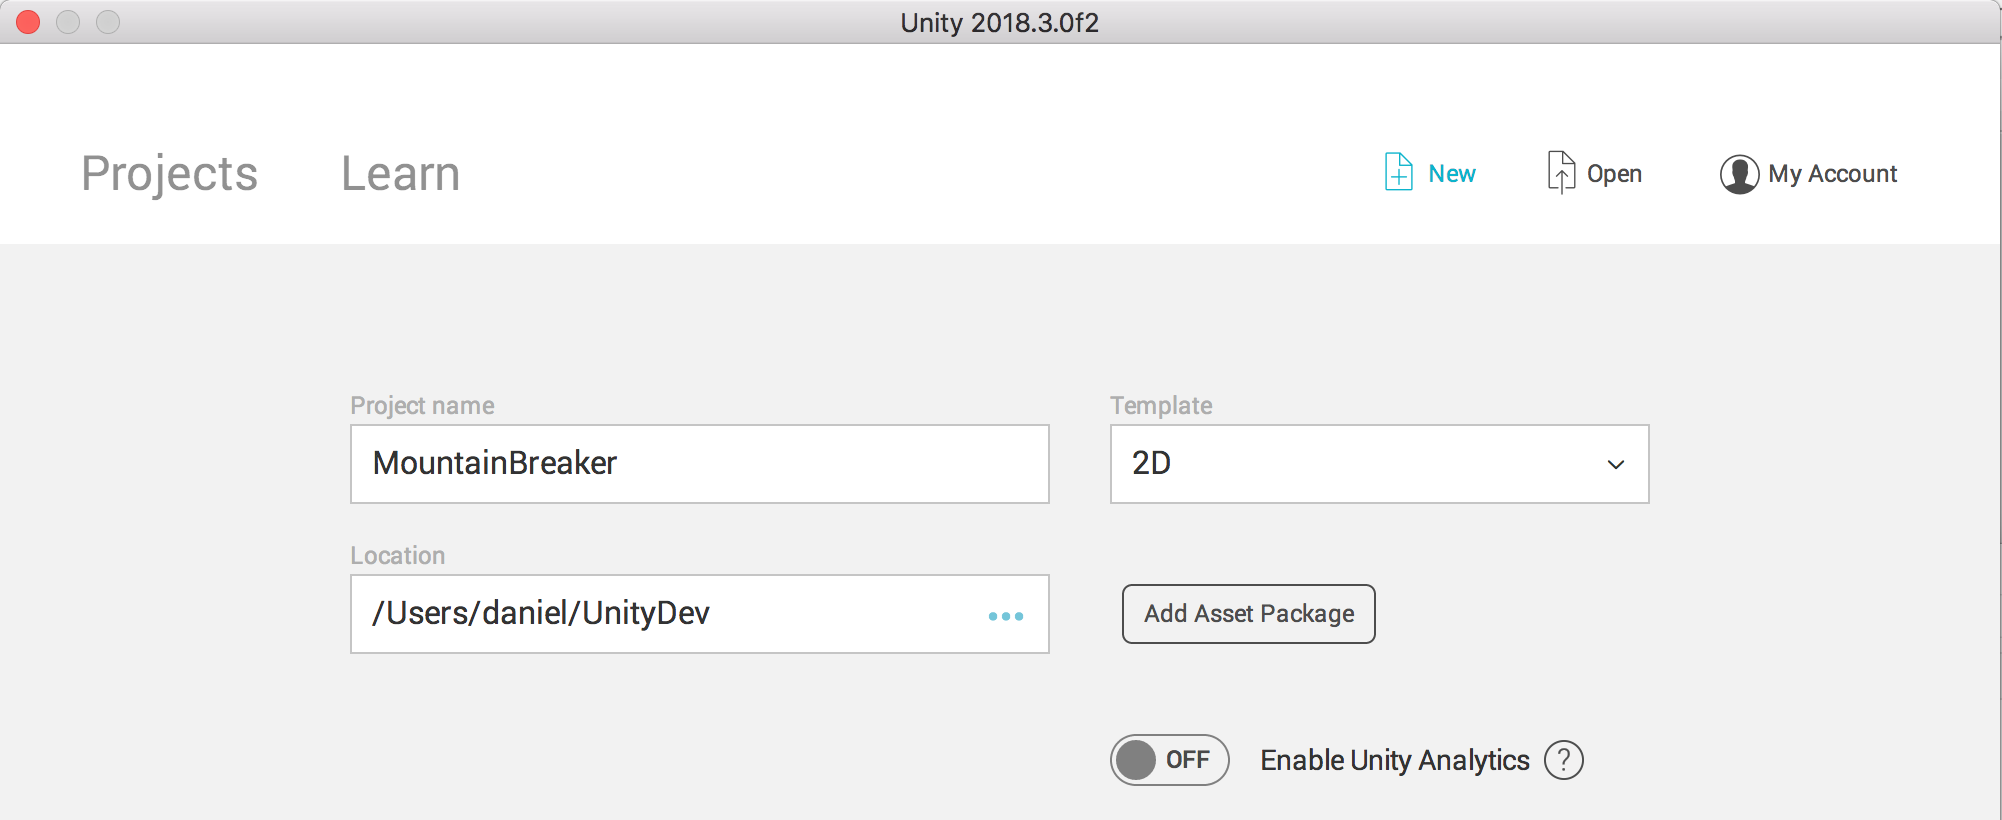
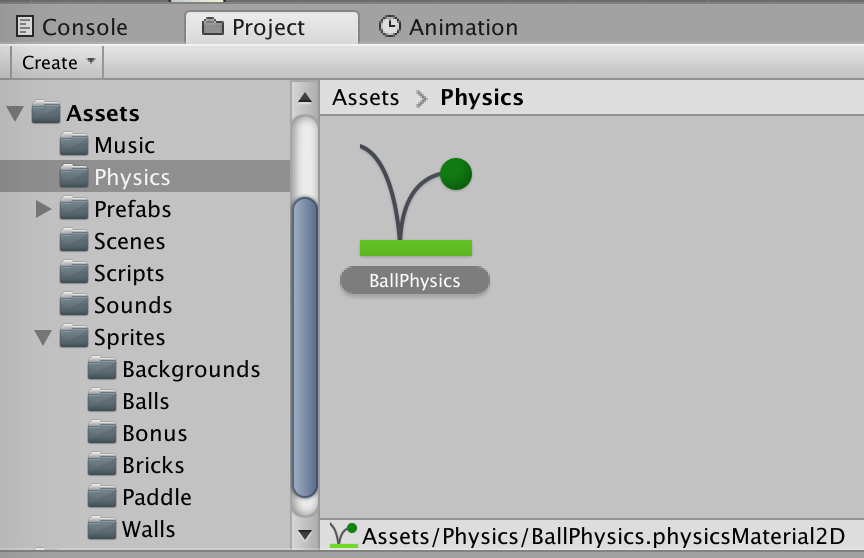
2.2.1 Set up the working environment
Launch Unity and create a new project on your disk.
Choose a 2D template:
Under Project > Assets, create the following folders:
- Music
- Physics
- Prefabs
- Scripts
- Sounds
- Sprites
Under Prefabs, create the following folders:
- Blocks
- Bonus
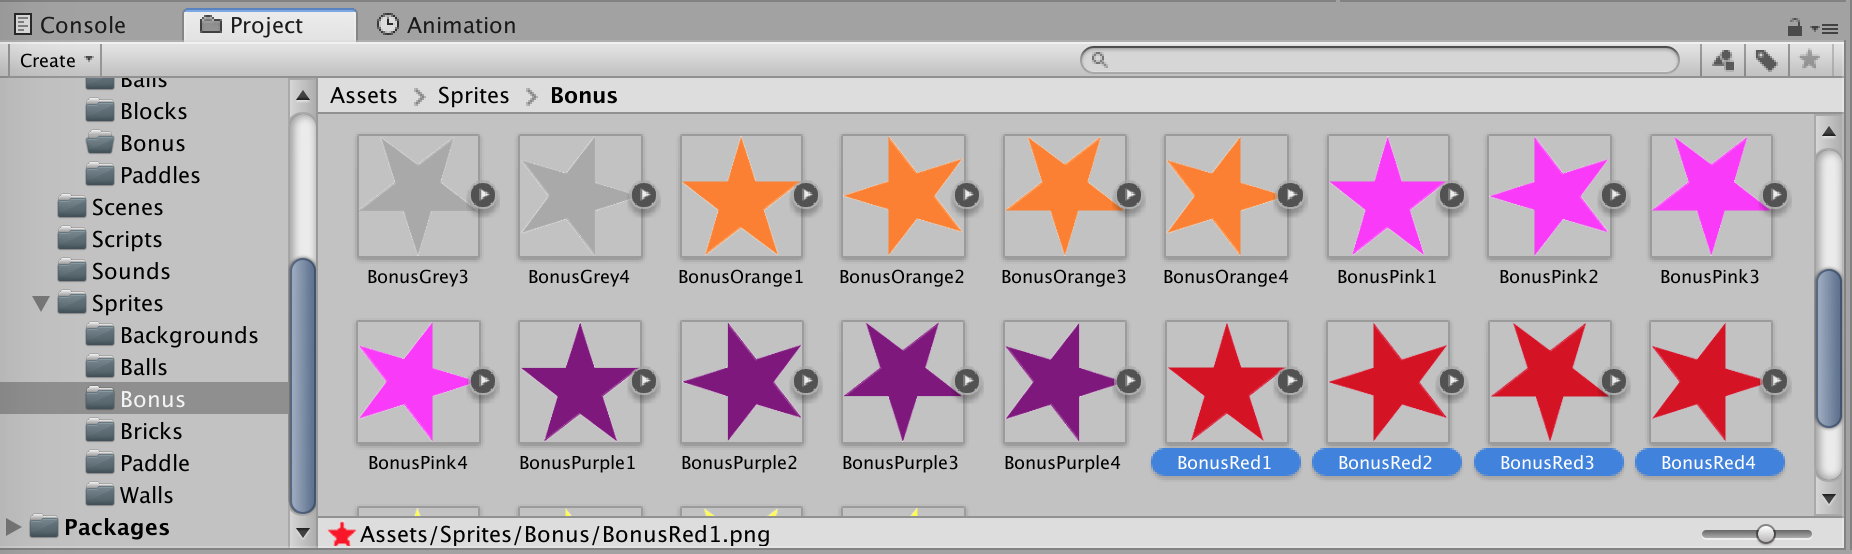
Under Sprites, create the following folders:
- Backgrounds
- Balls
- Bonus
- Bricks
- Paddle
- Walls
Copy your artwork to the sprites’ folders. Import the music and sounds.
2.2.2 Add the sprites
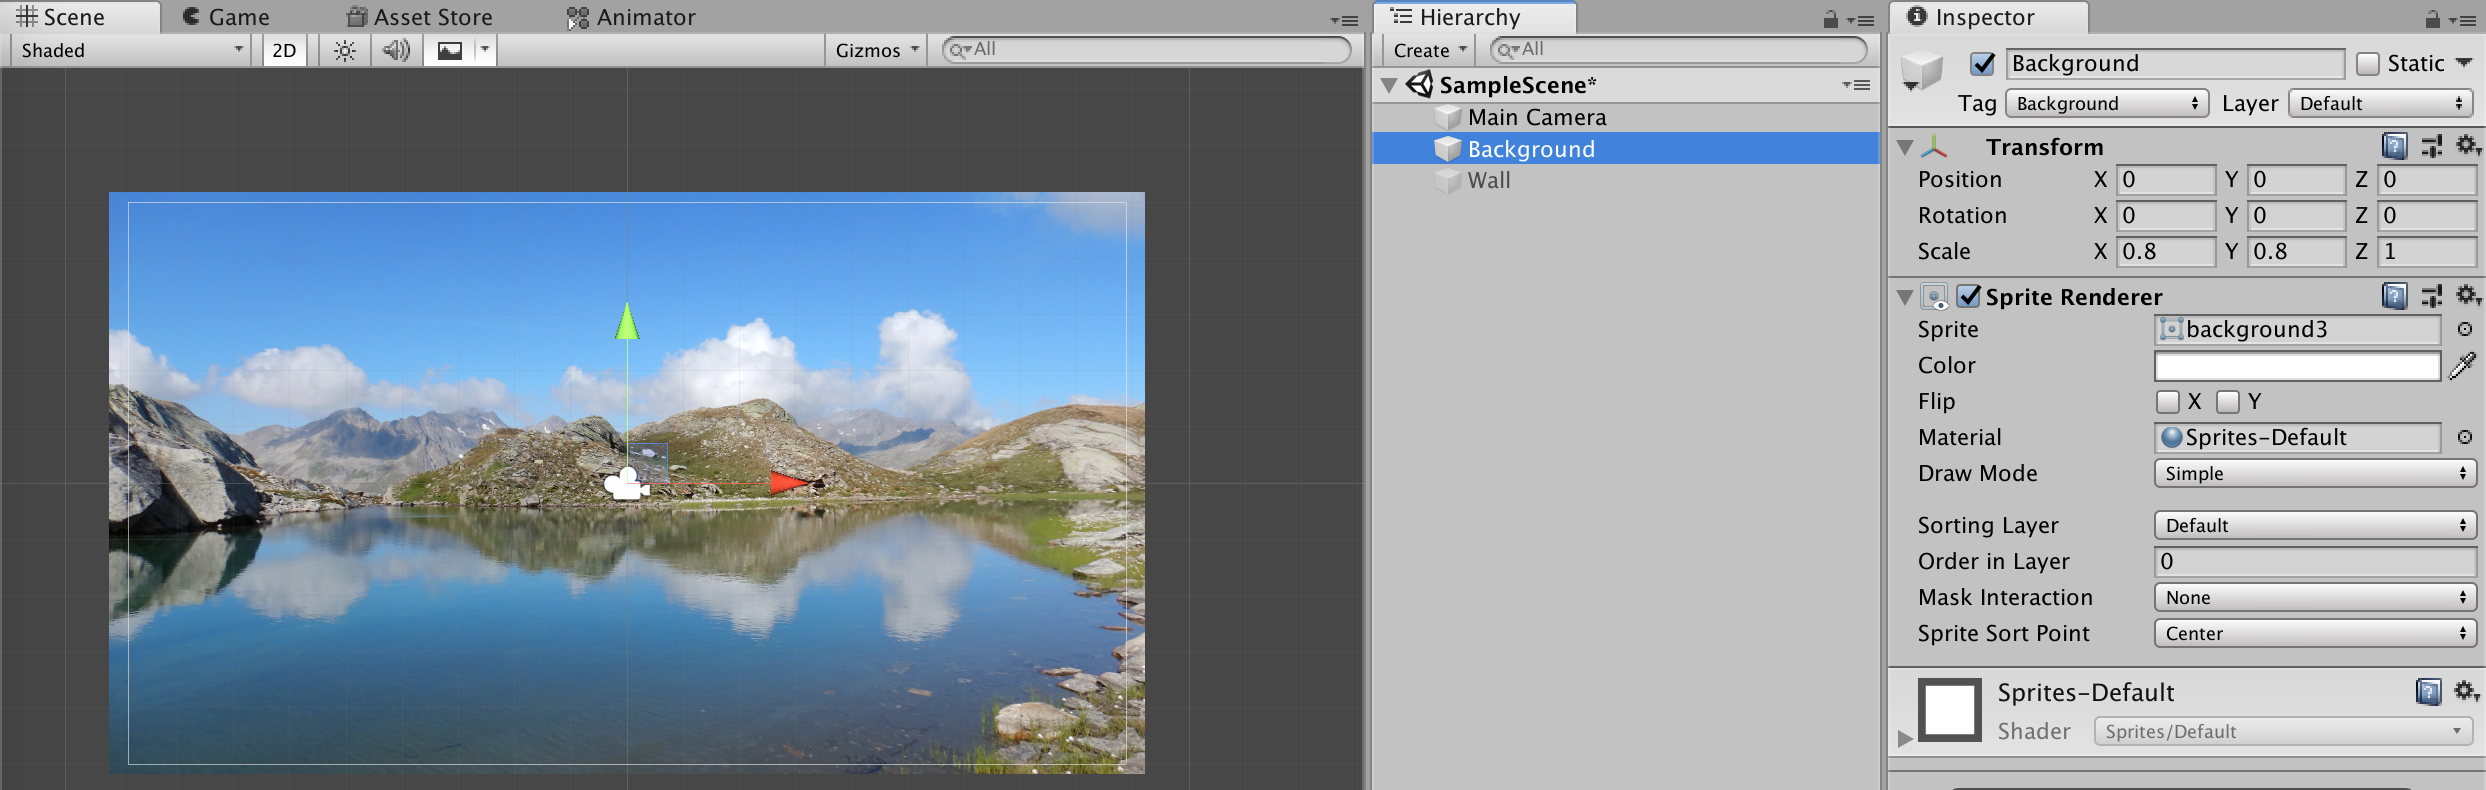
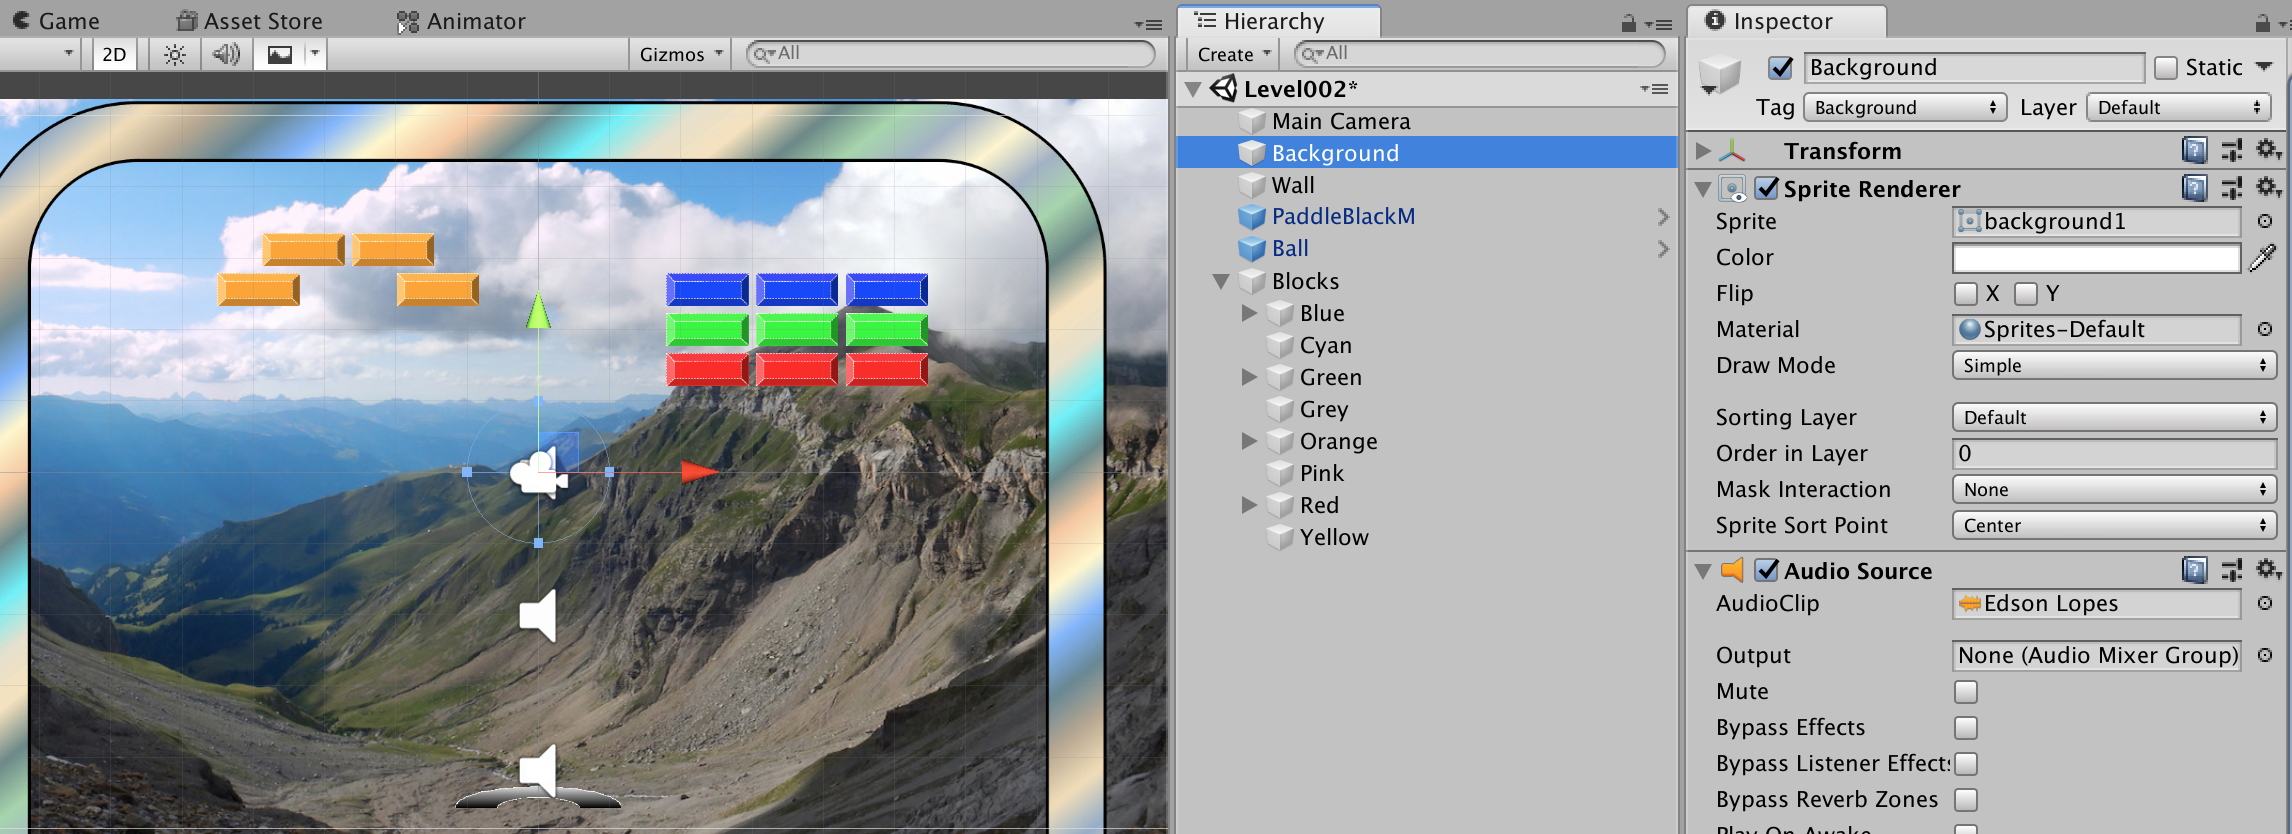
Create a new scene named Level001.
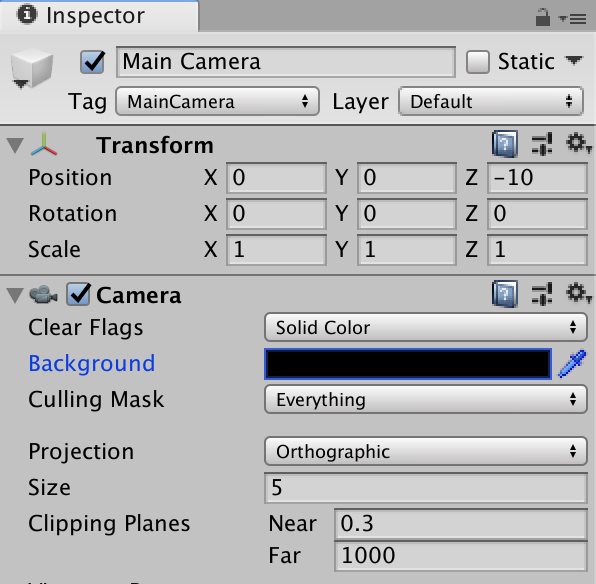
Select the MainCamera and change the background color to black.
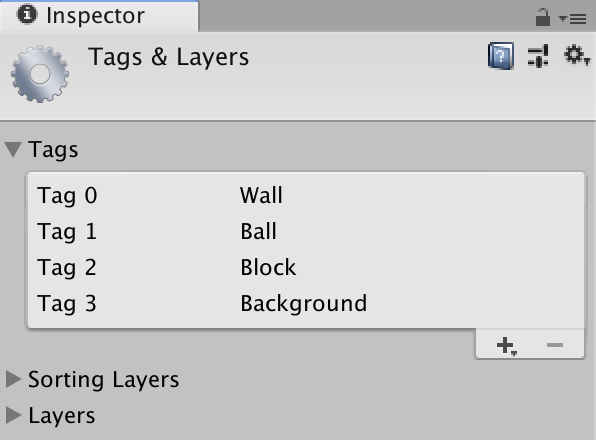
Add new tags
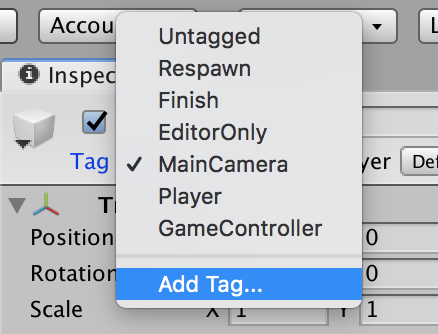
Add the following tags:
- Background
- Ball
- Block
- Bonus
- Wall
Add a background image, rename it to Background and change its tag to Background.
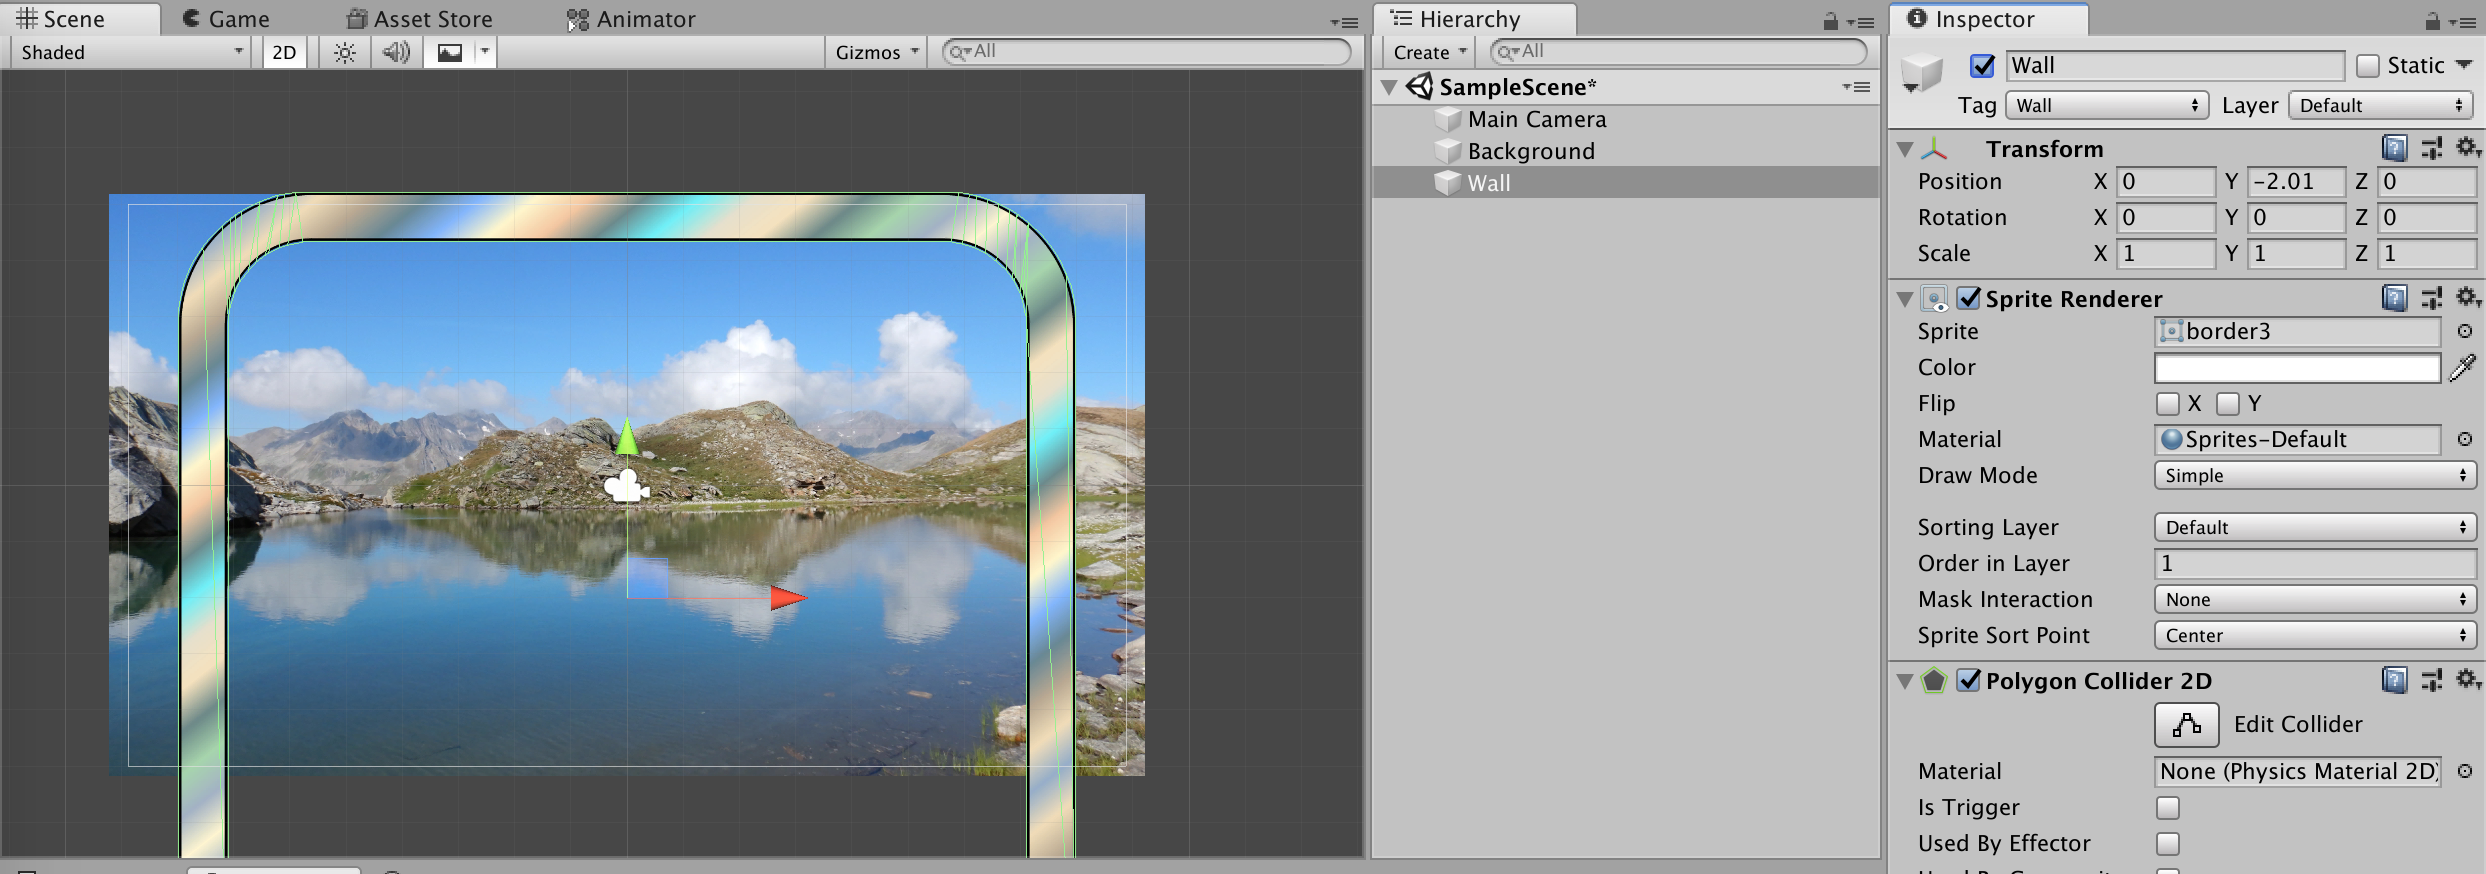
Add a wall image, rename it to Wall, change its tag to Wall, change its Order in Layer to 2 and add a Polygon Collider 2D.
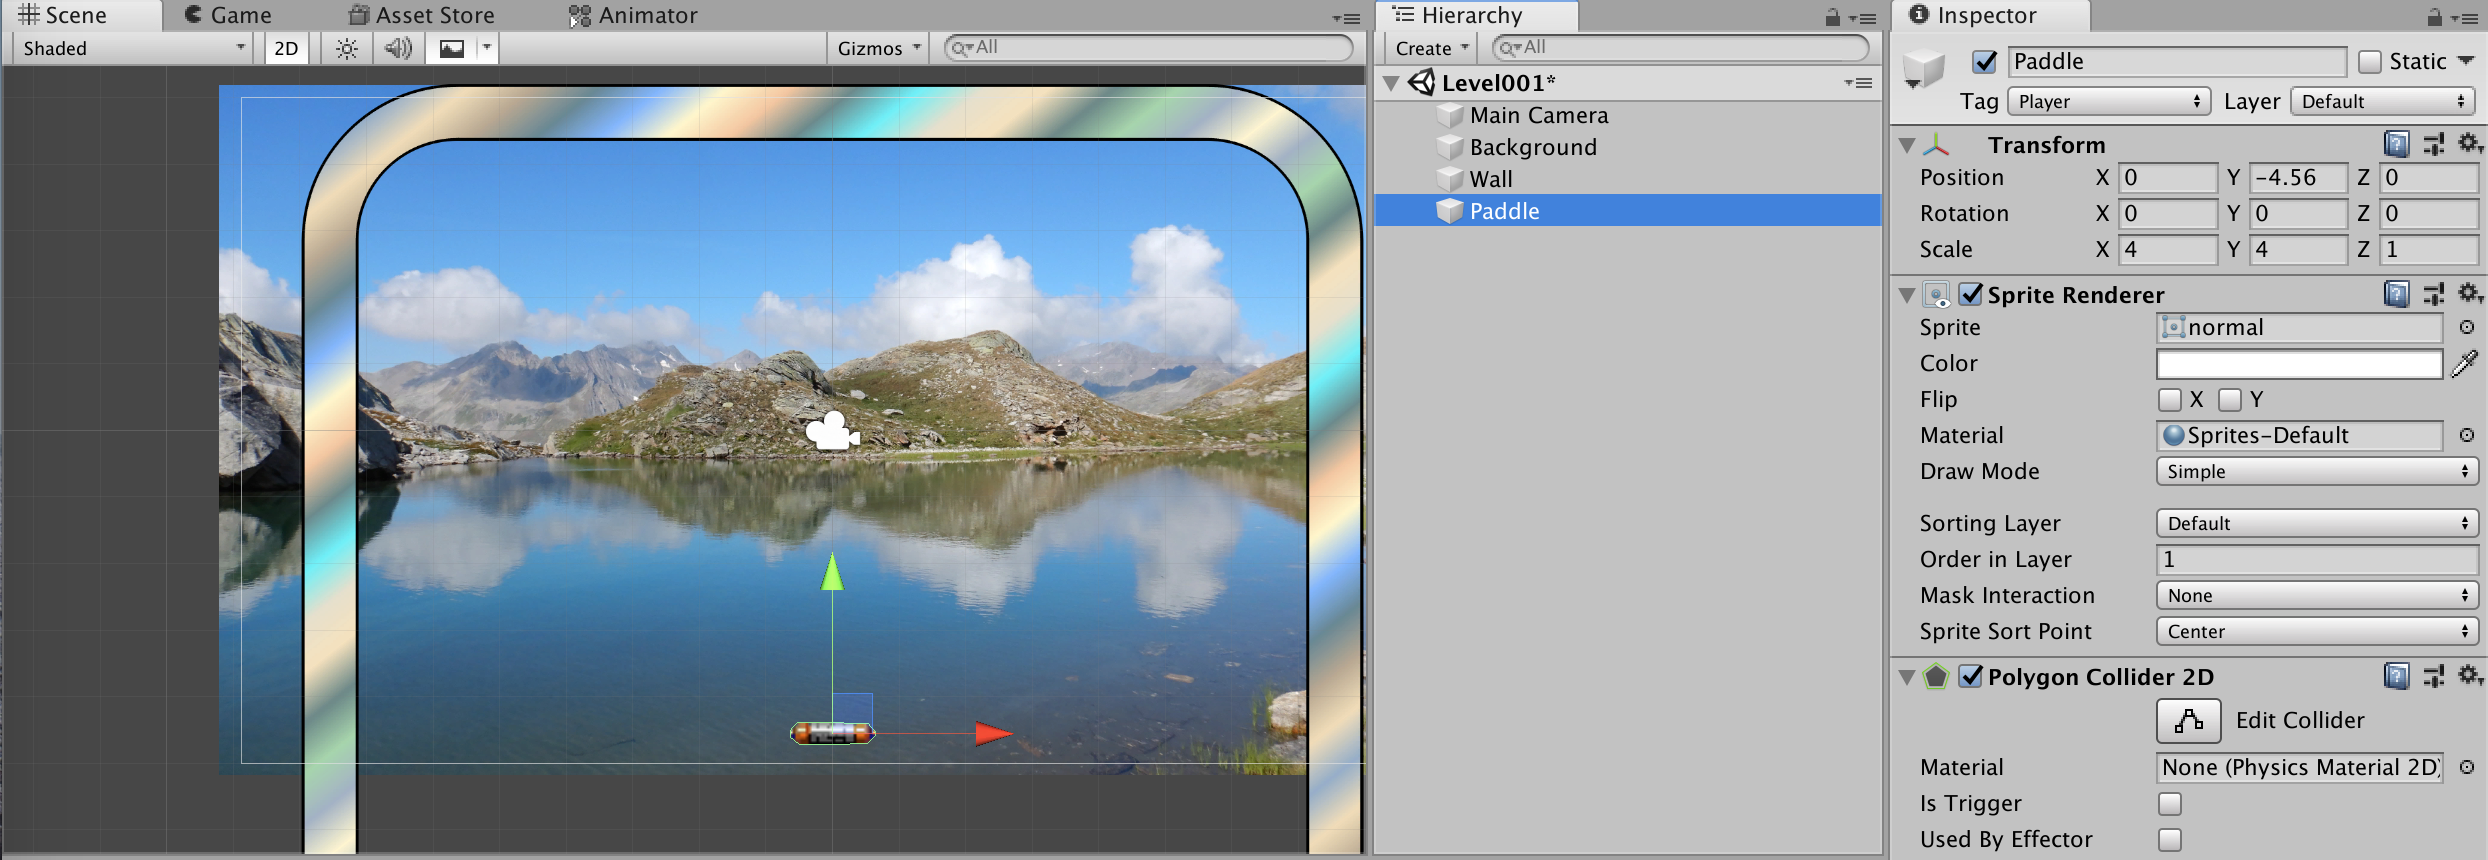
Add a paddle image, rename it to Paddle, change its tag to Player, change its Order in Layer to 1 and add a Polygon Collider 2D.
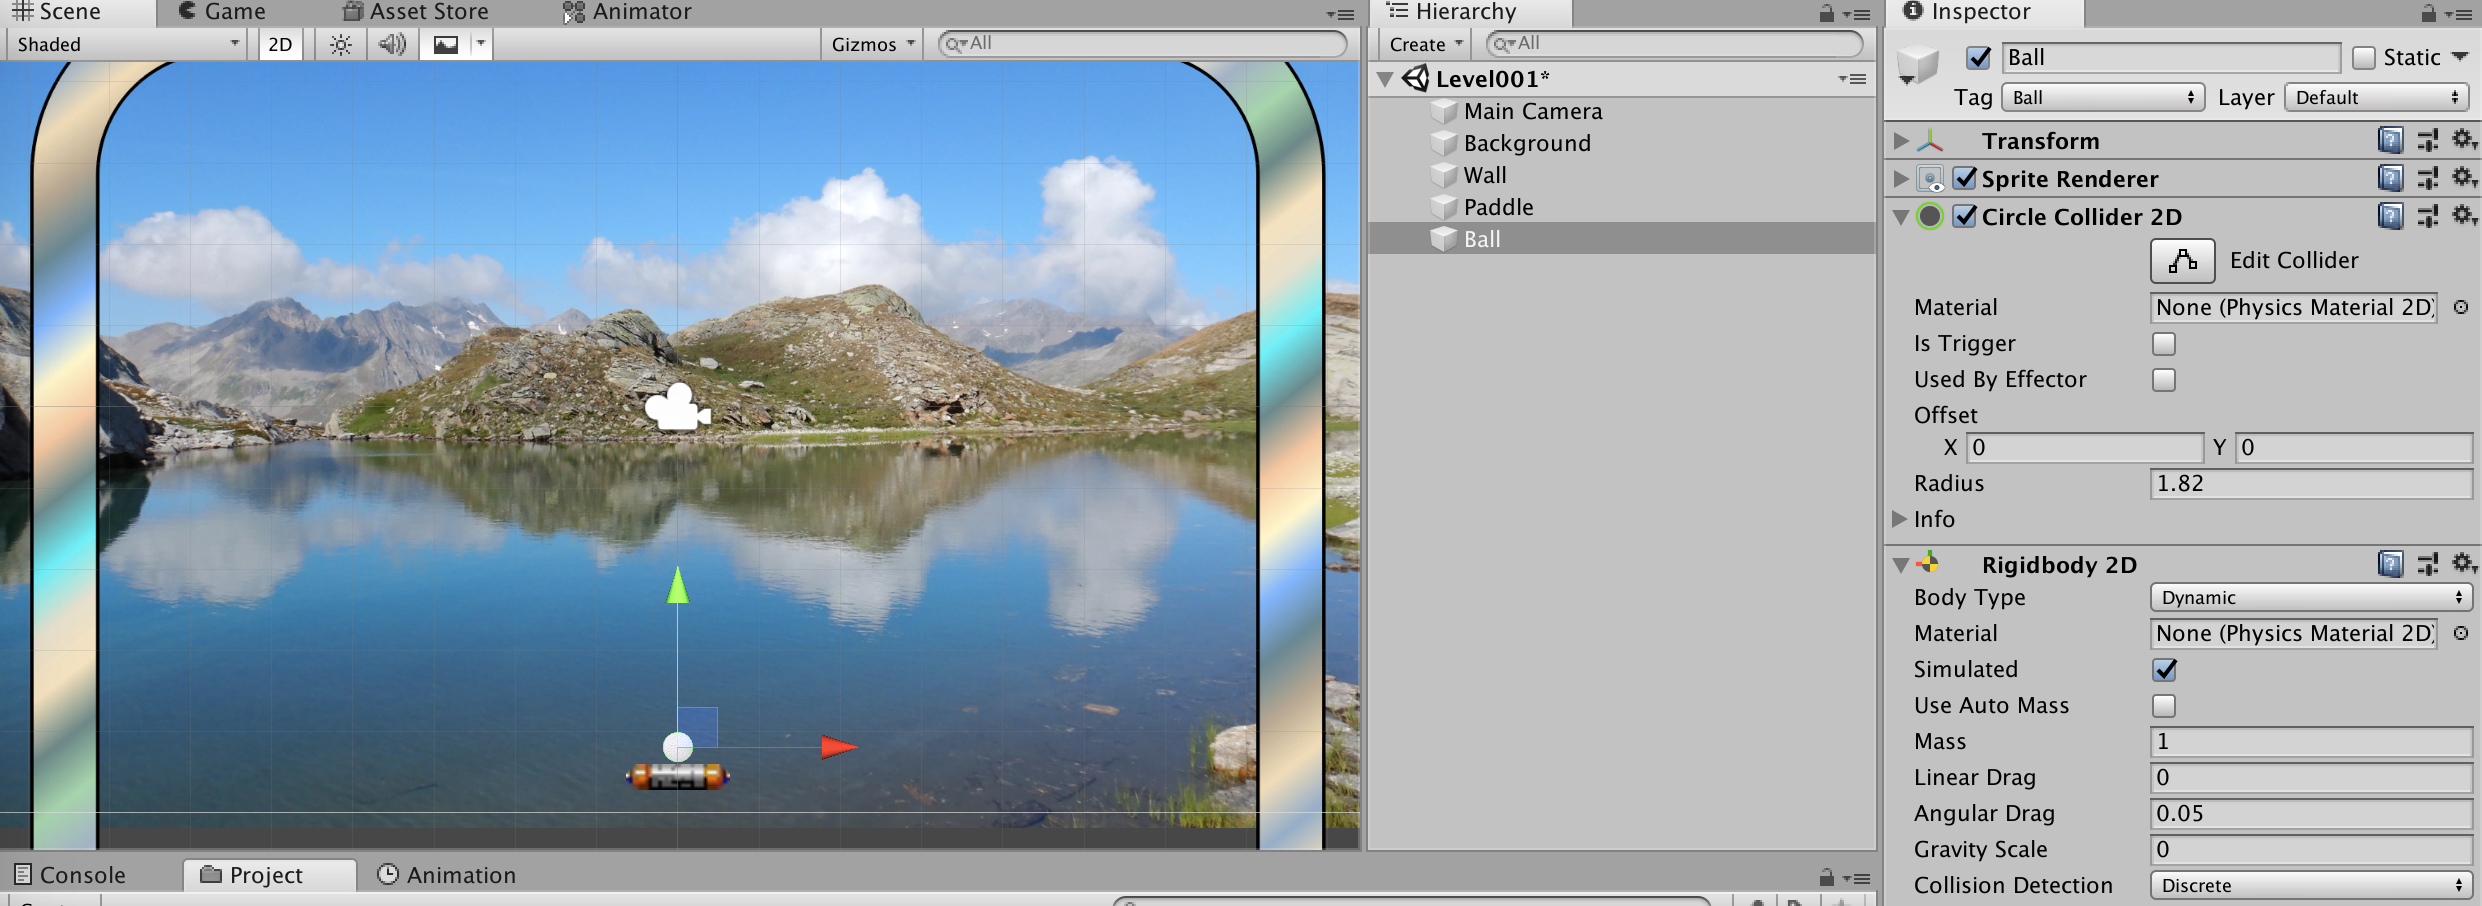
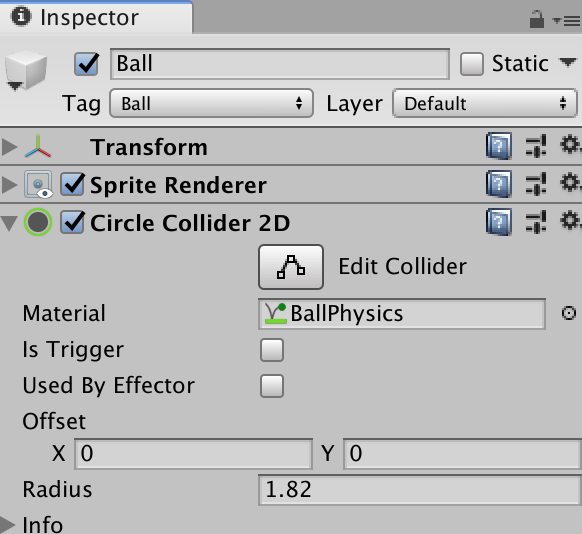
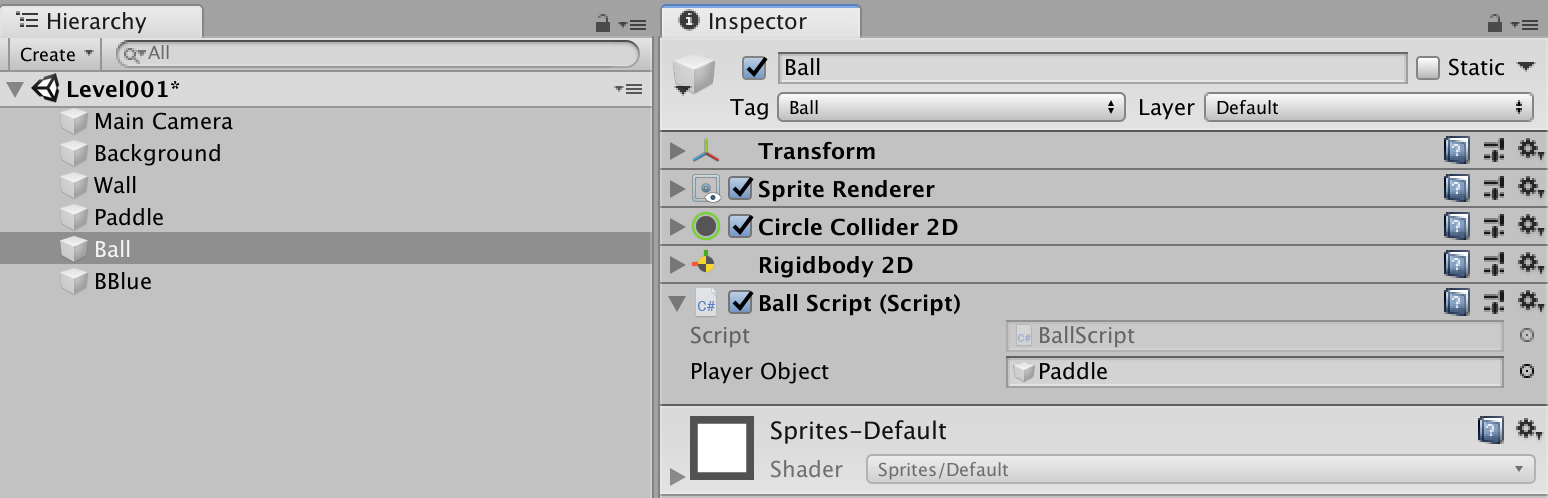
Add a ball image, rename it to Ball, change its tag to Ball, change its Order in Layer to 1, add a Circle Collider 2D and a Rigidbody 2D. Change the Rigidbody’s Gravity to 0.
If we hit the Play button, nothing happens because the animation wasn’t done so far.
2.2.3 Write the paddle script
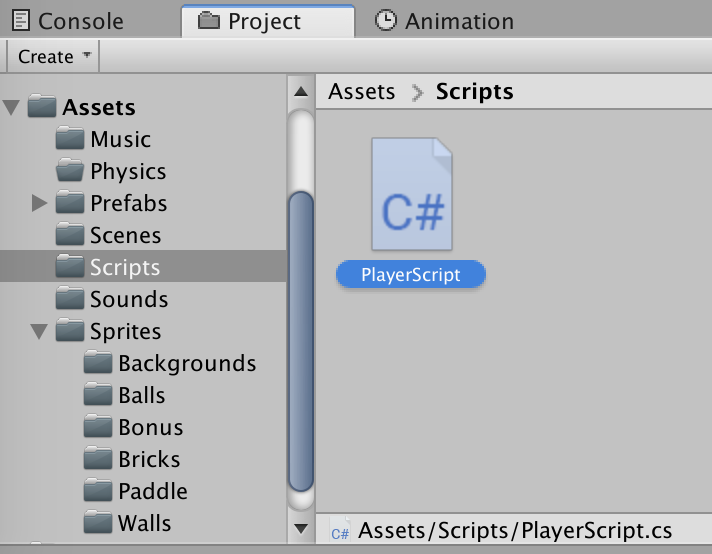
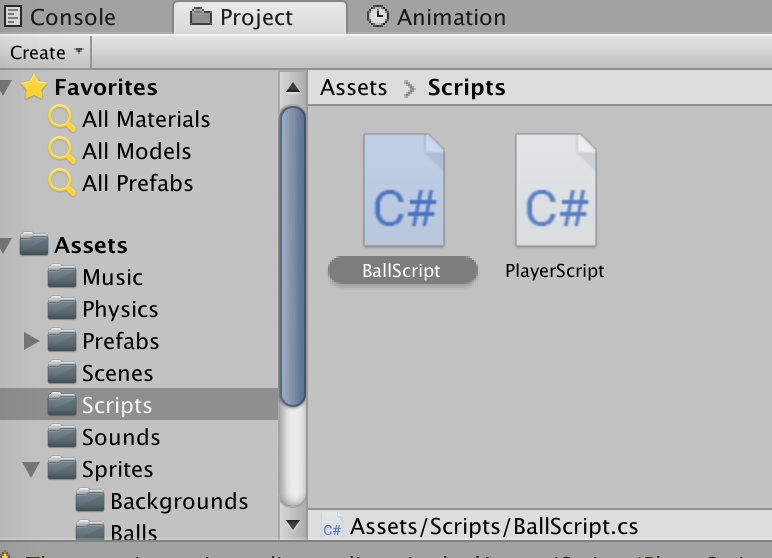
Create a new PlayerScript.
Add the script to the paddle.
Edit the script.
First we need two variables:
//paddle velocity and position
public float playerVelocity = 0.3f;
private Vector3 playerPosition;
Then we need to get the start position of the paddle. This goes to the Start function.
// get the initial position of the game object
playerPosition = gameObject.transform.position;
Finally we need to move the paddle by adding some code to the Update function.
// horizontal movement
playerPosition.x += Input.GetAxis("Horizontal") * playerVelocity;
// update the game object transform
transform.position = playerPosition;
If you hit Play and move your paddle with the arrow keys, you’ll notice that the paddle goes “through” the walls.
To stop the paddle at the walls, we need only one variable, as the paddle was designed in the middle between the two walls. The value you need to enter may differ.
//define the walls distance
public float boundary = 6.52f;
And in the Update function, we set the min and max distance.
// stop the paddle at the walls
if (playerPosition.x < -boundary)
{
transform.position = new Vector3(-boundary, playerPosition.y, playerPosition.z);
}
if (playerPosition.x > boundary)
{
transform.position = new Vector3(boundary, playerPosition.y, playerPosition.z);
}
2.2.4 Add an escape mode
If the user wants to stop the game, he can hit the ESC key.
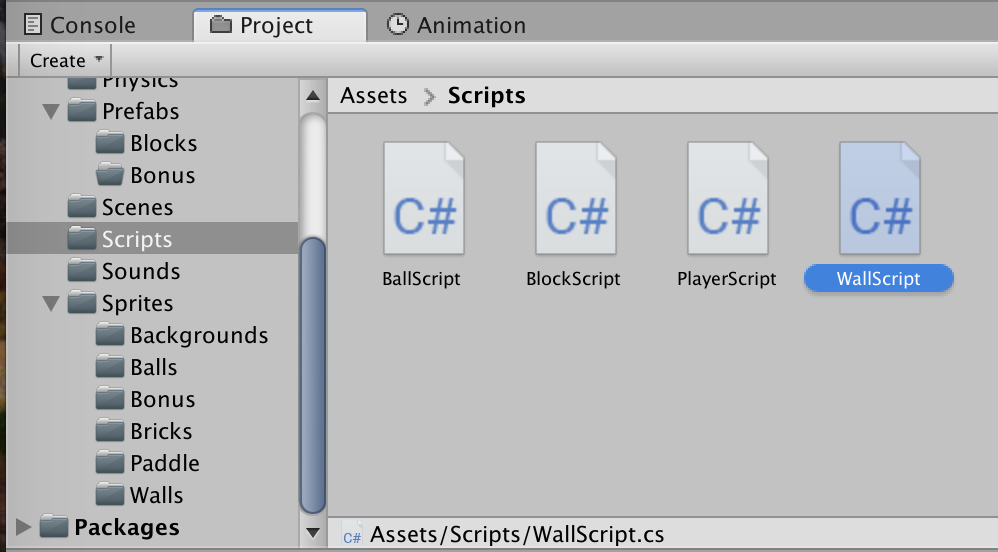
Create a new WallScript and add it to the Wall.
We create a private function (as we will use it later again) in the WallScript and call it from the Update function.
private void QuitApp()
{
// using the platform dependent commands
#if UNITY_EDITOR
UnityEditor.EditorApplication.isPlaying = false;
#elif UNITY_WEBGL
//if fullscreen is true, turn it to false
if(Screen.fullScreen == true)
{
Screen.fullScreen = !Screen.fullScreen;
}
//open an URL when quitting WebGL
Application.OpenURL("http://mountainpath.ch/cmsimplexh/index.php?Unity-3D/Create-a-breakout-game");
#else
Application.Quit();
#endif
}
The call in the Update function looks like this:
// leave the game
if (Input.GetKeyDown(KeyCode.Escape))
{
QuitApp();
}
2.2.5 Animate the ball
To make the ball bounce, we need some physics.
Create a new Physics Material 2D and name it BallPhysics.
In the Inspector, set the Friction to 0 and the Bounciness to 1.
Now add the BallPhysics to the ball’s Circle Collider 2D under Material.
Create a new BallScript and add it to the ball.
What should the ball do?
- at game start, be “glued” to the paddle.
- start moving by a given force when the player hits the spacebar.
- reset to the paddle if it falls off-screen.
We need to define 4 variables:
private int ballIsActive;
private Vector3 ballPosition;
private Vector2 ballInitialForce;
private float OriginY;
In the Start function, we initialize the whole stuff:
// create the force
ballInitialForce = new Vector2(100.0f, 300.0f);
// set to inactive
ballIsActive = 0;
// ball position
ballPosition = transform.position;
// get Y position of ball used for reset
OriginY = transform.position.y;
In the Update function, we add that:
// check for user input
if (Input.GetButtonDown("Jump") == true)
{
// check if is the first play
if (ballIsActive == 0)
{
// add a force
GetComponent<Rigidbody2D>().AddForce(ballInitialForce);
// set ball active
ballIsActive = 1;
}
}
Hit Play to test the ball launch (hit spacebar). Right now the ball isn’t glued to the paddle; so we need to implement this.
Add a new variable:
// Link the paddle
public GameObject playerObject;
And under Update:
//move ball with paddle if not started
if (ballIsActive == 0 && playerObject != null)
{
// get and use the player position
ballPosition.x = playerObject.transform.position.x;
// apply player X position to the ball
transform.position = ballPosition;
}
In Unity, link the paddle to the BallScript.
Hit Play and see that the ball follows the paddle, but it’s not reseted if it falls off-screen.
In the Update, add this:
//Ball reset (falls off-screen)
if (ballIsActive == 1 && transform.position.y < -6)
{
//set the ball to inactive
ballIsActive = 0;
//get the paddle X coordinate
ballPosition.x = playerObject.transform.position.x;
//get the ball's origin Y coordinate
ballPosition.y = OriginY;
//set the ball to the paddle
transform.position = ballPosition;
}
Hit Play and test the reset. You’ll notice that the ball speed is affected somehow after each new start from the paddle… The problem is that the AddForce() is added at each new start without resetting to zero.
Add a new variable:
private int BIForce = 0;
Modify the GetComponent (under Update) so that the force is added only once:
// add it only once, otherwise it goes to fast
if (BIForce == 0)
{
// add a force
GetComponent<Rigidbody2D>().AddForce(ballInitialForce);
BIForce = 1;
}
Hit Play and test the reset.
2.2.6 Write the block script
Create a new BlockScript.
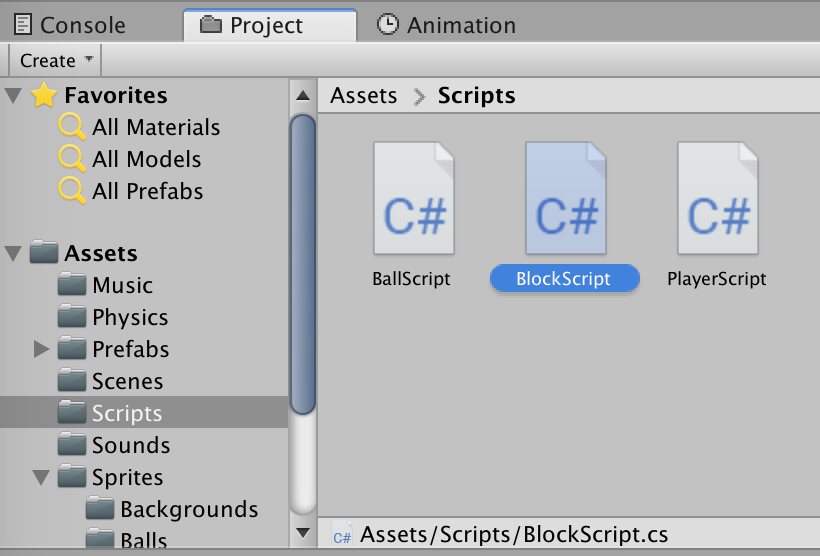
Add the script to the paddle.
Edit the script. We need 3 variables:
//hits number needed to destroy the block
public int hitsToDestroy = 1;
//block's point value
public int points = 10;
//hit count
private int numberOfHits;
Under Start:
//initialize the number of hits
numberOfHits = 0;
We use the predefined OnCollisionEnter2D function:
//On objects collision do this
void OnCollisionEnter2D(Collision2D collision)
{
//check if collision with ball happens
if (collision.gameObject.tag == "Ball")
{
//add 1 to the number of hits
numberOfHits++;
//check if we have the max number of hits
if (numberOfHits == hitsToDestroy)
{
// destroy the object
Destroy(this.gameObject);
}
}
}
Hit Play to test.
2.2.7 Create block prefabs
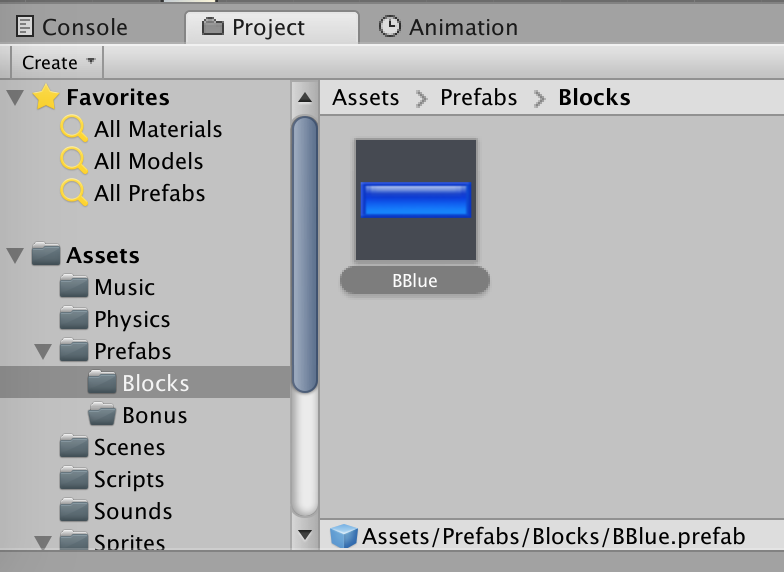
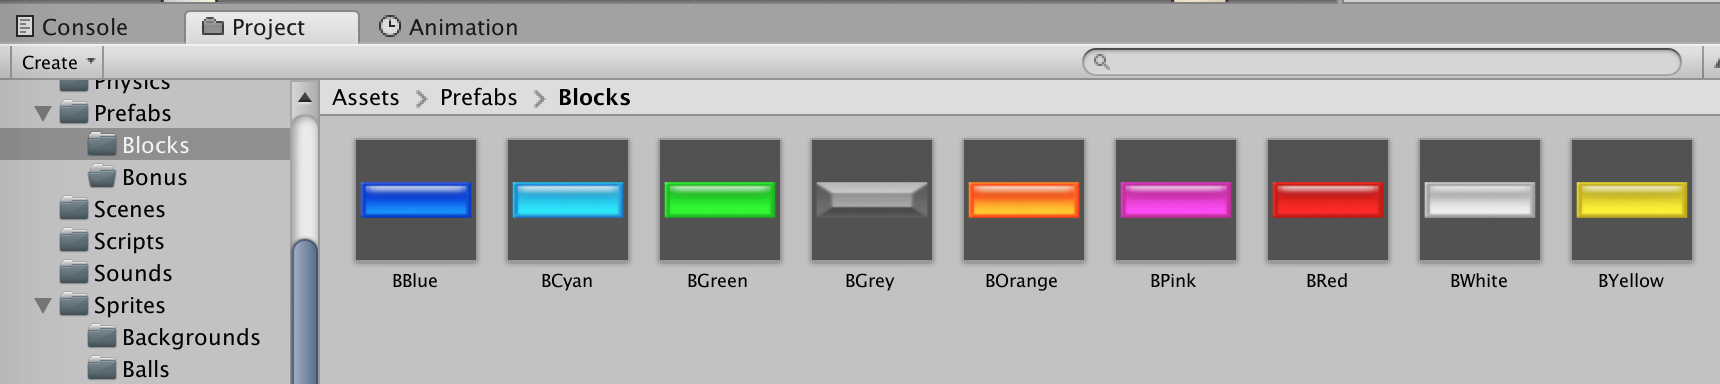
In order to duplicate the blocks easily, we create prefabs of the existing BBlue block.
Move BBlue into Assets/Prefabs/Blocks:
Duplicate the prefab and name it BGreen.
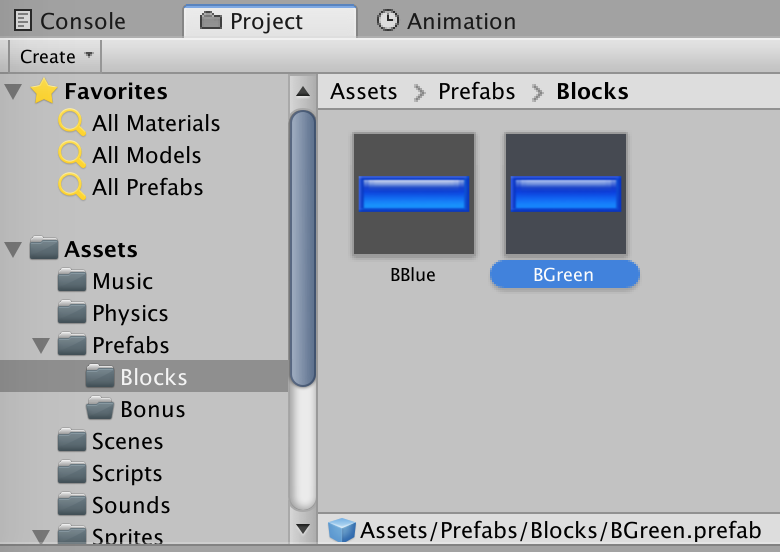
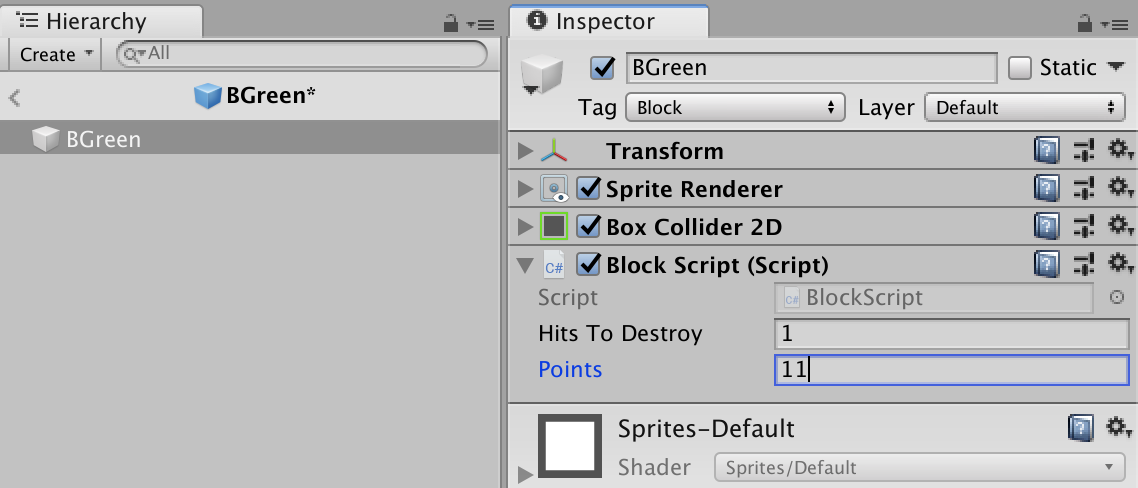
Double-clic BGreen. Under Inspector/Sprite Renderer/Sprite, choose the green block image.
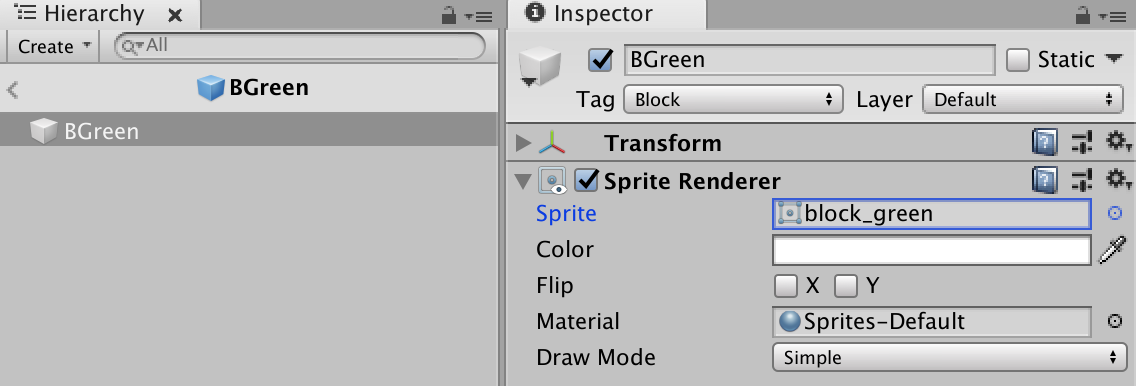
Assign the points’ value under Inspector/Block Script/Points and the needed hits under Hits to Destroy:
Repeat these steps for every color.
2.2.8 Level creation
To make the whole level design easier, create a new empty GameObject. Rename it Blocks and add a Grid component. Define the grid according to the block size. The block size can be found under BBlue/Inspector/Box Collider 2D/Size; if Transform/Scale is used, the X and Y must be multiplied by the Scale.X and Scale.Y values.
For each color, create an empty GameObject under Blocks.
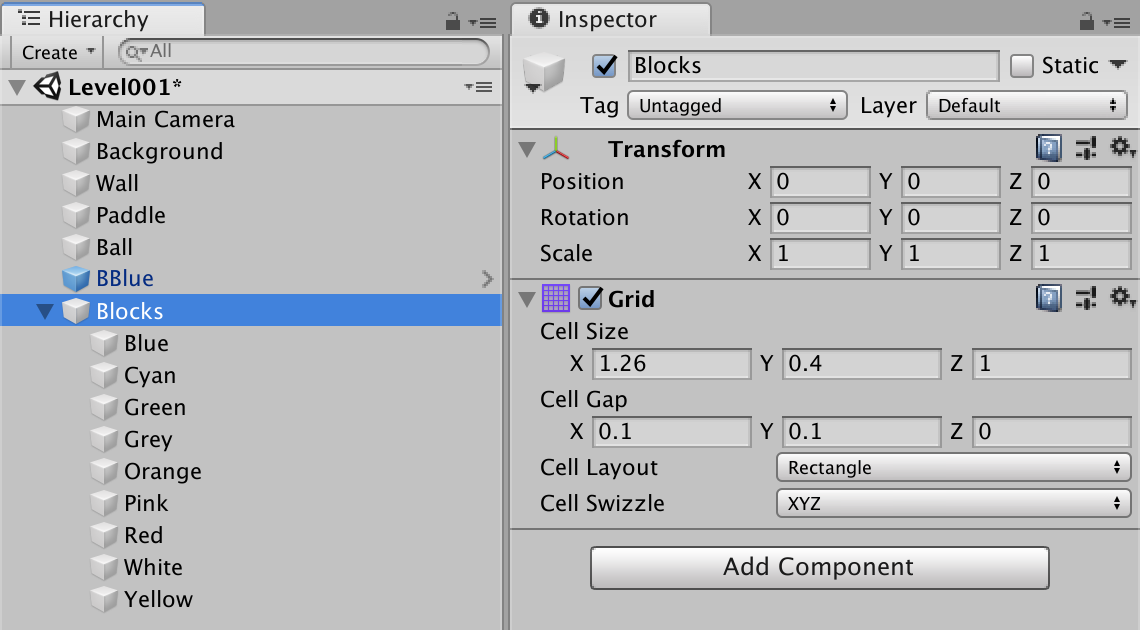
The block prefab can now be drag and dropped to the according folder and placed using the grid.
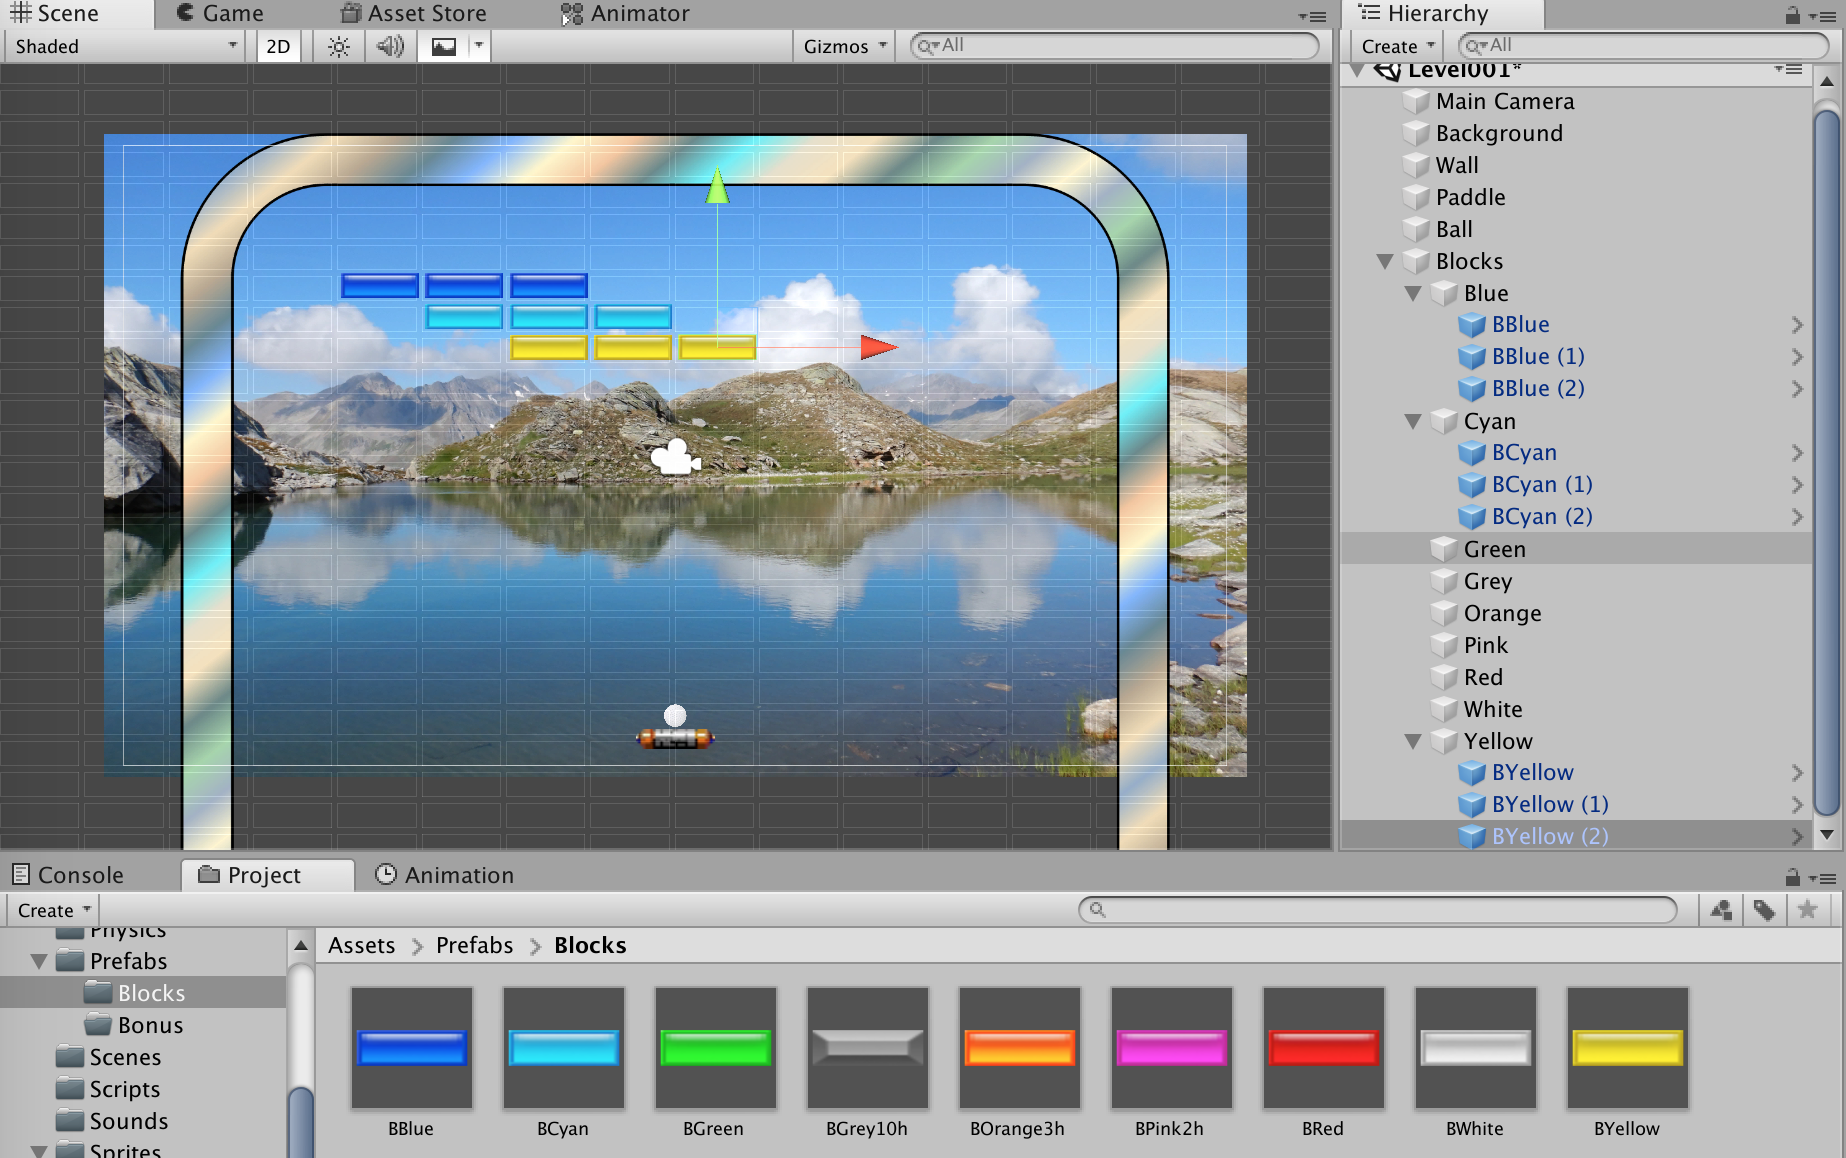
Hit Play to test the level.
2.2.9 Lives and score system
To handle the lives and score, we need a game object that doesn’t change during the gameplay. One would take the paddle, but if the paddle changes (e.g. because of a bonus), then everything is lost. For this tutorial, we take the walls.
In the WallScript, add 2 variables.
//number of lives
private int playerLives;
//number of points
private int playerPoints;
Initialize the variables in the Start.
//give 3 lives
playerLives = 3;
//give 0 points
playerPoints = 0;
Add a function to count the points.
//add points to existing points
void addPoints(int points)
{
playerPoints += points;
}
If a block is deleted (hit by the ball), the block’s points must be added to the points counter. As there are too many blocks to be linked to the wall, we will send a message from the block to the wall.
In the BlockScript, go to the OnCollisionEnter2D function and before the Destroy() command, paste this code:
// get reference of wall object
GameObject wall = GameObject.FindGameObjectsWithTag("Wall")[0];
// send message
wall.SendMessage("addPoints", points);
Back in the WallScript we add some GUI objects to show all the needed information in a function:
//display general information, remaining lives and score
void OnGUI()
{
//create a box object
GUI.Box(new Rect(Screen.width / 2 - 260, 0,Screen.width / 2 + 180, 25)," ");
//create the label inside the box
GUI.Label(new Rect(Screen.width / 2 - 255, 3, Screen.width / 2 + 175, 22), "Arrows to move. Spacebar to launch. Type ESC to leave. *** Lives: " + playerLives + " Score: " + playerPoints);
}
In the same script we add a live counter:
//remove live from total lives
void TakeLife()
{
playerLives--;
}
In the BallScript, where the ball reset stuff happens, we need to add a SendMessage command to remove one live. Add this code:
// get reference of wall object
GameObject wall = GameObject.FindGameObjectsWithTag("Wall")[0];
// Send Message
wall.SendMessage("TakeLife");
If no live is available (playerLives = 0), then we restart the level.
For this we need to add the SceneManagement to the beginning of the WallScript.
using UnityEngine.SceneManagement;
We need also a new function that tests the number of lives:
//Handle the event "no more lives"
void WinLose()
{
// restart the game
if (playerLives == 0)
{
SceneManager.LoadScene("Level001");
}
}
This test is fired in the Update part:
// Check game state
WinLose();
Hit Play and test your game!
3. Enhancements
3.1 Add sound effects and music
3.1.1 Background music
The background music will play until leaving the level. We will associate the music to the background image.
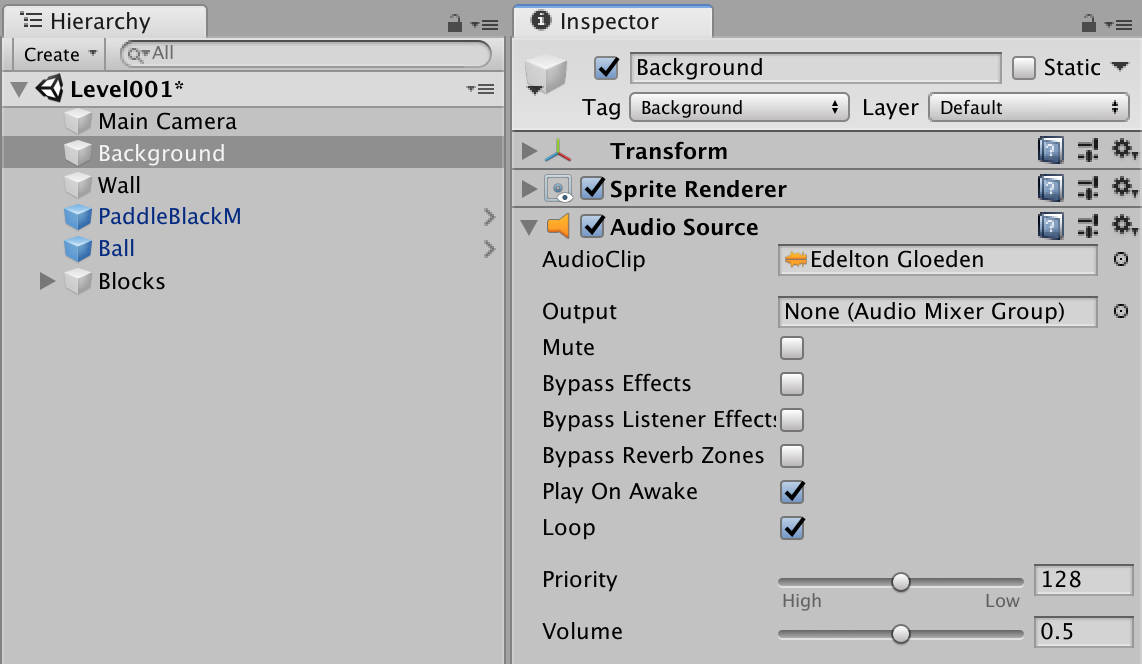
Select the Background. Add an Audio Source component:
- under Audio Source/AudioClip add a music file.
- check Audio Source/Play on Awake.
- check Audio Source/Loop.
- reduce the Volume a bit.
3.1.2 Enhanced background music
The background music will play until leaving the level or until the player hits the toggle button. We will associate the music to the background image.
Select the Background. Add an Audio Source component:
- under Audio Source/AudioClip add a music file.
- uncheck Audio Source/Play on Awake.
- check Audio Source/Loop.
- reduce the Volume a bit.
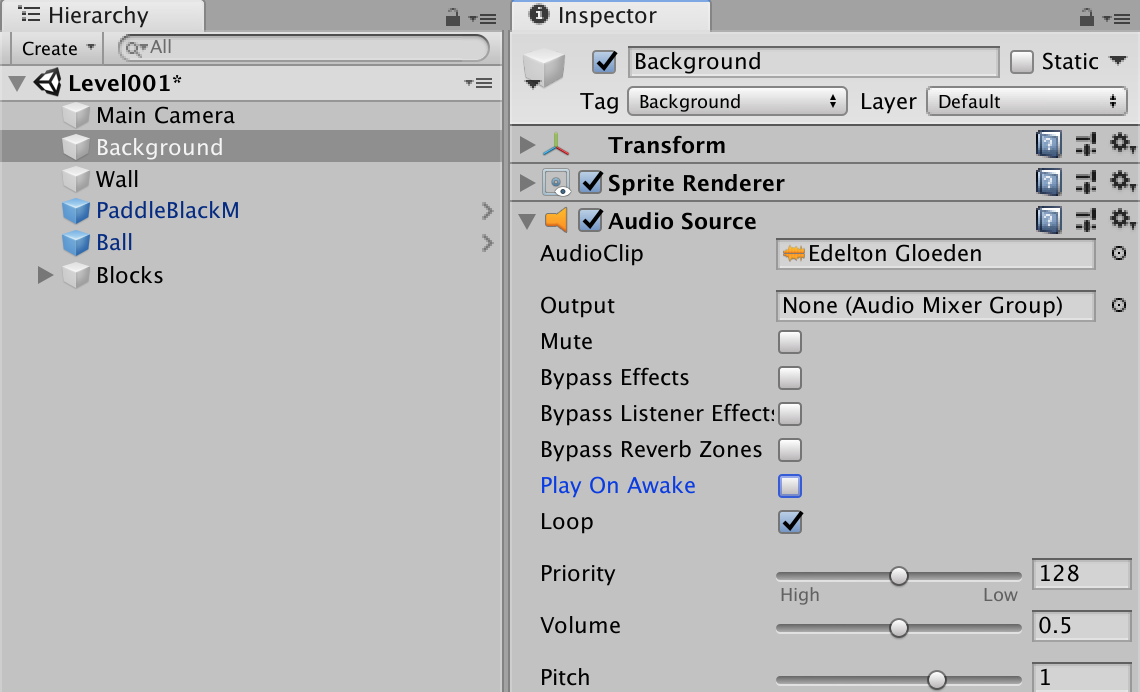
Create a new BackgroundScript and add it to the Background.
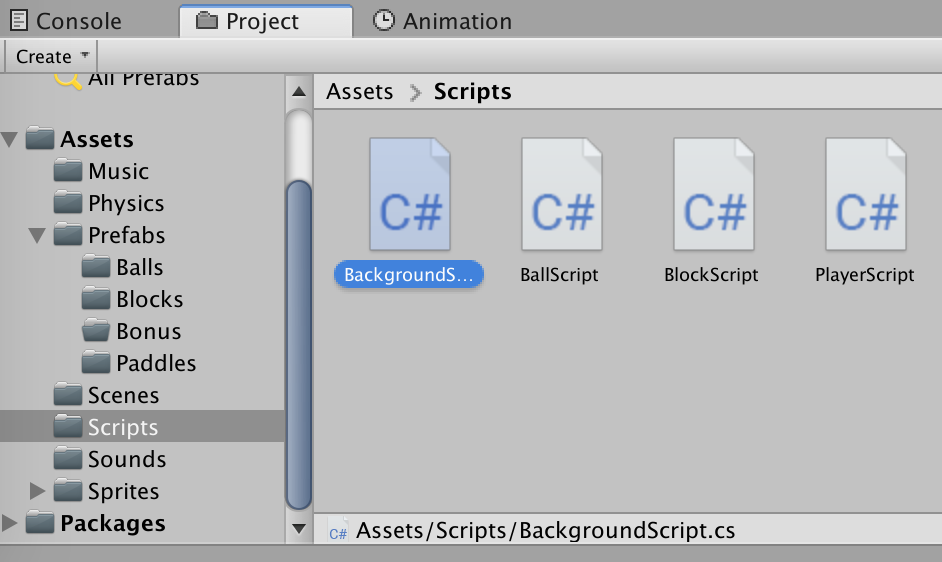
Add this code to the script:
AudioSource m_MyAudioSource;
//Play the music
bool m_Play;
//Detect when you use the toggle, ensures music isn’t played multiple times
bool m_ToggleChange;
// Start is called before the first frame update
void Start()
{
//Fetch the AudioSource from the GameObject
m_MyAudioSource = GetComponent<AudioSource>();
//Ensure the toggles are set to true for the music to play at start-up
m_Play = true;
m_ToggleChange = true;
}
// Update is called once per frame
void Update()
{
//Check to see if you just set the toggle to positive
if (m_Play == true && m_ToggleChange == true)
{
//Play the audio you attach to the AudioSource component
m_MyAudioSource.Play();
m_ToggleChange = false;
}
//stops the music if on
if (Input.GetKeyDown(KeyCode.Alpha1) && m_Play == true)
{
m_Play = false;
m_MyAudioSource.Stop();
}
//starts the music if off
if (Input.GetKeyDown(KeyCode.Alpha2) && m_Play == false)
{
m_Play = true;
m_ToggleChange = true;
}
}
This allow to stop the music with the alphakey 1 and restart it with alphakey 2.
3.1.3 Add sound effects
We will add some sound effects to the ball and to the wall (actually the sfx should play when losing a life and getting some points).
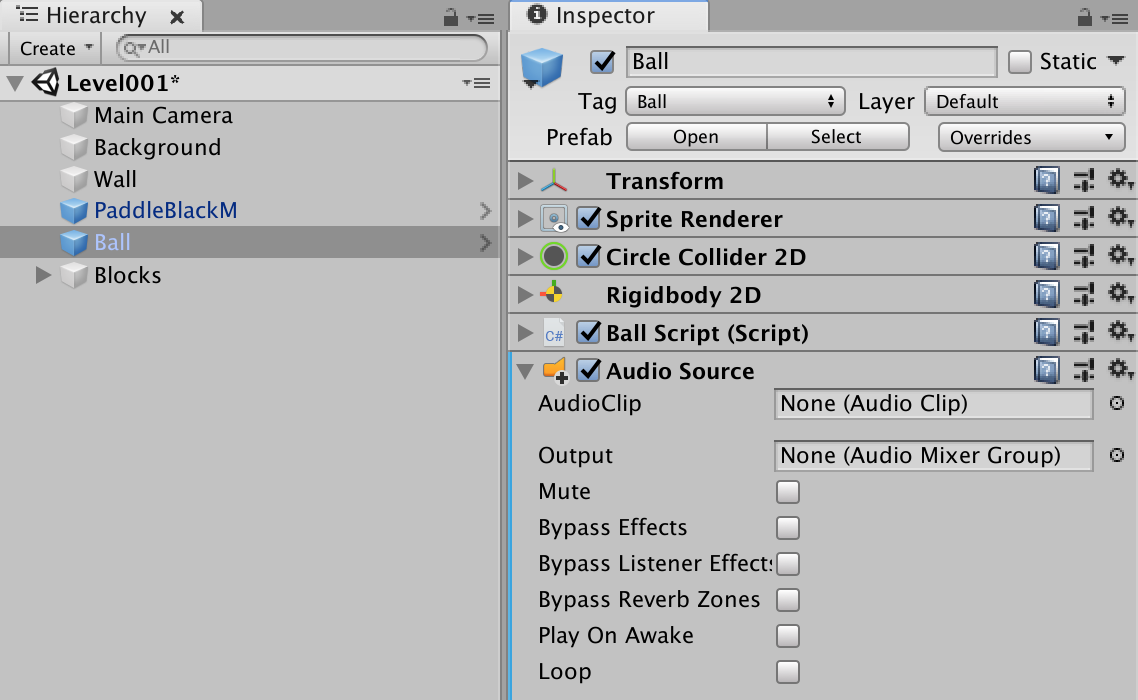
Add an Audio Source to the Ball and uncheck everything.
Add an Audio Source to the Wall and uncheck everything.
In the BallScript, add a variable:
// link the sfx
public AudioClip hitSound;
Add a function to play on every collision:
void OnCollisionEnter2D(Collision2D collision)
{
if (ballIsActive ==1)
{
GetComponent<AudioSource>().PlayOneShot(hitSound);
}
}
Don’t forget to link the sound file to the variable in the inspector.
In the WallScript, add two variables:
//link the sfx
public AudioClip pointSound;
public AudioClip lifeSound;
And modify these two functions:
//add points to existing points
void addPoints(int points)
{
playerPoints += points;
GetComponent<AudioSource>().PlayOneShot(pointSound);
}
//remove live from total lives
void TakeLife()
{
playerLives--;
GetComponent<AudioSource>().PlayOneShot(lifeSound);
}
3.2 Create a bonus system
3.2.1 Create the bonus prefabs
First of all, we need to add 4 sprites to the hierarchy.
This will create automatically an animation. Rename the object to Bonus1.
Add the Rigidbody 2D and Circle Collider 2D components and set the tag to Bonus.
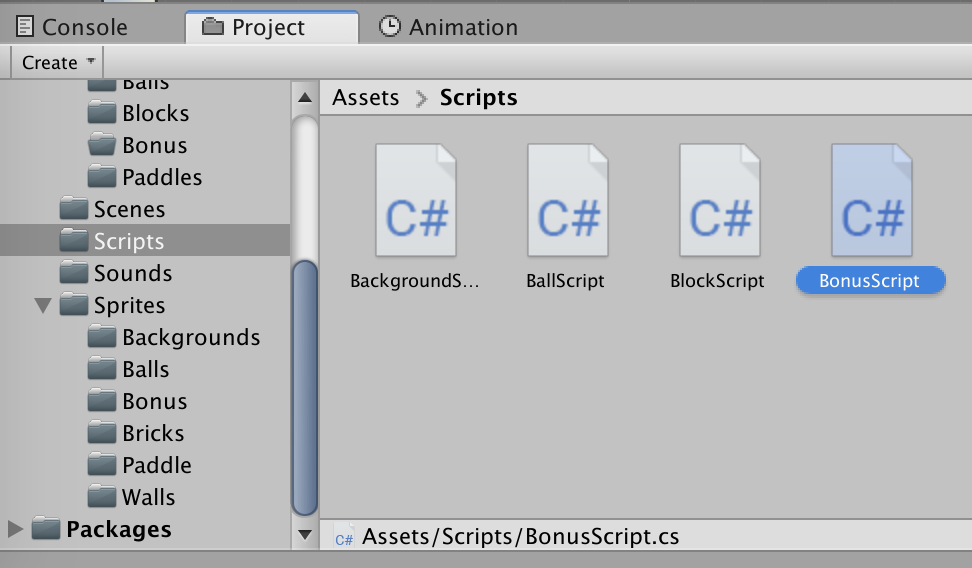
Create a new BonusScript and add it to the object.
Edit the script. Add these variables:
//Bonus' inital force
private Vector2 bonusInitialForce;
//Assign a point value to bonus
private int BonusPoints;
//Name of the bonus object
private string ObjName;
Initialize the force in the Start function:
// create the force
bonusInitialForce = new Vector2(0f, -100.0f);
GetComponent<Rigidbody2D>().AddForce(bonusInitialForce);
Delete the bonus, within the Update function, if it falls off-screen.
//Bonus object delete when missed by player (falls off-screen)
if (transform.position.y < -6)
{
//Debug.Log("BonusScript - missed bonus removed!");
Destroy(this.gameObject);
}
The next step is to check if the bonus collides with the paddle. If this happens, we do an action for that type of bonus (here we add some points) and we delete the bonus object.
Add the following function:
void OnCollisionEnter2D(Collision2D collision)
{
// bonus catched by player
if (collision.gameObject.tag == "Player")
{
// get the name of the cloned object
ObjName = this.name;
ObjName = ObjName.Substring(0, 6);
//Debug.Log("BonusScript - Got a bonus: " + ObjName); //ObjName returns "Bonus2"
// test what bonus was caught and what to do
if (ObjName == "Bonus1")
{
BonusPoints = 10;
}
if (ObjName == "Bonus2")
{
BonusPoints = 10;
}
if (ObjName == "Bonus3")
{
BonusPoints = 10;
}
if (ObjName == "Bonus4")
{
BonusPoints = 10;
}
if (ObjName == "Bonus5")
{
BonusPoints = 10;
}
if (ObjName == "Bonus6")
{
BonusPoints = 10;
}
// get reference of player object
GameObject wall = GameObject.FindGameObjectsWithTag("Wall")[0];
// send message
wall.SendMessage("addPoints", BonusPoints);
// destroy the bonus object if caught
Destroy(this.gameObject);
}
}
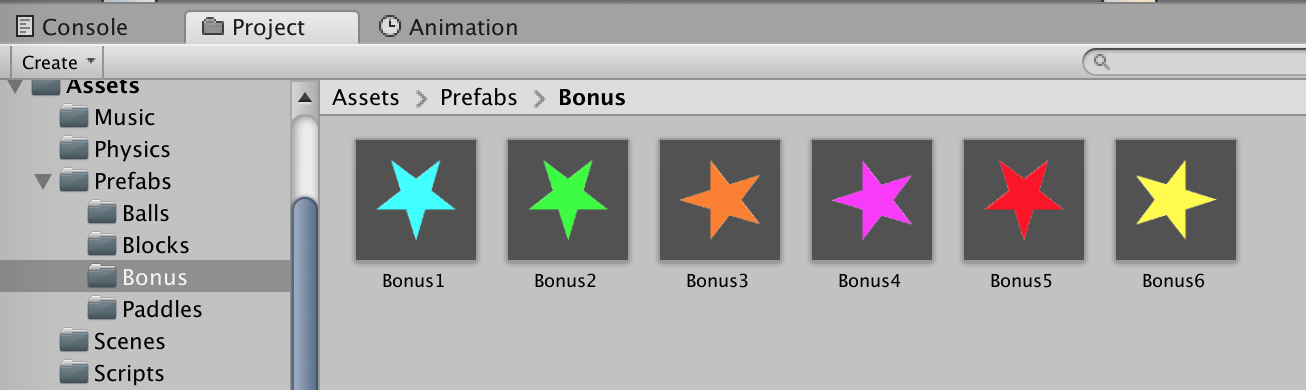
Create prefabs of your different bonuses.
The bonus is part of the block. This means we need to update the BlockScript.
Add these variables:
// set the bonus value
public int Bonus = 0;
public Transform MyBonusPrefab;
If the block has no bonus, which is the default state, the Bonus variable takes 0. With this set, we don’t need to change our block’s prefabs.
The bonus should be created when the block is deleted. Therefore we need to add some code in the OnCollisionEnter2D function, just before the deletion of the block.
// drop bonus object
if (Bonus != 0)
{
Instantiate(MyBonusPrefab, gameObject.transform.position, MyBonusPrefab.rotation);
}
To test this, go back to Unity, select a block and, in the Block Script part, set Bonus to 1 and add a bonus prefab to My Bonus Prefab.
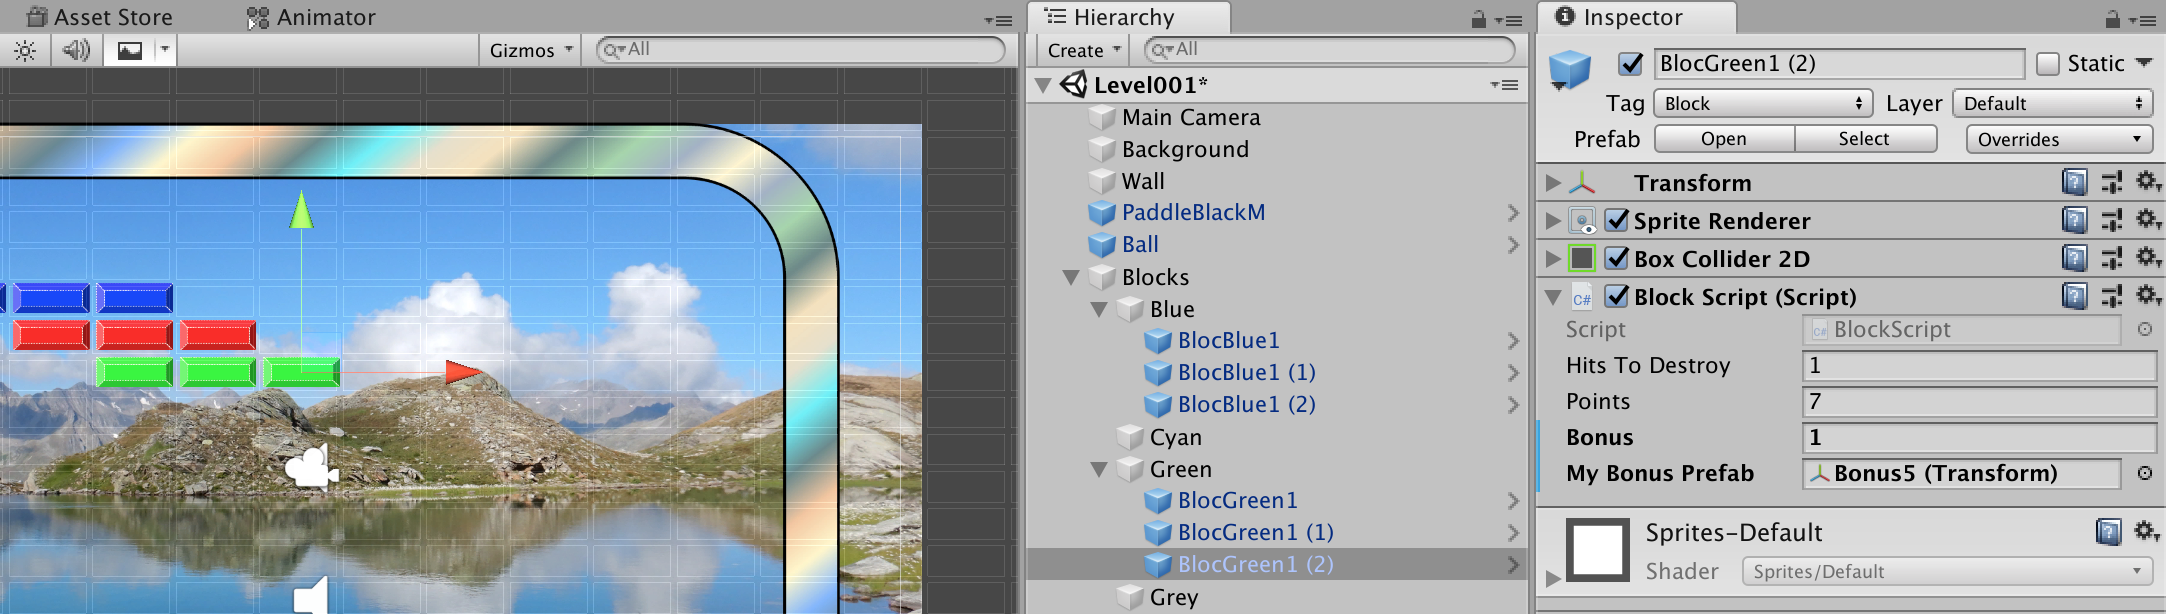
Hit Play and test!
3.3 Adding more levels
To create a new level, duplicate the existing one.
In the Inspector, change the background image and the music file.
Change the blocks.
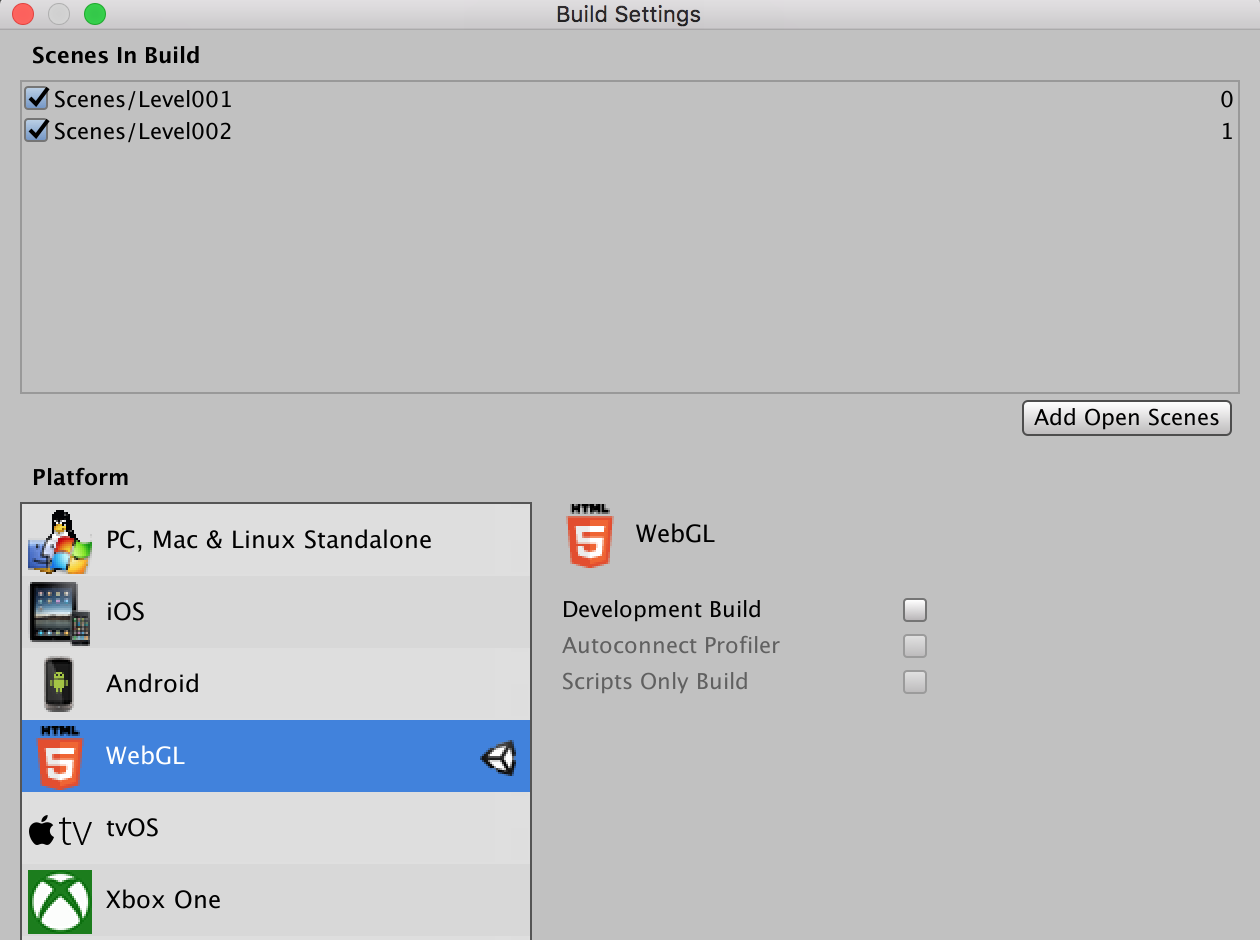
Open the Build Settings and add your levels.
In a previous chapter we created the function WinLose in the WallScript. This allowed us to restart at level 1 if all the balls were lost. Now we will extend this function for the case all the blocks were hit.
Add this code to the WinLose function.
// all blocks destroyed
if ((GameObject.FindGameObjectsWithTag("Block")).Length == 0)
{
// check the current level
if (SceneManager.GetActiveScene().name == "Level001")
{
SceneManager.LoadScene("Level002");
}
else
{
QuitApp();
}
}
3.4 Adding a start menu
The start menu is created like described in chapter 3 of the Virtual Museum: http://mountainpath.ch/cmsimplexh/index.php?Unity-3D/Create-a-virtual-museum-in-one-day.
Modify the QuitApp function in the WallScript into a QuitLevel function. Change also the two refenrences.
private void QuitLevel()
{
SceneManager.LoadScene(0);
}
This allows us to return to the start menu instead of quitting the game.
3.5 Improving the lives and score system
Right now, the lives and score system is level dependent. This means that the score and the amount of lives are reseted on every level. A better way of doing would be to have a lives and score system across all levels. Let’s see what we need.
For this, we will use the PlayerPrefs API: https://docs.unity3d.com/ScriptReference/PlayerPrefs.html.
We need only a few changes in the code. As the WallScript handles these variables, we will edit that script. The WinLose function links the levels. So, just before loading the next scene, we save the values into the memory using this code:
//store the score for next level
PlayerPrefs.SetInt("score", playerPoints);
//store the lives for next level
PlayerPrefs.SetInt("lives", playerLives);
In the Start function, we initialize these values. Here, we need to initialize the value only on the first level. For all other levels, we get the values back from memory. Replace the content of the function by this:
// check the current level
if (SceneManager.GetActiveScene().name == "Level001")
{
//at level 1, initialize the values
//give 3 lives
playerLives = 3;
//give 0 points
playerPoints = 0;
} else
{
//for all other levels, get the values from memory
playerLives = PlayerPrefs.GetInt("lives");
playerPoints = PlayerPrefs.GetInt("score");
}
Hit Play to test!
3.6 Improve the level loading
The next level is loaded by the WallScript. The actual code needs to be extended for each new level. And this is bad!
Let’s adapt the code under if ((GameObject.FindGameObjectsWithTag("Block")).Length == 0).
The idea is to check if we have achieved the last level. In this case we return to the main menu. If not, we “calculate” the next level’s name and load that level.
// check if we are at the last level
if (SceneManager.GetActiveScene().name == "Level002")
{
//if the last level is achieved, go back to main menu
QuitLevel();
} else
{
//Save all variable values
SaveStats();
//load next level
//get the current level name e.g. Level001
curLevelName = SceneManager.GetActiveScene().name;
//convert the string number to int e.g. 001 to 1
int.TryParse(curLevelName.Substring(5, 3), out curLevelNumber);
//add 1 to level number, e.g. 1+1=2
curLevelNumber++;
//create the new level name, e.g. Level002
if (curLevelNumber < 10)
{
nextLevelName = "Level00" + curLevelNumber.ToString();
} else if (curLevelNumber < 100)
{
nextLevelName = "Level0" + curLevelNumber.ToString();
} else
{
nextLevelName = "Level" + curLevelNumber.ToString();
}
SceneManager.LoadScene(nextLevelName);
}
Hit Play to test!
3.7 Adding a gameover screen
The gameover screen is displayed when a player finished the game or lost all its balls.
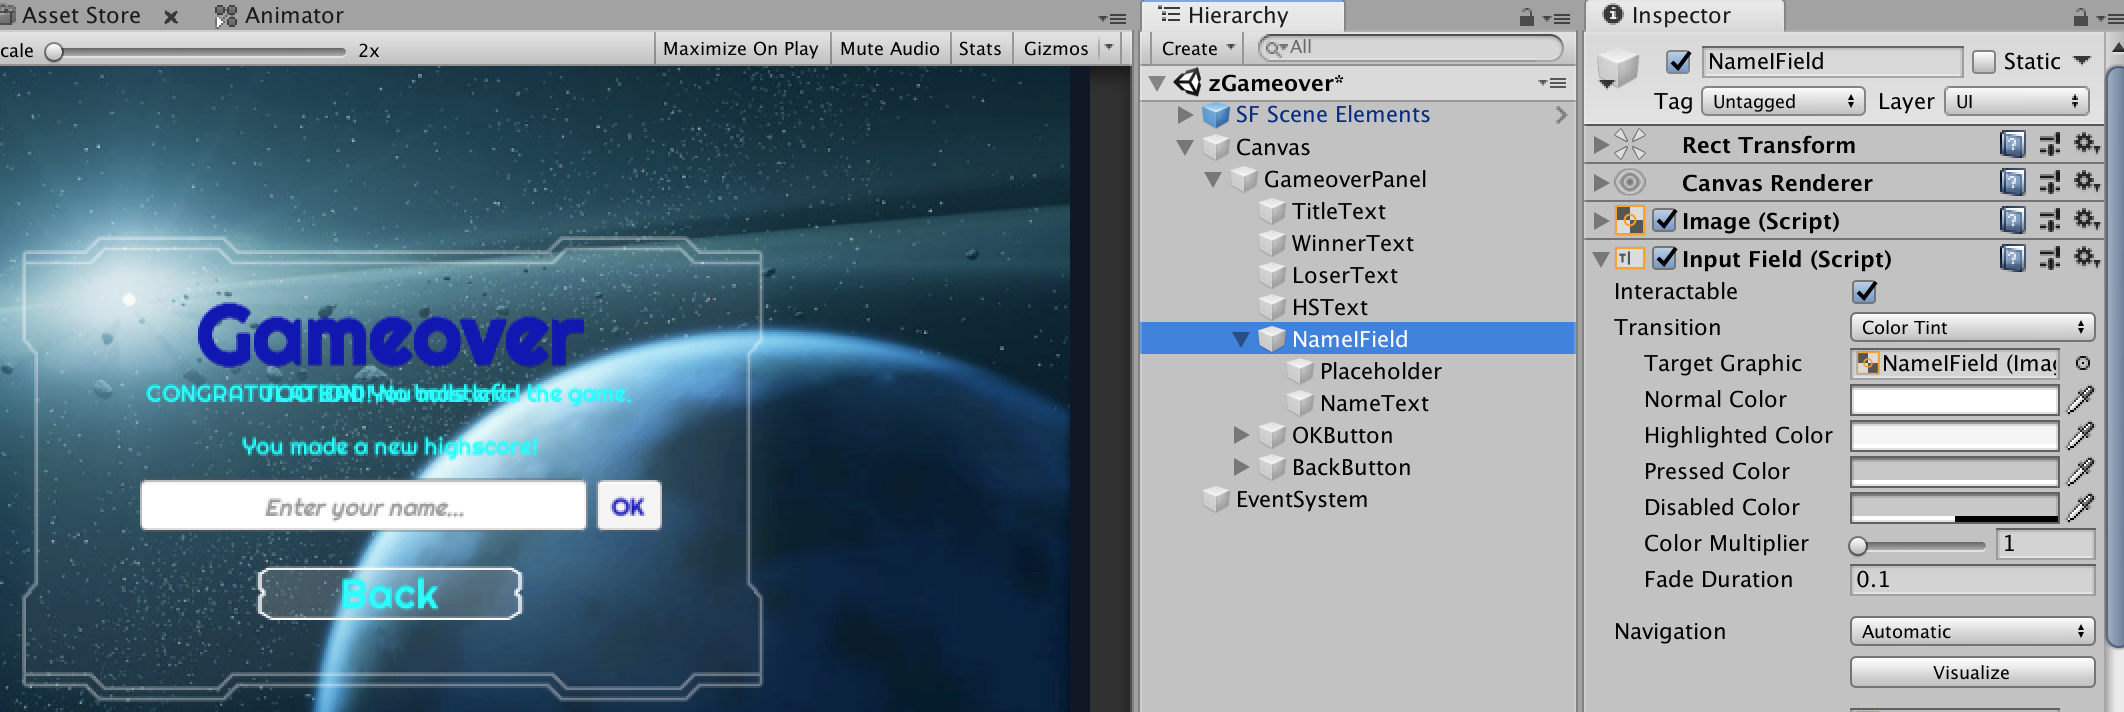
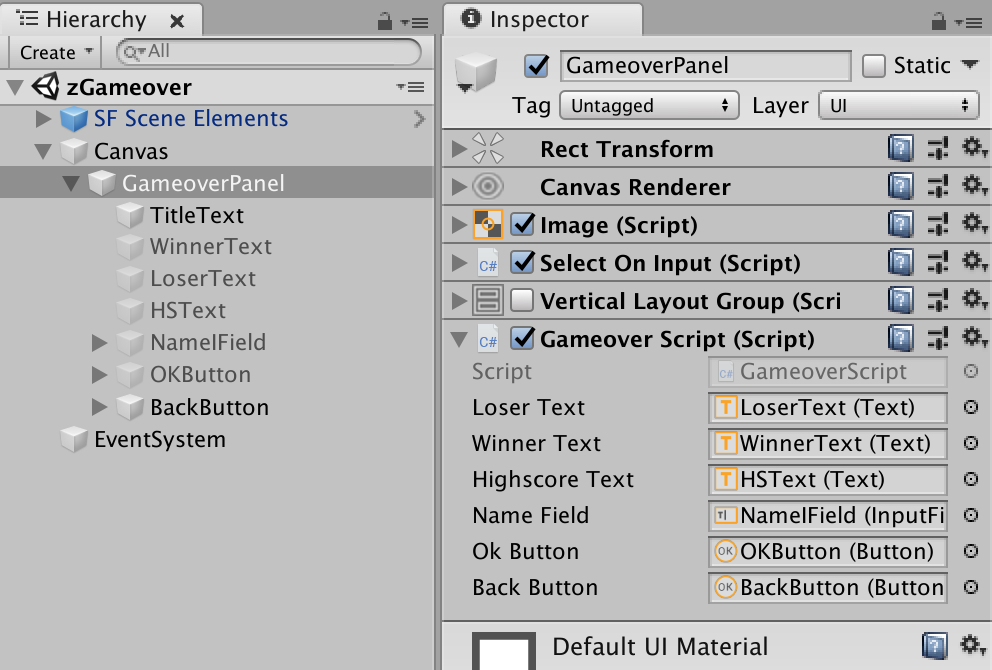
Create a new scene named zGameover. Add it to your Build Settings.
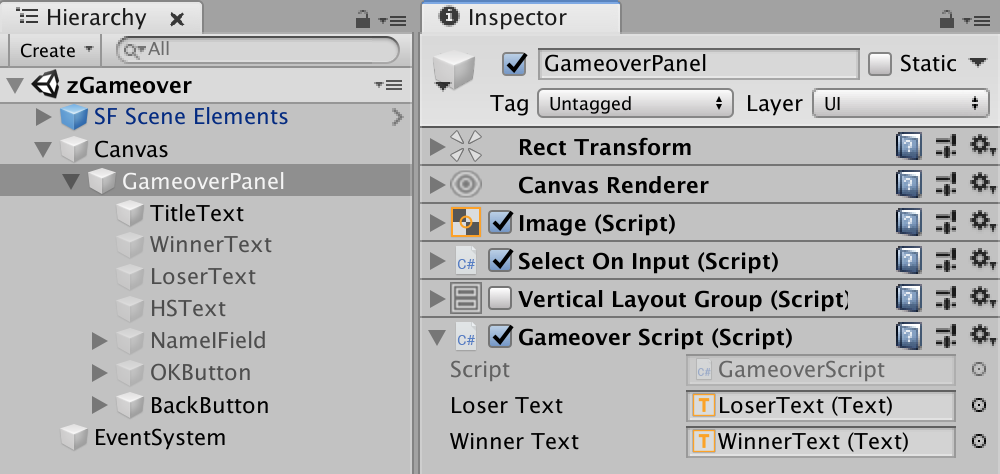
Create the following:
- a GameoverPanel
- a TitleText
- a WinnerText
- a LoserText, located at the same place as the WinnerText.
- a HSText
- an input field named NameIField
- an OKButton near the NameIField
- a BackButton
- by default, hide everything, but the TitleText and the BackButton.
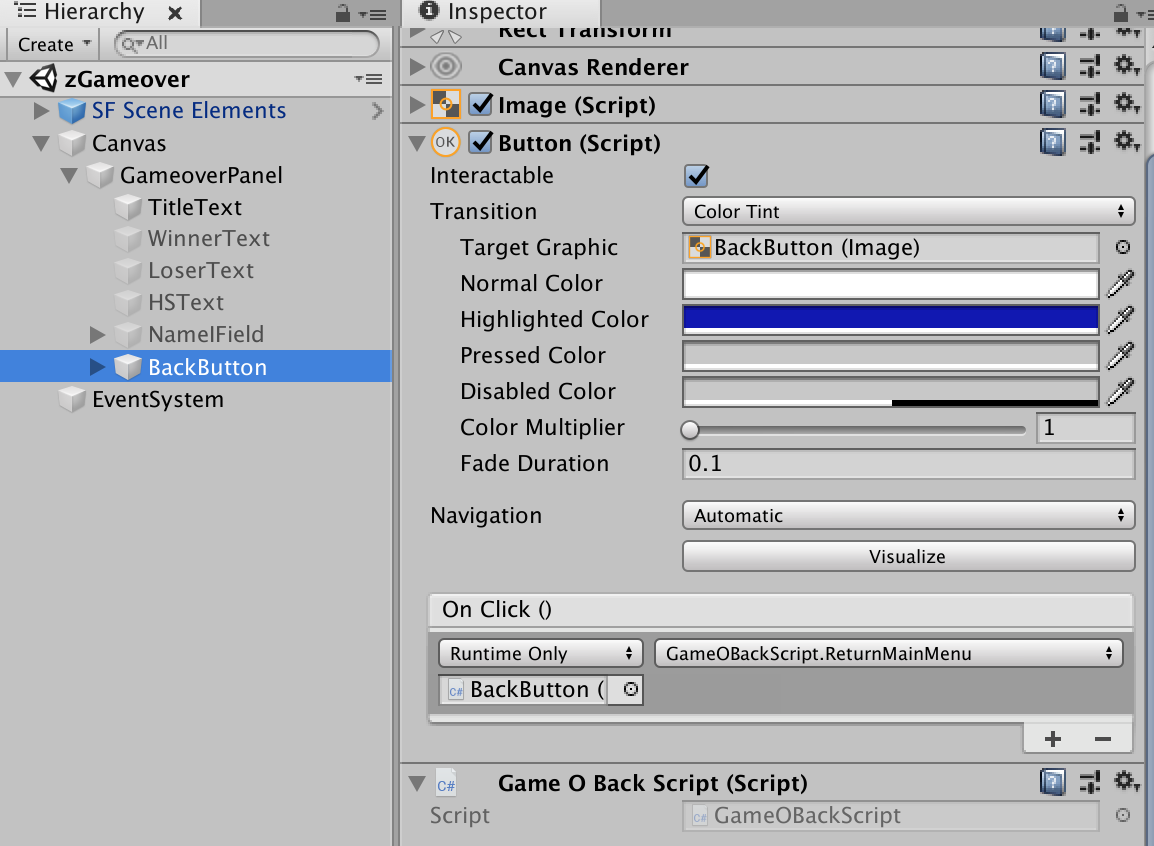
Create a GameOBackScript and add it to the BackButton.
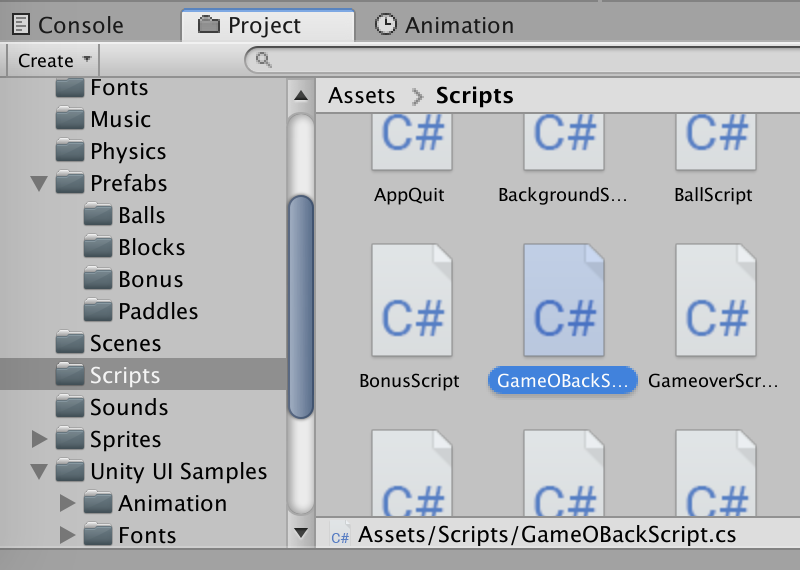
Replace the script code by this one:
using System.Collections;
using System.Collections.Generic;
using UnityEngine;
using UnityEngine.SceneManagement;
public class GameOBackScript : MonoBehaviour
{
public void ReturnMainMenu()
{
SceneManager.LoadScene(0);
}
}
Link the BackButton with the script in the On Click () section.
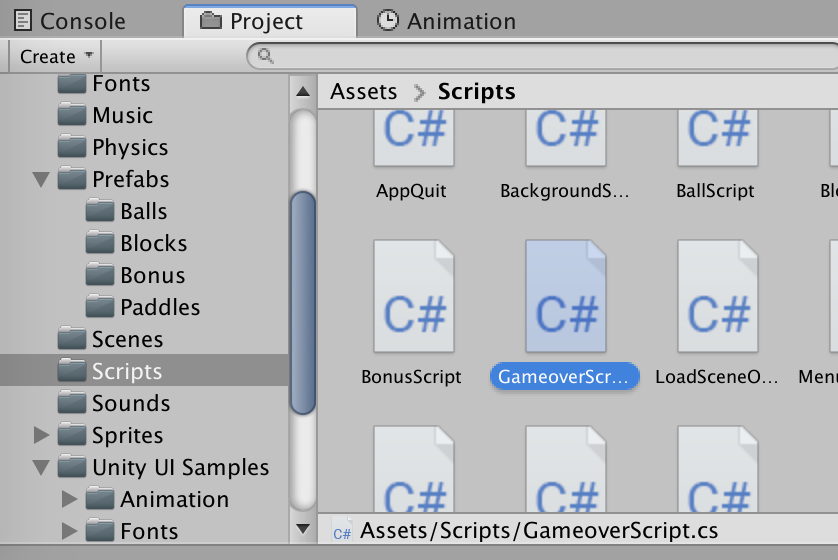
Create the GameoverScript and add it to the GameoverPanel.
In the header add:
using UnityEngine.UI;
Add these variables:
//link the text objects
public Text LoserText;
public Text WinnerText;
//var for gameover state
private int GameoverState;
Add this code in the Start function:
//get the gameover state from memory (10=no lives, 20=win game)
GameoverState = PlayerPrefs.GetInt("gameover");
if (GameoverState == 10)
{
//if no more lives
LoserText.gameObject.SetActive(true);
}
else if (GameoverState == 20)
{
//if win the game
WinnerText.gameObject.SetActive(true);
}
In Unity, link the two text objects to the script.
Now we have to write the gameover state to memory from within the WallScript.
In the WinLose() function, in the if (playerLives == 0) part, add the following:
//store the gameover var (10=no lives, 20=win game)
PlayerPrefs.SetInt("gameover", 10);
In the WinLose() function, in the if (SceneManager.GetActiveScene().name == LastLevel) part, add the following:
//store the gameover var (10=no lives, 20=win game)
PlayerPrefs.SetInt("gameover", 20);
Hit Play to test!
3.8 Adding a highscore system
3.8.1 Adding a highscore panel
The highscore shows the highest achieved scores.
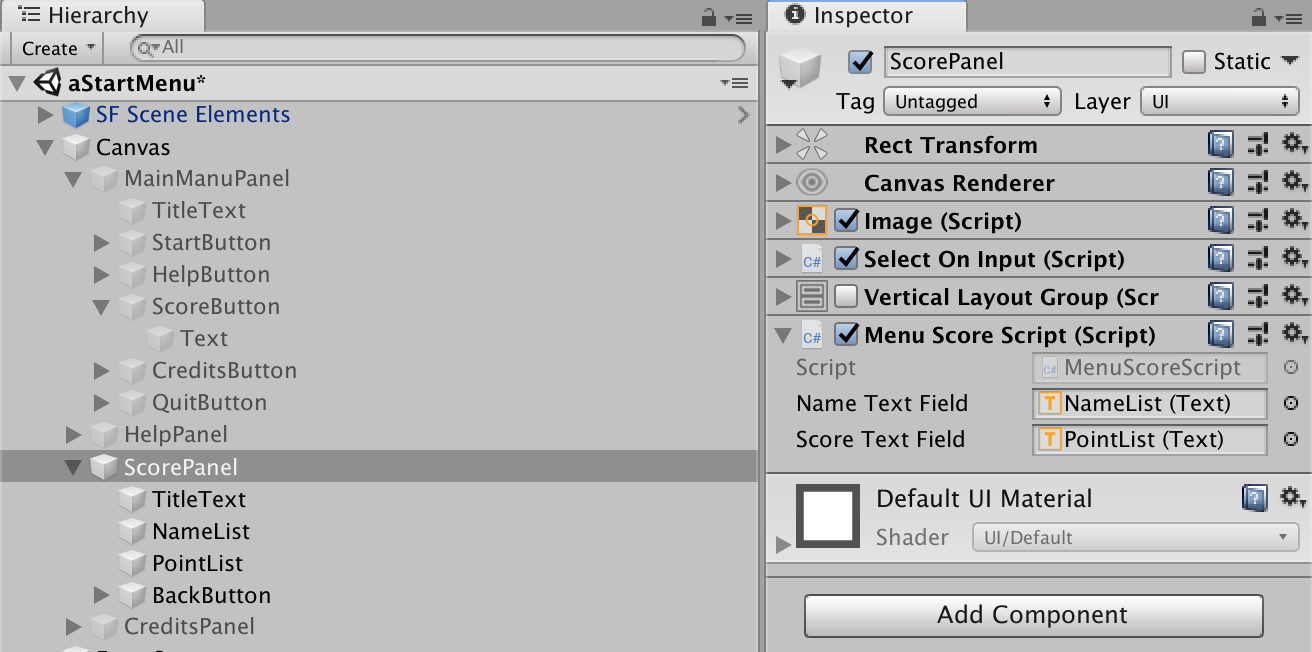
In the start scene, create a new ScorePanel. Create a TitleText. Create two texts, NameList and PointList. Create a BackButton and link it to the MainMenuPanel.
In the MainMenuPanel, add a new ScoreButton. Link the ScoreButton with the ScorePanel like seen in a previous chapter.
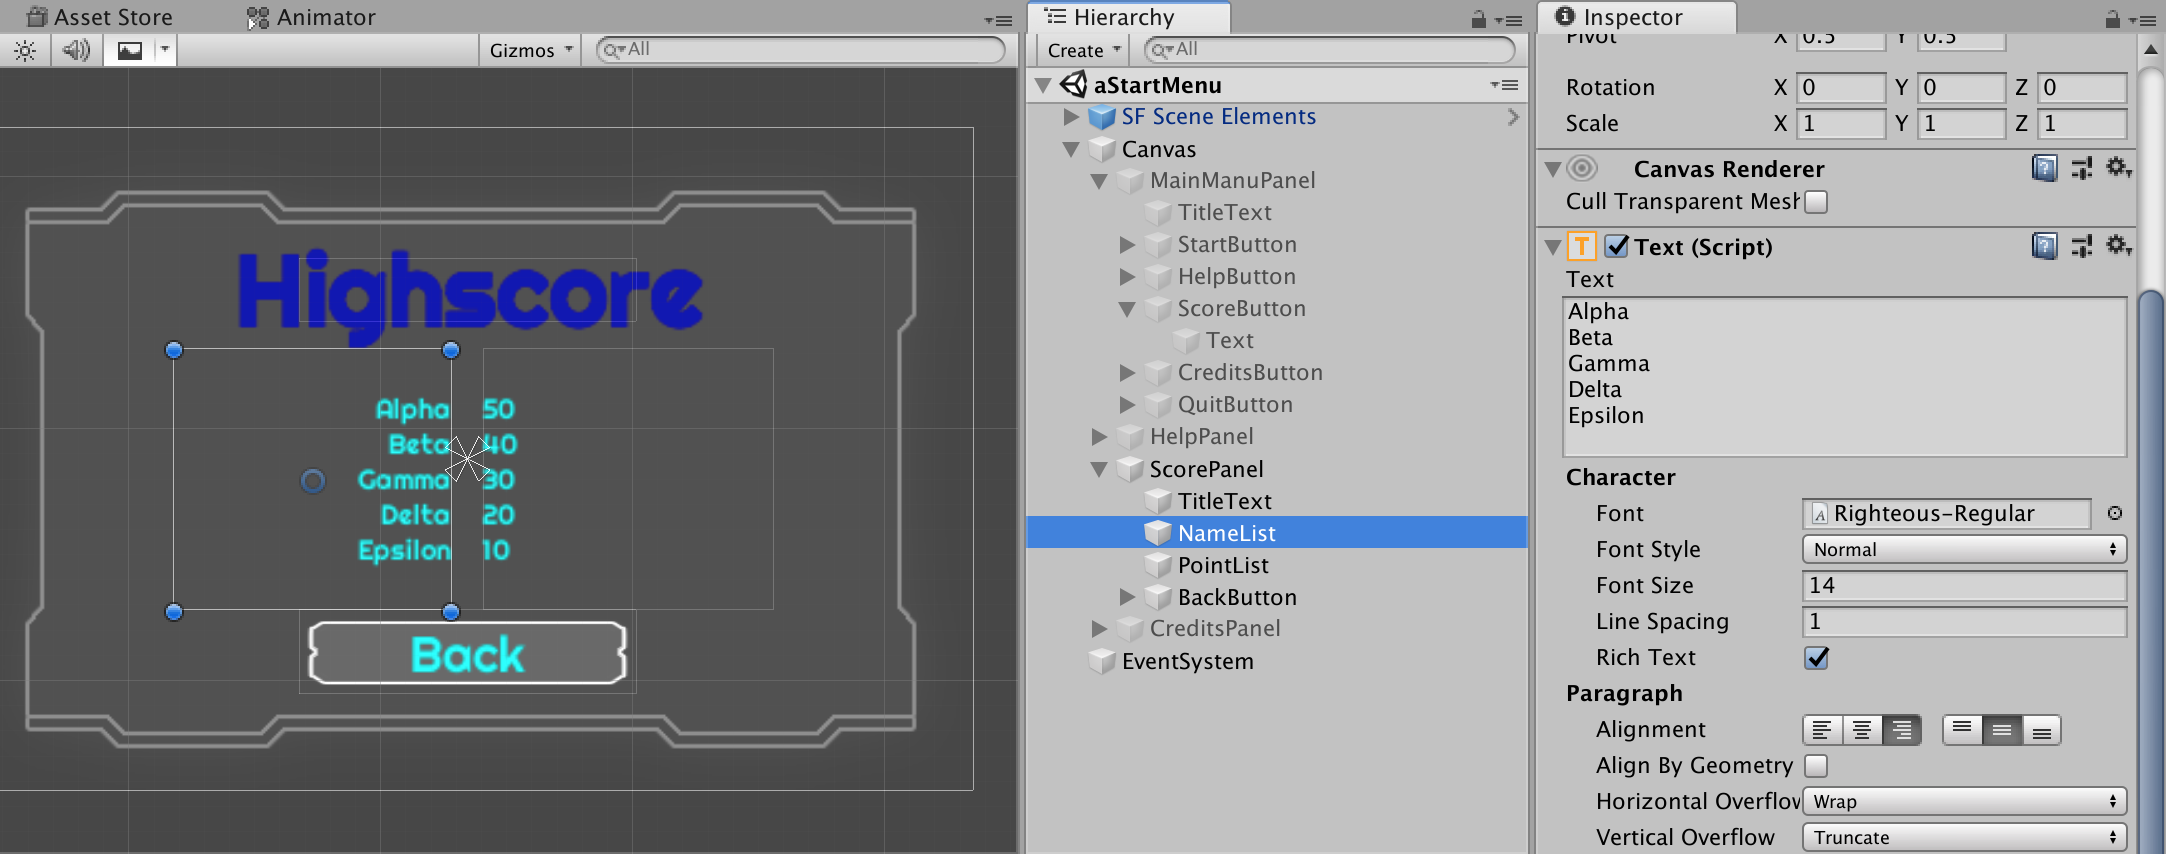
Create a new MenuScoreScript and add it to the ScorePanel.
In the script header, add (used to pass a variable’s content to a text field):
using UnityEngine.UI;
We need these variables:
//Textfields to link
public Text NameTextField;
public Text ScoreTextField;
//concat lists
private string NameList;
private string ScoreList;
//store the existing highscore points
private int hscorePt1;
private int hscorePt2;
private int hscorePt3;
private int hscorePt4;
private int hscorePt5;
//store the existing highscore names
private string hscoreNm1;
private string hscoreNm2;
private string hscoreNm3;
private string hscoreNm4;
private string hscoreNm5;
And this code goes to the Start function:
//Fetch the scores
hscorePt1 = PlayerPrefs.GetInt("hscore1");
if (hscorePt1 == 0)
{
hscorePt1 = 50;
}
hscorePt2 = PlayerPrefs.GetInt("hscore2");
if (hscorePt2 == 0)
{
hscorePt2 = 40;
}
hscorePt3 = PlayerPrefs.GetInt("hscore3");
if (hscorePt3 == 0)
{
hscorePt1 = 30;
}
hscorePt4 = PlayerPrefs.GetInt("hscore4");
if (hscorePt4 == 0)
{
hscorePt4 = 20;
}
hscorePt5 = PlayerPrefs.GetInt("hscore5");
if (hscorePt5 == 0)
{
hscorePt1 = 10;
}
//Fetch the names
hscoreNm1 = PlayerPrefs.GetString("hname1");
if (hscoreNm1 == "")
{
hscoreNm1 = "Alpha";
}
hscoreNm2 = PlayerPrefs.GetString("hname2");
if (hscoreNm2 == "")
{
hscoreNm2 = "Beta";
}
hscoreNm3 = PlayerPrefs.GetString("hname3");
if (hscoreNm3 == "")
{
hscoreNm3 = "Gamma";
}
hscoreNm4 = PlayerPrefs.GetString("hname4");
if (hscoreNm4 == "")
{
hscoreNm4 = "Delta";
}
hscoreNm5 = PlayerPrefs.GetString("hname5");
if (hscoreNm5 == "")
{
hscoreNm5 = "Epsilon";
}
//Create the lists
NameList = hscoreNm1 + "\r\n" + hscoreNm2 + "\r\n" + hscoreNm3 + "\r\n" + hscoreNm4 + "\r\n" + hscoreNm5;
ScoreList = hscorePt1.ToString() + "\r\n" + hscorePt2.ToString() + "\r\n" + hscorePt3.ToString() + "\r\n" + hscorePt4.ToString() + "\r\n" + hscorePt5.ToString();
//assign the texts to the fields
NameTextField.text = NameList;
ScoreTextField.text = ScoreList;
Back in Unity, we need to assign the two text fields to the script.
3.8.2 Store a new highscore
When the player finishes a game, then we need to check if his score is bigger than the lowest highscore and if it is, we write a method to update the highscore table.
In the GameoverScript, we need some more variables:
public Text HighscoreText;
public InputField NameField;
public Button OkButton;
public Button BackButton;
//var for gameover state
private int GameoverState;
//var for player's score
private int PlayerScore;
//var of existing highscore points
private int hscorePt5;
We check if the player’s score is higher than the lowest highscore. If this is the case, we add some more gameobjects to the screen.
Add this to the Start function:
//get the player's score from memory
PlayerScore = PlayerPrefs.GetInt("score");
//Fetch the existing lowest score
hscorePt5 = PlayerPrefs.GetInt("hscore5");
if (hscorePt5 == 0)
{
hscorePt5 = 10;
}
if (PlayerScore > hscorePt5)
{
//if the player's score is higher than the lowest highscore, we add some stuff
HighscoreText.gameObject.SetActive(true);
NameField.gameObject.SetActive(true);
OkButton.gameObject.SetActive(true);
BackButton.gameObject.SetActive(false);
}
In Unity, don’t forget to link the GameObjects.
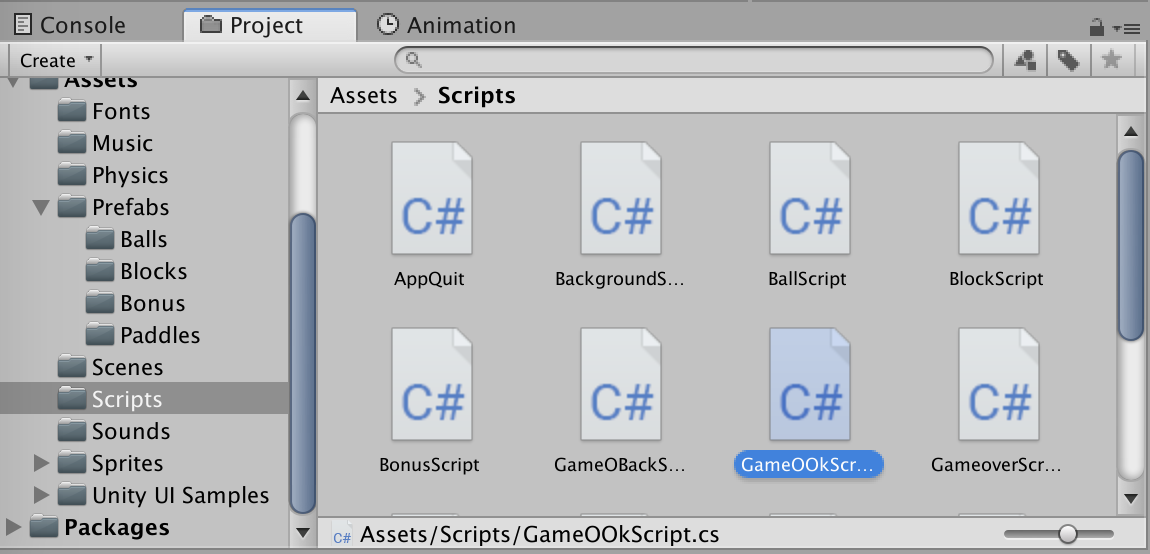
Create a new GameOOkScript and add it the OKButton.
In the header, add:
using UnityEngine.UI;
Add the variables:
//Link the Input field
public InputField NameField;
//store the existing highscore points
private int hscorePt1;
private int hscorePt2;
private int hscorePt3;
private int hscorePt4;
private int hscorePt5;
//store the existing highscore names
private string hscoreNm1;
private string hscoreNm2;
private string hscoreNm3;
private string hscoreNm4;
private string hscoreNm5;
//new scores and names
private int newhscorePt5;
private int newhscorePt4;
private int newhscorePt3;
private int newhscorePt2;
private int newhscorePt1;
private string newhscoreNm5;
private string newhscoreNm4;
private string newhscoreNm3;
private string newhscoreNm2;
private string newhscoreNm1;
//var the player's score and name
private int PlayerScore;
private string myPlayerName;
Create a new function:
public void OnClick()
{
//get the player's score from memory
PlayerScore = PlayerPrefs.GetInt("score");
//get the player's name from the input field
myPlayerName = NameField.text;
if (myPlayerName == "")
{
myPlayerName = "no name";
}
//Fetch the scores
hscorePt1 = PlayerPrefs.GetInt("hscore1");
if (hscorePt1 == 0)
{
hscorePt1 = 50;
}
hscorePt2 = PlayerPrefs.GetInt("hscore2");
if (hscorePt2 == 0)
{
hscorePt2 = 40;
}
hscorePt3 = PlayerPrefs.GetInt("hscore3");
if (hscorePt3 == 0)
{
hscorePt3 = 30;
}
hscorePt4 = PlayerPrefs.GetInt("hscore4");
if (hscorePt4 == 0)
{
hscorePt4 = 20;
}
hscorePt5 = PlayerPrefs.GetInt("hscore5");
if (hscorePt5 == 0)
{
hscorePt5 = 10;
}
//Fetch the names
hscoreNm1 = PlayerPrefs.GetString("hname1");
if (hscoreNm1 == "")
{
hscoreNm1 = "Alpha";
}
hscoreNm2 = PlayerPrefs.GetString("hname2");
if (hscoreNm2 == "")
{
hscoreNm2 = "Beta";
}
hscoreNm3 = PlayerPrefs.GetString("hname3");
if (hscoreNm3 == "")
{
hscoreNm3 = "Gamma";
}
hscoreNm4 = PlayerPrefs.GetString("hname4");
if (hscoreNm4 == "")
{
hscoreNm4 = "Delta";
}
hscoreNm5 = PlayerPrefs.GetString("hname5");
if (hscoreNm5 == "")
{
hscoreNm5 = "Epsilon";
}
//player's score is higher than the highest score
if (PlayerScore > hscorePt1)
{
newhscorePt5 = hscorePt4;
newhscorePt4 = hscorePt3;
newhscorePt3 = hscorePt2;
newhscorePt2 = hscorePt1;
newhscorePt1 = PlayerScore;
newhscoreNm5 = hscoreNm4;
newhscoreNm4 = hscoreNm3;
newhscoreNm3 = hscoreNm2;
newhscoreNm2 = hscoreNm1;
newhscoreNm1 = myPlayerName;
} else if (PlayerScore > hscorePt2)
{
newhscorePt5 = hscorePt4;
newhscorePt4 = hscorePt3;
newhscorePt3 = hscorePt2;
newhscorePt2 = PlayerScore;
newhscoreNm5 = hscoreNm4;
newhscoreNm4 = hscoreNm3;
newhscoreNm3 = hscoreNm2;
newhscoreNm2 = myPlayerName;
} else if (PlayerScore > hscorePt3)
{
newhscorePt5 = hscorePt4;
newhscorePt4 = hscorePt3;
newhscorePt3 = PlayerScore;
newhscoreNm5 = hscoreNm4;
newhscoreNm4 = hscoreNm3;
newhscoreNm3 = myPlayerName;
} else if (PlayerScore > hscorePt4)
{
newhscorePt5 = hscorePt4;
newhscorePt4 = PlayerScore;
newhscoreNm5 = hscoreNm4;
newhscoreNm4 = myPlayerName;
} else if (PlayerScore > hscorePt5)
{
newhscorePt5 = PlayerScore;
newhscoreNm5 = myPlayerName;
//write the scores back to memory
PlayerPrefs.SetInt("hscore1", newhscorePt1);
PlayerPrefs.SetInt("hscore2", newhscorePt2);
PlayerPrefs.SetInt("hscore3", newhscorePt3);
PlayerPrefs.SetInt("hscore4", newhscorePt4);
PlayerPrefs.SetInt("hscore5", newhscorePt5);
PlayerPrefs.SetString("hname1", newhscoreNm1);
PlayerPrefs.SetString("hname2", newhscoreNm2);
PlayerPrefs.SetString("hname3", newhscoreNm3);
PlayerPrefs.SetString("hname4", newhscoreNm4);
PlayerPrefs.SetString("hname5", newhscoreNm5);
}
Back in Unity, link the input field with the script and define all events that happen when the button is clicked.

Hit Play to test.
3.9 Improving the bonus system
3.9.1 Bonus1 gives one life
We want to create a bonus that gives the player one more life. The live system is stored in the WallScript, but we are working in the BonusScript. The solution is to work with public variables.
In the WallScript, change
//number of lives.
private int playerLives;
into
//number of lives. Must be public so that BonusScript has access to it!
public int playerLives;
In the BonusScript, look for the Bonus1 if statement. Add the following:
//Bonus1 adds one life to the playerLives counter in the WallScript.
//The playerLives variable must be set to public in the WallScript.
GameObject.FindGameObjectsWithTag("Wall")[0].GetComponent<WallScript>().playerLives++;
3.9.2 Bonus2 gives the large paddle
We want to create a bonus that gives a wider paddle.
We have to consider three options:
- we have the medium (normal) paddle → we want the large paddle.
- we have the small paddle → we want the medium paddle.
- the paddle is initialized to medium when the ball is lost.
First of all, we need to modify the BallScript so that any paddle is accepted.
Replace the variable:
// Link the paddle
public GameObject playerObject;
by:
// Link the paddle
//we search for the paddle by script
private GameObject playerObject;
At the beginning of the Update function, add this:
//we look for the paddle through script as the paddle might change through bonuses
playerObject = GameObject.FindGameObjectsWithTag("Player")[0];
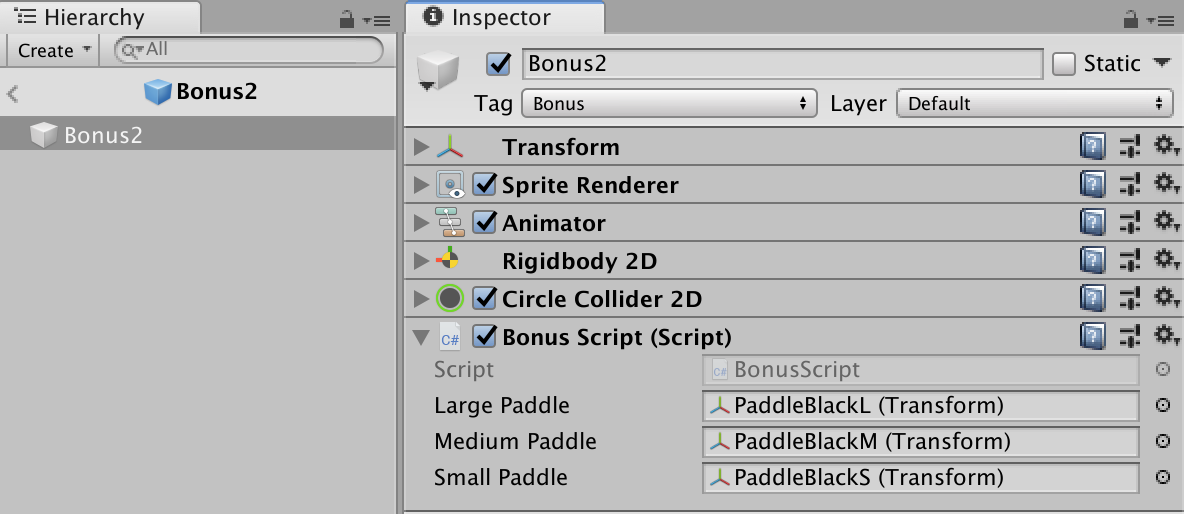
Then, we need to handle the paddle modifications. In the BonusScript, add these variables:
//define the paddles to use
public Transform LargePaddle;
public Transform MediumPaddle;
public Transform SmallPaddle;
private string PaddleName;
private string PaddleNameShort;
Look for the Bonus2 if statement. Add the following:
//Bonus2 gives a wider paddle
//Find the paddle name (used to instantiate and destroy)
PaddleName = GameObject.FindGameObjectsWithTag("Player")[0].name;
//Find the paddle short name (used to compare the names)
//as the paddle can be instantiated by a bonus, the name might be followed by "(clone)"
PaddleNameShort = PaddleName.Substring(0, 12);
//Get the MediumPaddle if we have the SmallPaddle
if (PaddleNameShort == "PaddleBlackS")
{
//Create the new paddle
Instantiate(MediumPaddle, GameObject.Find(PaddleName).transform.position, MediumPaddle.rotation);
//Remove the old paddle
Destroy(GameObject.Find(PaddleName));
}
//Get the LargePaddle if we have the MediumPaddle
if (PaddleNameShort == "PaddleBlackM")
{
//Create the new paddle
Instantiate(LargePaddle, GameObject.Find(PaddleName).transform.position, LargePaddle.rotation);
//Remove the old paddle
Destroy(GameObject.Find(PaddleName));
}
Back in Unity, open the Bonus2 prefab and link the three paddles prefabs (drag and drop the paddles prefabs).
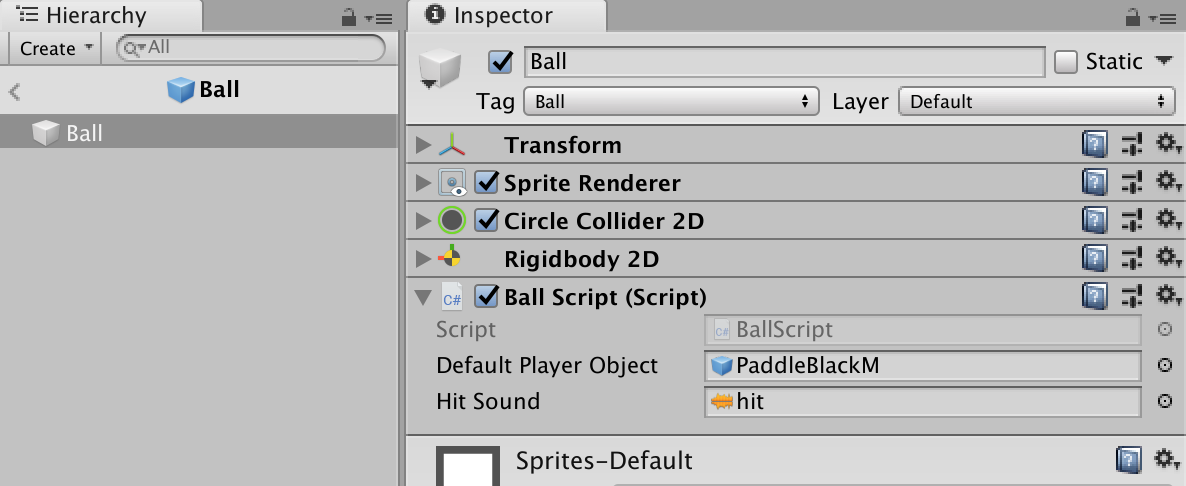
Finally, we need to implement the default paddle in the BallScript. This will allow to return to the medium paddle, if the ball is lost.
Add this variable:
//Link the default paddle
//this is used if the ball is lost
public GameObject defaultPlayerObject;
Look for the IF statement where the ball gets off-screen and add the following:
//the default paddle should be taken when resetting the ball
if (playerObject.name.Substring(0, 12) != "PaddleBlackM")
{
//Create the default paddle
Instantiate(defaultPlayerObject, playerObject.transform.position, defaultPlayerObject.transform.rotation);
//Remove the old paddle
Destroy(playerObject);
}
In Unity, open the Ball prefab and link the default paddle prefab.
Hit Play to test.
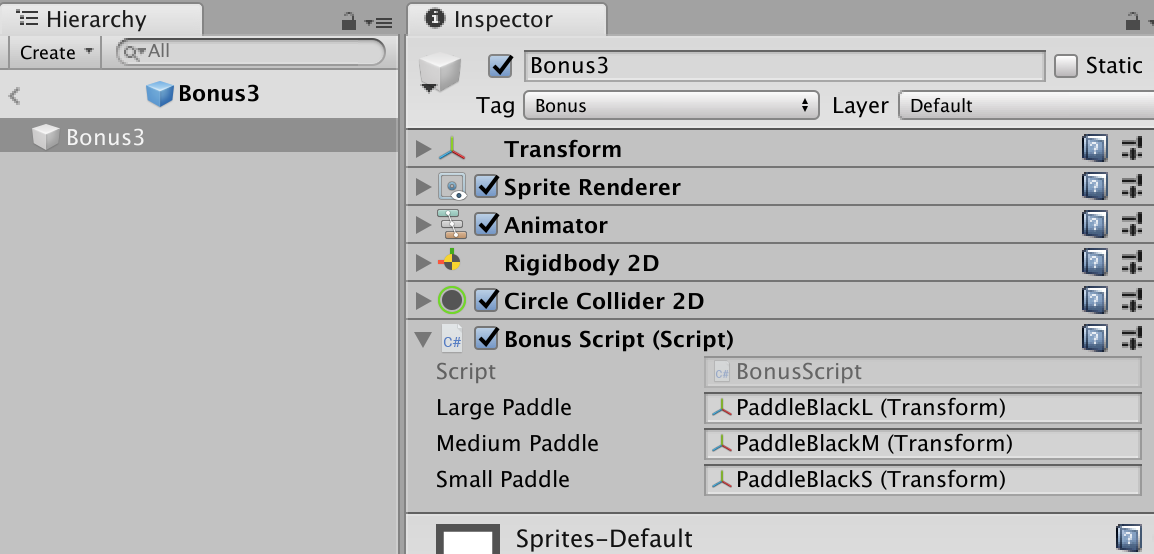
3.9.3 Bonus3 gives the small paddle
We want to create a bonus that gives a smaller paddle. This works similar to the previous one.
We have to consider three options:
- we have the medium (normal) paddle → we want the small paddle.
- we have the large paddle → we want the medium paddle.
- the paddle is initialized to medium when the ball is lost.
Several things were already implemented in Bonus2. Here we document only the add-ons.
In the BonusScript, look for the Bonus3 IF statement. Add the following:
//Bonus3 gives a smaller paddle
//Find the paddle name (used to instantiate and destroy)
PaddleName = GameObject.FindGameObjectsWithTag("Player")[0].name;
//Find the paddle short name (used to compare the names)
//as the paddle can be instantiated by a bonus, the name might be followed by "(clone)"
PaddleNameShort = PaddleName.Substring(0, 12);
//Get the SmallPaddle if we have the MediumPaddle
if (PaddleNameShort == "PaddleBlackM")
{
//Create the new paddle
Instantiate(SmallPaddle, GameObject.Find(PaddleName).transform.position, SmallPaddle.rotation);
//Remove the old paddle
Destroy(GameObject.Find(PaddleName));
}
//Get the MediumPaddle if we have the LargePaddle
if (PaddleNameShort == "PaddleBlackL")
{
//Create the new paddle
Instantiate(MediumPaddle, GameObject.Find(PaddleName).transform.position, MediumPaddle.rotation);
//Remove the old paddle
Destroy(GameObject.Find(PaddleName));
}
Back in Unity, open the Bonus3 prefab and link the three paddles prefabs (drag and drop the paddles prefabs).
Hit Play to test.
3.9.4 Bonus4 takes one life
We want to create a bonus to remove one life from the player. We use here a similar method as the one used for Bonus1.
In the BonusScript, look for the Bonus4 IF statement. Add the following:
//Bonus4 removes one life from the playerLives counter in the WallScript.
//The playerLives variable must be set to public in the WallScript.
GameObject.FindGameObjectsWithTag("Wall")[0].GetComponent<WallScript>().playerLives--;
3.9.5 Bonus5 gives extra points
We want to add extra points to the player’s score.
This was implemented while creating the bonus system. We need to change the value.
In the BonusScript, look for the Bonus5 IF statement. Add the following:
//Bonus5 adds 50 points to the playerscore
BonusPoints = 50;
3.9.6 Bonus6 removes points
We want to remove points from the player’s score.
This was implemented while creating the bonus system. We need to change the value.
In the BonusScript, look for the Bonus6 IF statement. Add the following:
//Bonus6 removes 50 points from the playerscore
BonusPoints = -50;
3.9.7 Bonus7 shakes the screen
With this bonus, we shake the camera. ;-)
For this implementation we need a script found here: http://wiki.unity3d.com/index.php/Camera_Shake
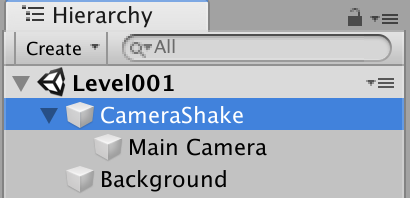
In Unity, create an empty GameObject, rename it CameraShake and place the MainCamera as its child.
Create a new script CameraShake and add it to the CameraShake object.
Paste the script from the web in your script.
In the BonusScript, look for the Bonus7 IF statement. Add the following:
//Bonus7 shakes the camera
GameObject.Find("CameraShake").GetComponent<CameraShake>().ShakeCamera(7f, 10f);
Happy testing!
3.10 Improve the collisions
You may have noticed that a bonus remains above an unbroken block or that a bonus collides with the ball. We want to avoid this.
In the Inspector of any GameObject, click on Add Layer.
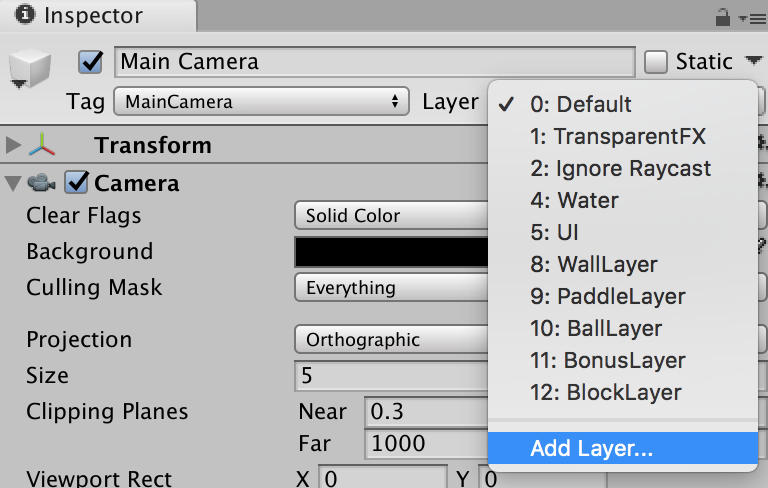
Create a new layer for any object that can collide.

Associate everything:
- the WallLayer to the Wall.
- the PaddleLayer to the paddle prefabs.
- the BallLayer to the ball prefabs.
- the BonusLayer to the bonus prefabs.
- the BlockLayer to the block prefabs.
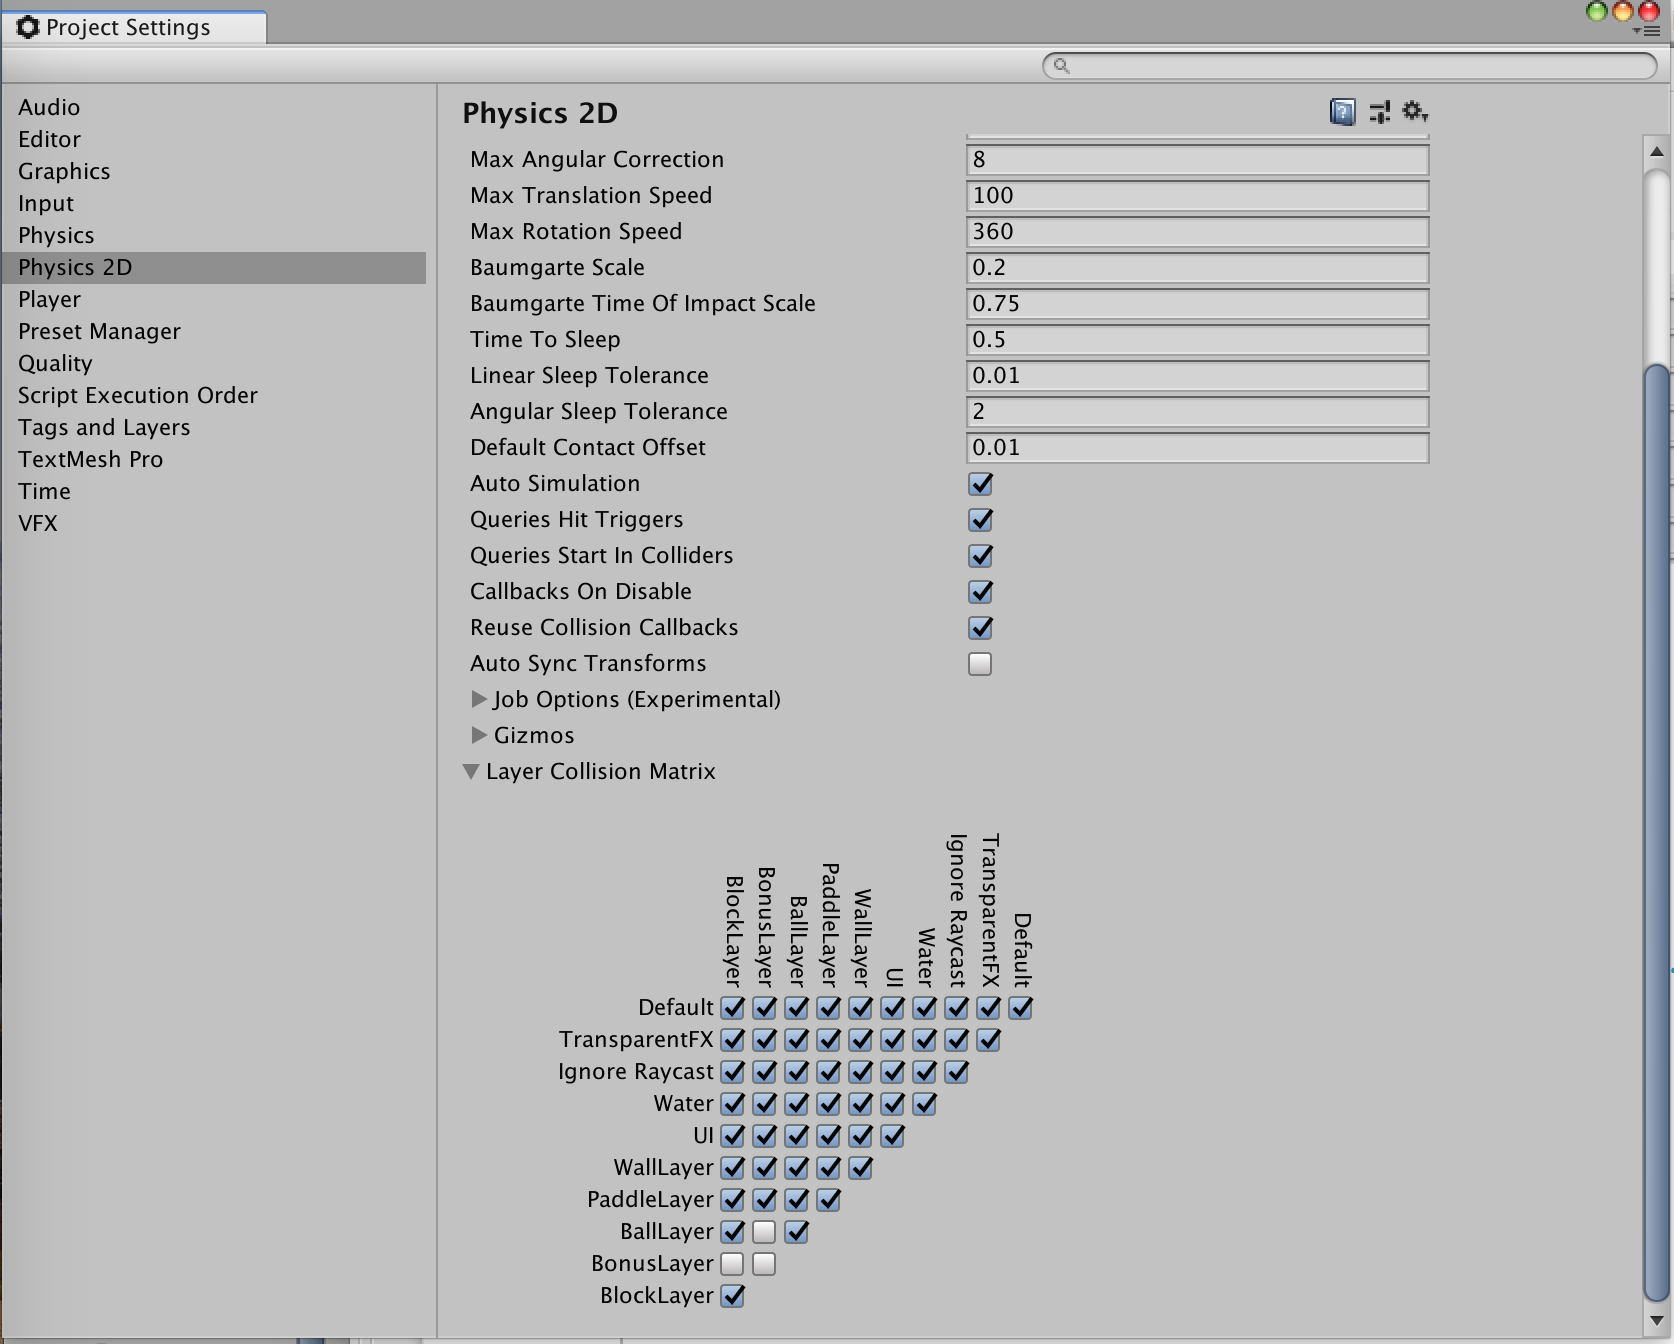
Open the Project Settings by selecting the menu Edit > Project Settings.
Under Physics 2D you find the Layer Collision Matrix. Uncheck the layers that shouldn’t collide.
3.11 Accelerate the ball
You may have noticed that the ball may bounce from one wall to the other without touching anything. This is something we want to avoid, because it blocks the game.
To achieve this, we count the collisions and change the ball vector.
In the BallScript, add this variable:
//Collision counter
private int CollisionCounter;
In the OnCollisionEnter2D method, only when the ball is active, we add this code:
//count the collisions with walls, blocs and paddles
if (collision.gameObject.name == "Wall")
{
CollisionCounter++;
} else if (collision.gameObject.name.Substring(0,4) == "Bloc")
{
if (CollisionCounter > 0)
{
CollisionCounter--;
}
} else if (collision.gameObject.name.Substring(0,6) == "Paddle")
{
if (CollisionCounter > 0)
{
CollisionCounter--;
}
}
//If the ball goes from one wall to the other more than 8 times,
//we add a new vector to the ball.
if (CollisionCounter > 8)
{
GetComponent<Rigidbody2D>().AddForce(new Vector2(30.0f, 30.0f));
}
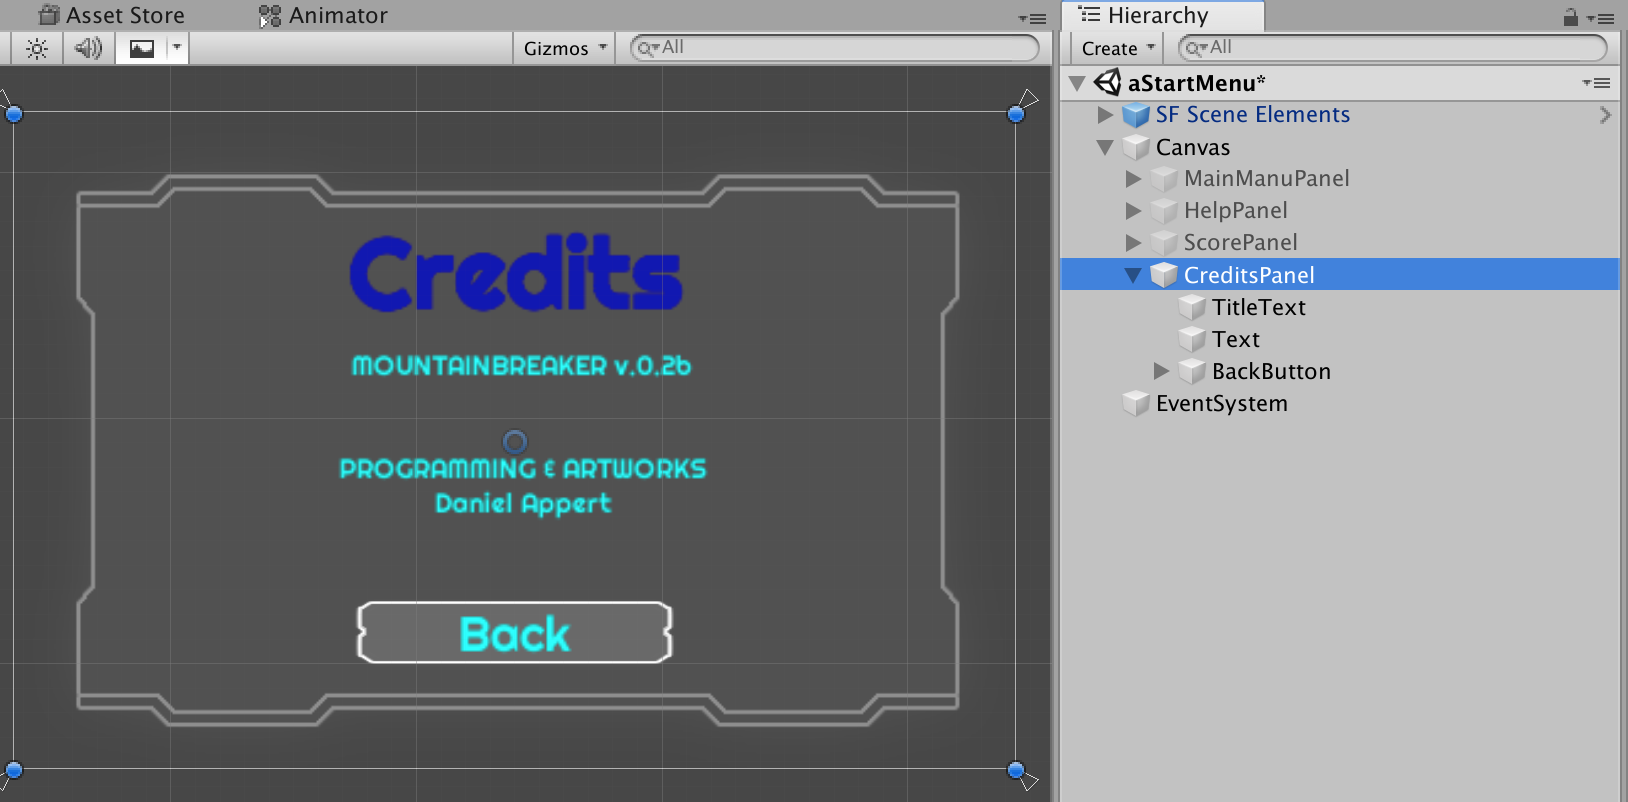
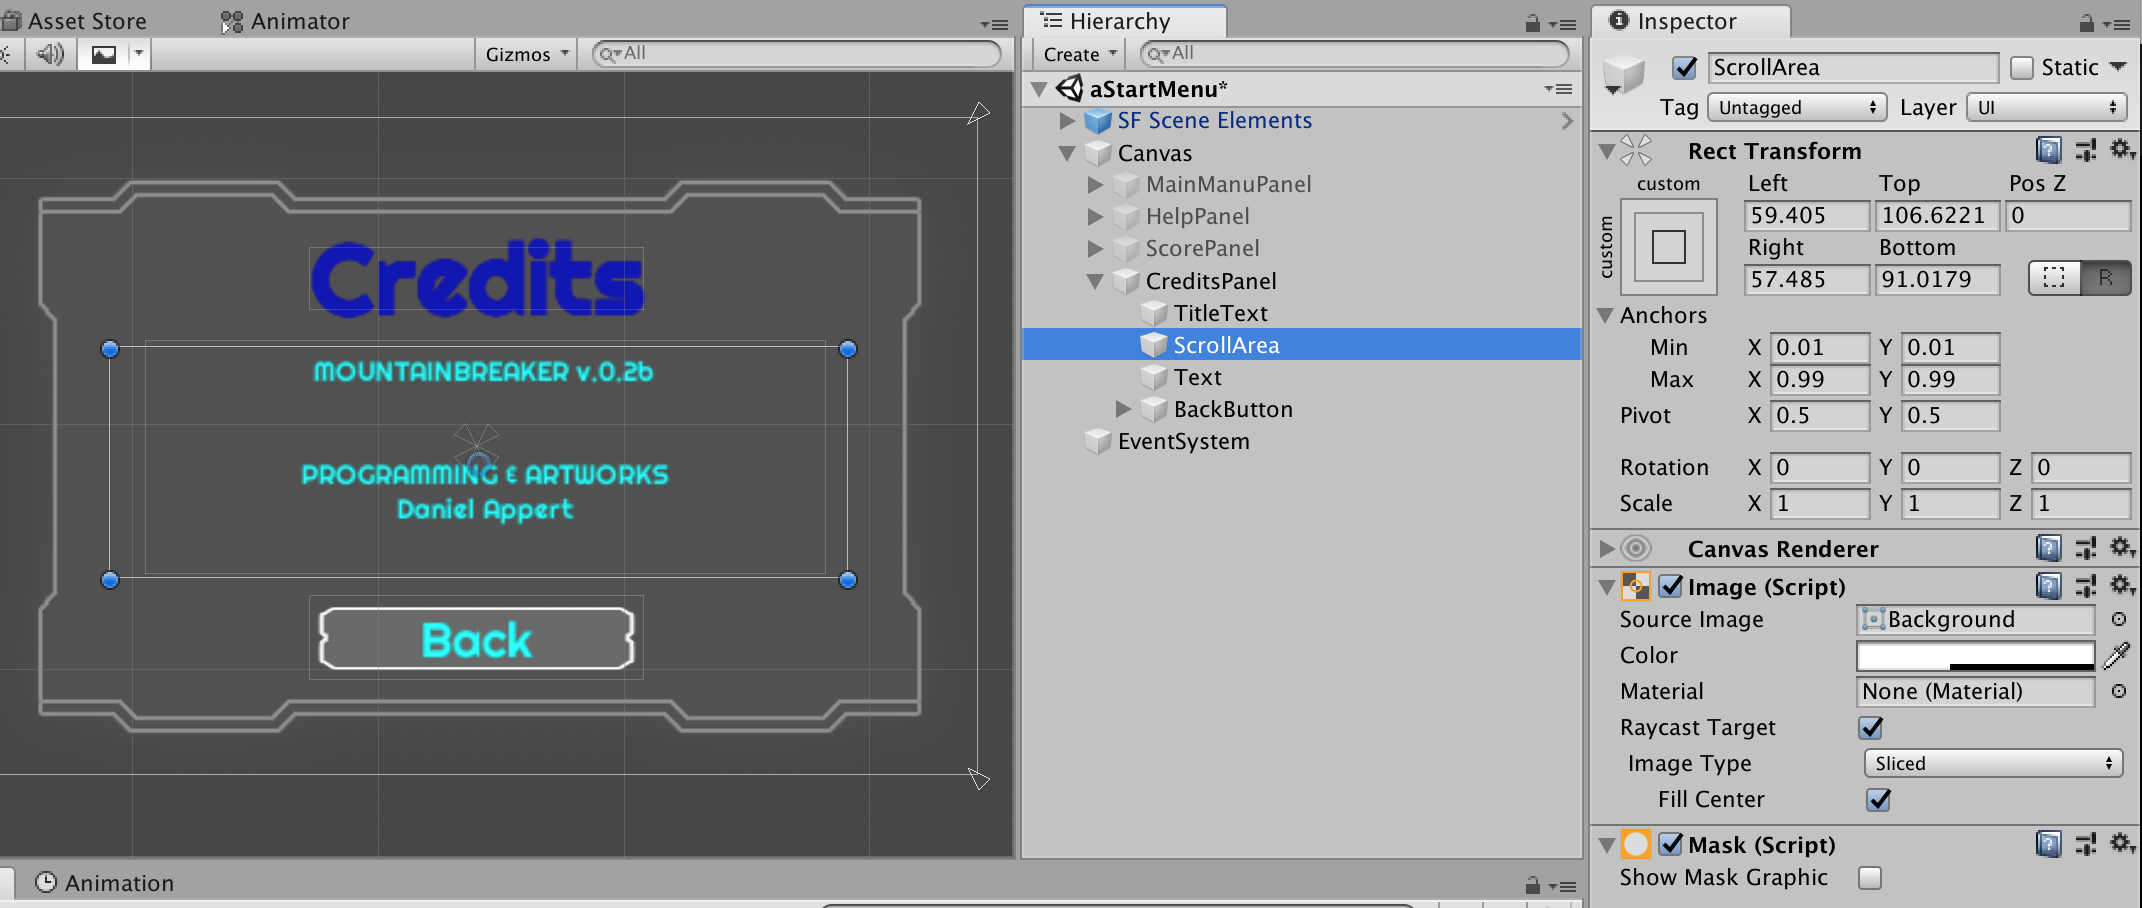
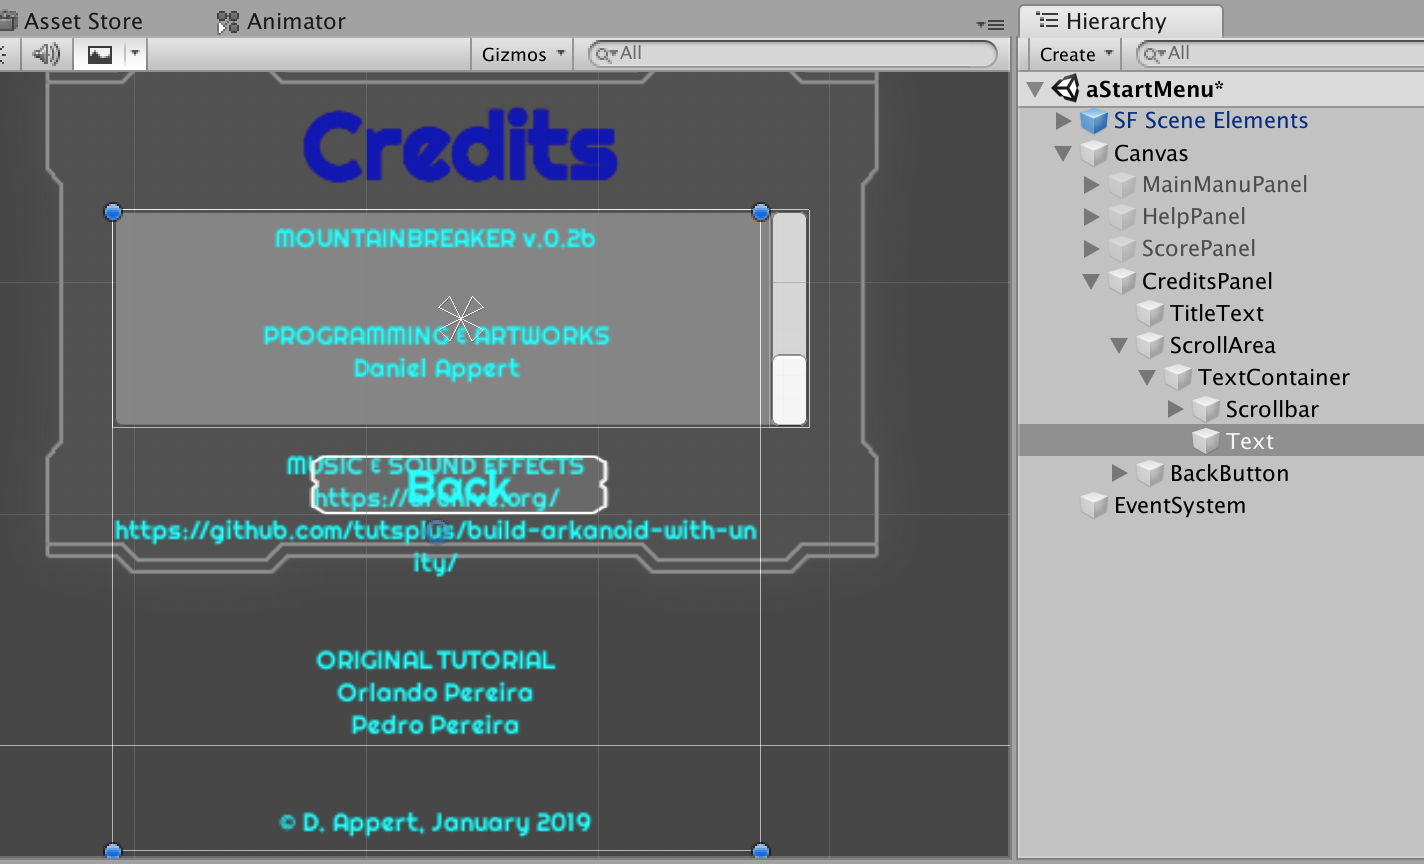
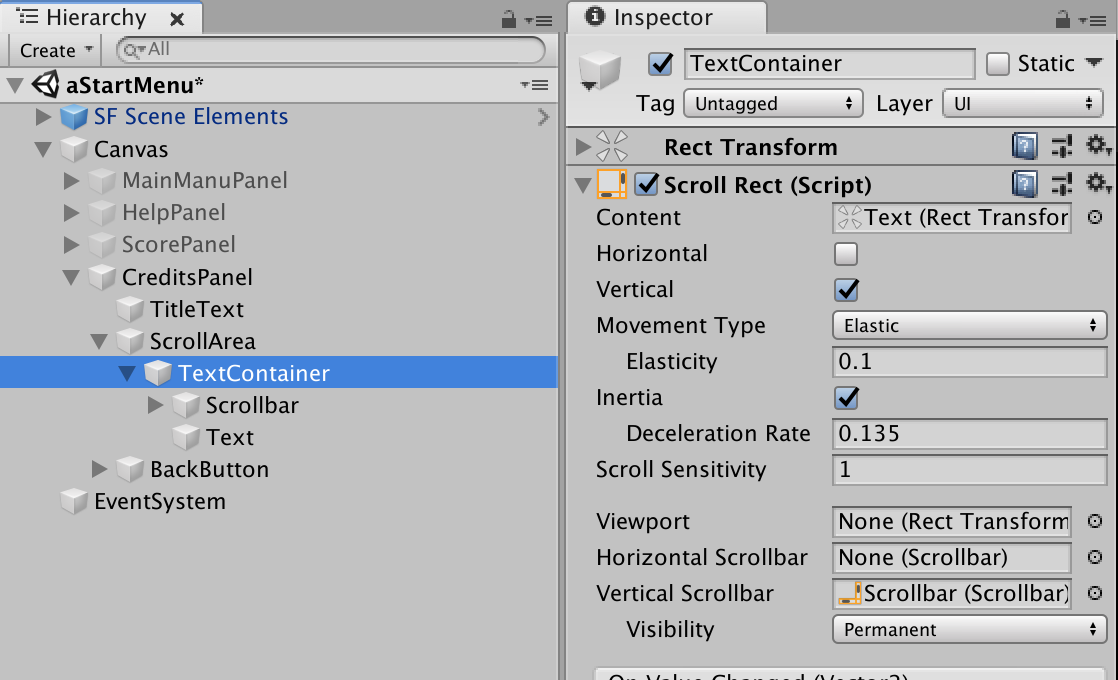
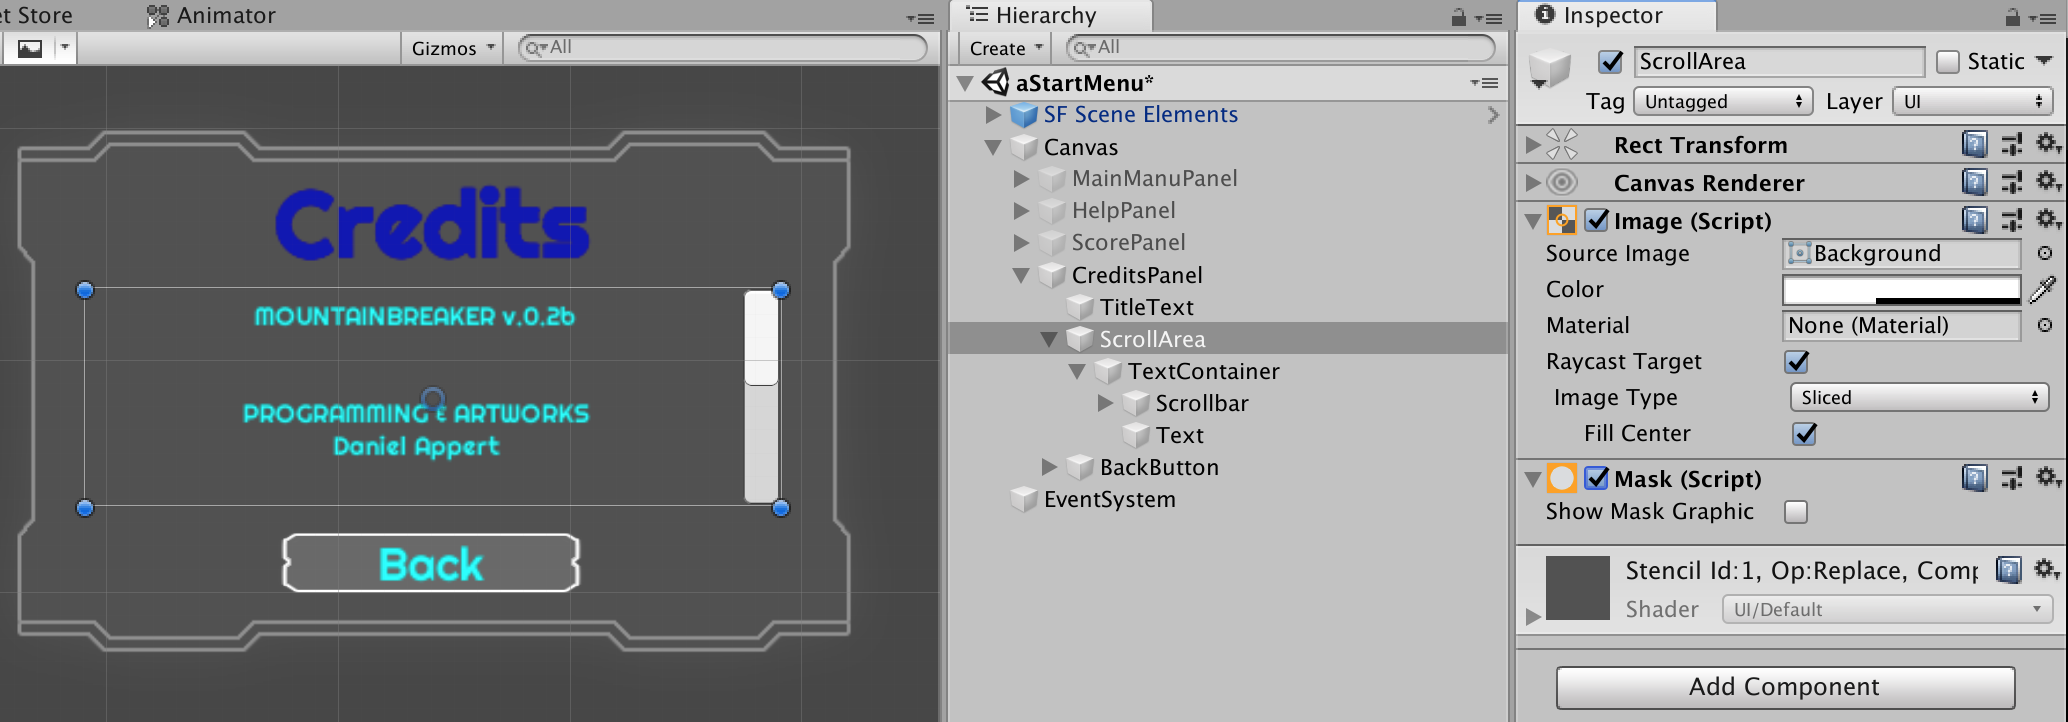
3.12 Make a better Credits panel
It may happen that the credits’ text is too large for the allowed space. In this case, we need to add a scrollbar.
Open the StartMenu scene and go to the CreditsPanel.
As a child of CreditsPanel, create a new UI/Panel and name it ScrollArea. Add a Mask component and uncheck it.
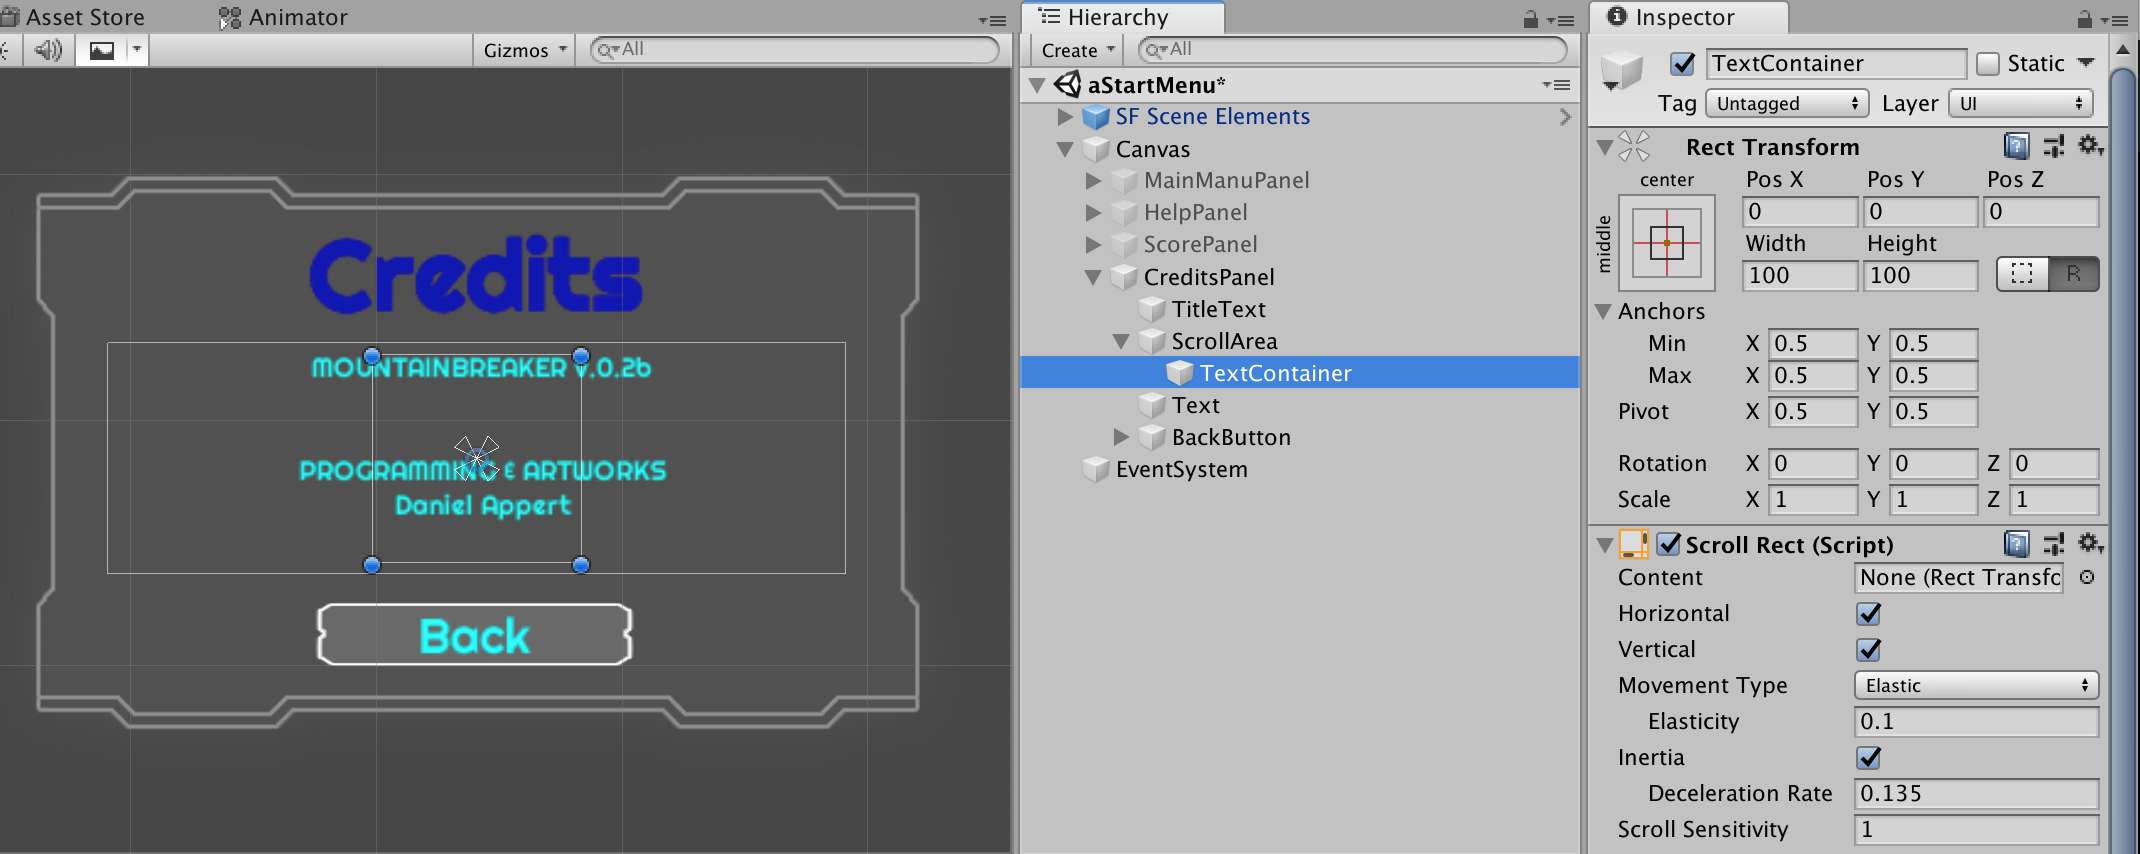
As a child of ScrollArea, create an empty GameObject and rename it TextContainer. Add a Scroll Rect component.
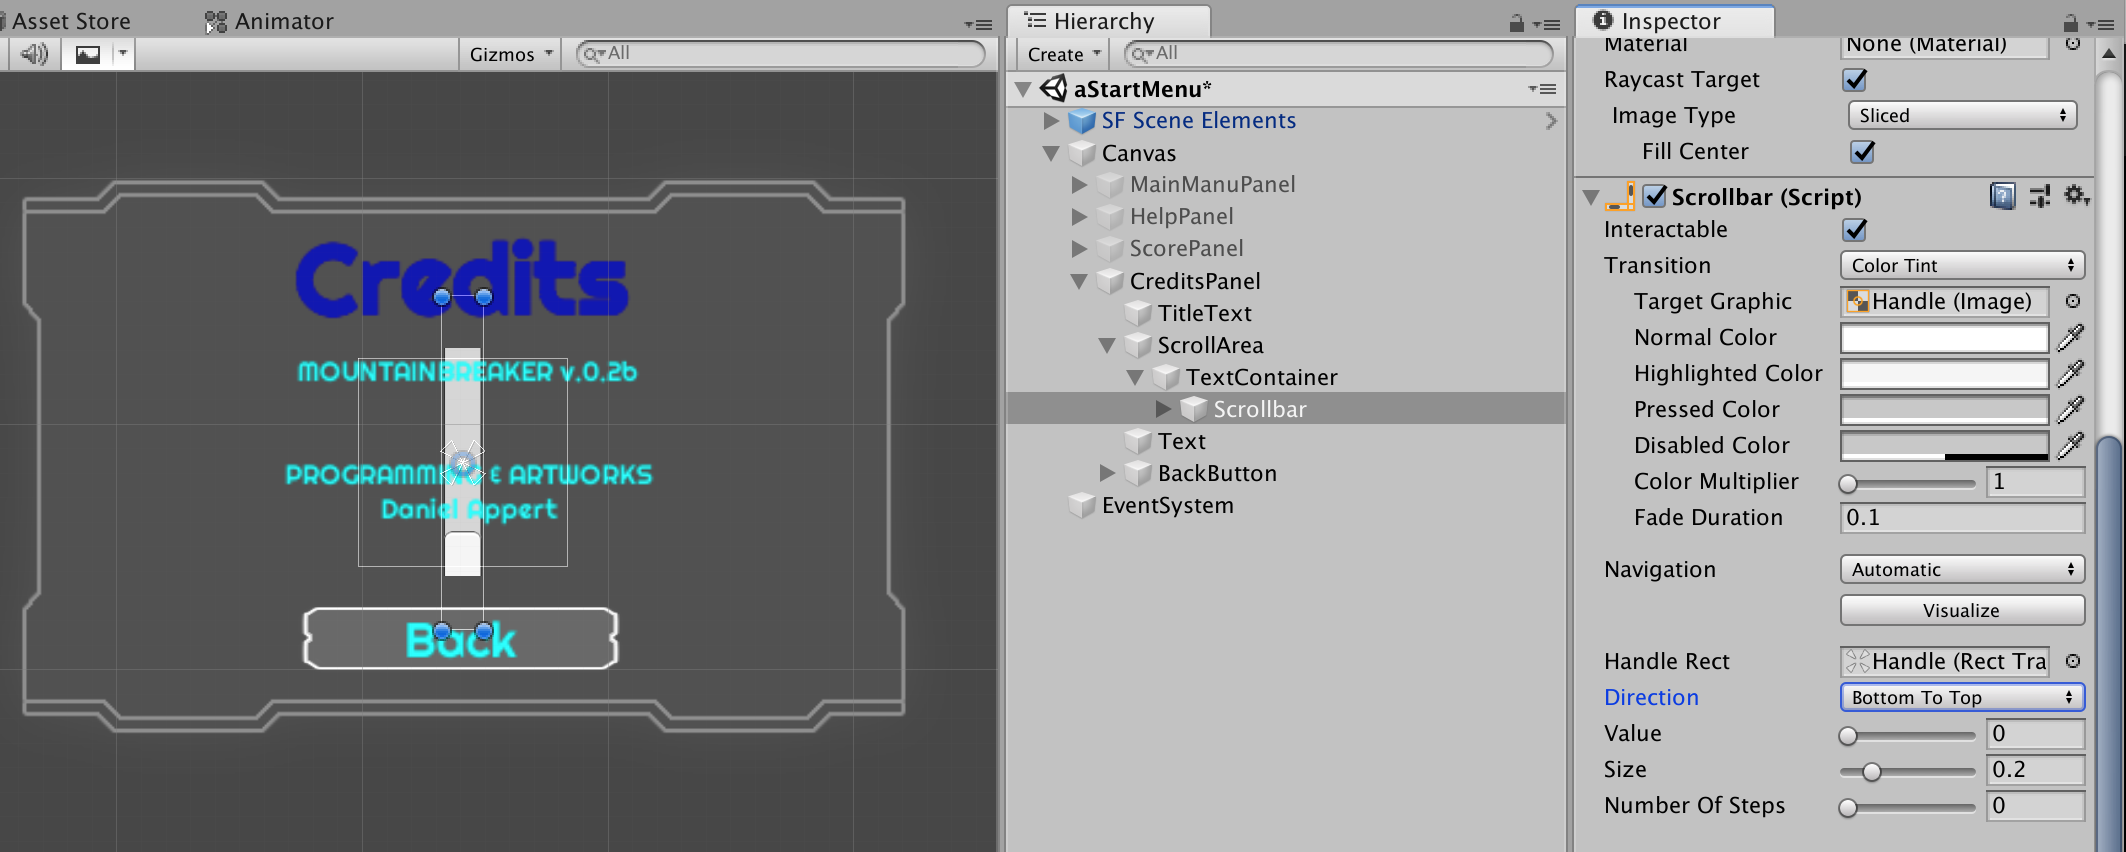
In the TextContainer, create a new UI/Scrollbar and set its Direction to Bottom to Top.
Rearrange the objects:
- Set the TextContainer to the dimensions of the ScrollArea.
- Place the Scrollbar to the right. Set its dimensions.
- Add your preexisting Text to the TextContainer.
- Set the Text dimensions to see all the text.
Under TextContainer/Inspector/Scroll Rect (Script), drag and drop:
- the Text under Content
- the Scrollbar under Vertical Scrollbar
and uncheck Horizontal.
On the ScrollArea, enable the Mask (Script).


