From a point cloud to Unity terrains using GDAL
Table of Contents
2. Needed tools, data and knowledge
3.2 Missing points or irregular grid (CSV2TIFF)
3.5 Need an XYZ file? (TIFF2XYZ)
3.6 Smooth the grid (CSV2TIFF)
3.7 Change the height (CSV2TIFF)
3.8 Create the RAW image (TIFF2RAW)
1. Objective
Create a 3D terrain from the real world.
The main problem here is that Unity 3D only accepts heightmaps as import method for terrain data. And your data is possibly not at heightmap.
The second thing is that the terrain image should be a square. This means the image must be cropped.
2. Needed tools, data and knowledge
2.1 Tools
2.1.1 Python
Python is used by GDAL, so it must be installed first.
Get it here: https://www.python.org/downloads/mac-osx/
2.1.2 GDAL
What is GDAL? Here’s what can be found on Wikipedia: https://en.wikipedia.org/wiki/GDAL
We will use GDAL to transform the dataset, the ASCII and the GeoTIFF data, directly from the command line.
But first, it needs to be installed. Download it from here:
https://trac.osgeo.org/gdal/wiki/DownloadingGdalBinaries
http://www.kyngchaos.com/software/frameworks/
Follow the instructions from these pages.
2.3 Data
Before we begin, we need some points cloud data.
In Switzerland, you can get a free simplified model of the country here: https://shop.swisstopo.admin.ch/en/products/height_models/dhm25200
2.4 Learn some new stuff
To be able to understand what the commands in the command line do, some pages should be helpful. You don’t need to read everything, but having an idea of their contents is useful.
2.4.1 GDAL Virtual Format
This is useful when converting CSV to GeoTIFF.
https://www.gdal.org/gdal_vrttut.html
2.4.2 GDAL Grid
This allows to create a regular grid from the scattered data; useful if you don’t have an XYZ file but some irregular points.
It may also be used when converting CSV to GeoTIFF.
https://www.gdal.org/gdal_grid.html
2.4.3 GDAL Translate
This converts raster data.
It’s used to convert XYZ to GeoTIFF and GeoTIFF to RAW.
https://www.gdal.org/gdal_translate.html
2.4.4 GDALwarp
It’s the image re-projection and warping utility.
It allows to crop the GeoTIFF.
https://www.gdal.org/gdalwarp.html
2.4.5 Heightmaps
What are heightmaps? Have a look here: https://en.wikipedia.org/wiki/Heightmap
Some websites provide heightmaps. Have a look here:
3. Prepare the data
Please note that every command line instruction is shown below with “$ “ at the beginning.
As I’m under Mac OS X, I’m working in the Terminal.
3.1 Quick look at the file
Often the data file is too big to be opened in a text editor or it takes ages. An easy way to look at it is to use the head command:
$ head -n 2 DHM200.xyz
will return:
655000.00 302000.00 835.01
655200.00 302000.00 833.11
This is mainly useful to see if there’s a header or not.
Another useful command is the gdalinfo, which returns a resume of its content (min/max on X, Y and height).
Call it with:
$ /Library/Frameworks/GDAL.framework/Versions/2.3/Programs/gdalinfo DHM200.xyz
And the result is:
Driver: XYZ/ASCII Gridded XYZ
Files: DHM200.xyz
Size is 1926, 1141
Coordinate System is `'
Origin = (479900.000000000000000,302100.000000000000000)
Pixel Size = (200.000000000000000,-200.000000000000000)
Corner Coordinates:
Upper Left  (  479900.000,  302100.000)
Lower Left  (  479900.000,   73900.000)
Upper Right (  865100.000,  302100.000)
Lower Right (  865100.000,   73900.000)
Center      (  672500.000,  188000.000)
Band 1 Block=1926x1 Type=Float32, ColorInterp=Undefined
  Min=193.000 Max=4556.630
  NoData Value=0
3.2 Missing points or irregular grid (CSV2TIFF)
If the grid is missing points or it’s irregular, then you need gdal_grid.
But before using gdal_grid, a VRT file must be written.
Mine looks like this:
<OGRVRTDataSource>
<OGRVRTLayer name="DHM200">
<SrcDataSource>DHM200.csv</SrcDataSource>
<GeometryType>wkbPoint</GeometryType>
<LayerSRS>EPSG:21781</LayerSRS>
<GeometryField separator="," encoding="PointFromColumns" x="field_1" y="field_2" z="field_3"/>
</OGRVRTLayer>
</OGRVRTDataSource>
This is an example of the command:
$ /Library/Frameworks/GDAL.framework/Versions/2.3/Programs/gdal_grid -a invdist:power=2.0:smoothing=1.0 -txe 480000 865000 -tye 74000 302000 -outsize 1925 1140 -of GTiff -ot Float64 -l DHM200 DHM200.vrt DHM200.tiff
If your file is really big, it may make sense to use all the power:
$ /Library/Frameworks/GDAL.framework/Versions/2.3/Programs/gdal_grid -zfield field_3 -a invdist:power=2.0:smoothing=1.0 -txe 480000 865000 -tye 74000 302000 -outsize 1925 1140 -of GTiff -ot Float64 -l DHM200 DHM200.vrt DHM200.tiff --config GDAL_NUM_THREADS ALL_CPUS
3.3 Regular grid (XYZ2TIFF)
If the grid is good, you can write directly the GeoTIFF from the XYZ:
$ /Library/Frameworks/GDAL.framework/Versions/2.3/Programs/gdal_translate -a_srs EPSG:21781 DHM200.xyz DHM200.tif
3.4 Crop an image
$ /Library/Frameworks/GDAL.framework/Versions/2.3/Programs/gdalwarp -t_srs EPSG:21781 -te 630000 147000 650000 167000 DHM200.tif DHM200_grindel.tif
3.5 Need an XYZ file? (TIFF2XYZ)
$ /Library/Frameworks/GDAL.framework/Versions/2.3/Programs/gdal_translate -a_srs EPSG:21781 DHM200_grindel.tif DHM200_grindel.xyz
3.6 Smooth the grid (CSV2TIFF)
Creating more points in the grid will “smooth” the 3D model: it will look at bit less blocky.
$ /Library/Frameworks/GDAL.framework/Versions/2.3/Programs/gdal_grid -a invdist:power=2.0:smoothing=1.0 -txe 630000 650000 -tye 147000 167000 -outsize 1025 1025 -of GTiff -ot Float64 -l DHM200_grindel DHM200_grindel.vrt DHM200_grindel_smooth.tif
3.7 Change the height (CSV2TIFF)
Changing the height might be interesting in Unity when working with large or flat areas.
$ /Library/Frameworks/GDAL.framework/Versions/2.3/Programs/gdal_grid -a invdist:power=2.0:smoothing=1.0 -txe 630000 650000 -tye 147000 167000 -outsize 1025 1025 -z_multiply 3 -of GTiff -ot Float64 -l DHM200_grindel DHM200_grindel.vrt DHM200_grindel_smooth3.tif
3.8 Create the RAW image (TIFF2RAW)
$ /Library/Frameworks/GDAL.framework/Versions/2.3/Programs/gdal_translate DHM200_grindel_smooth3.tif DHM200_grindel_smooth3.raw -ot UInt16 -scale -of ENVI -outsize 1025 1025
An alternative here would be to use the GIMP or similar image processing software.
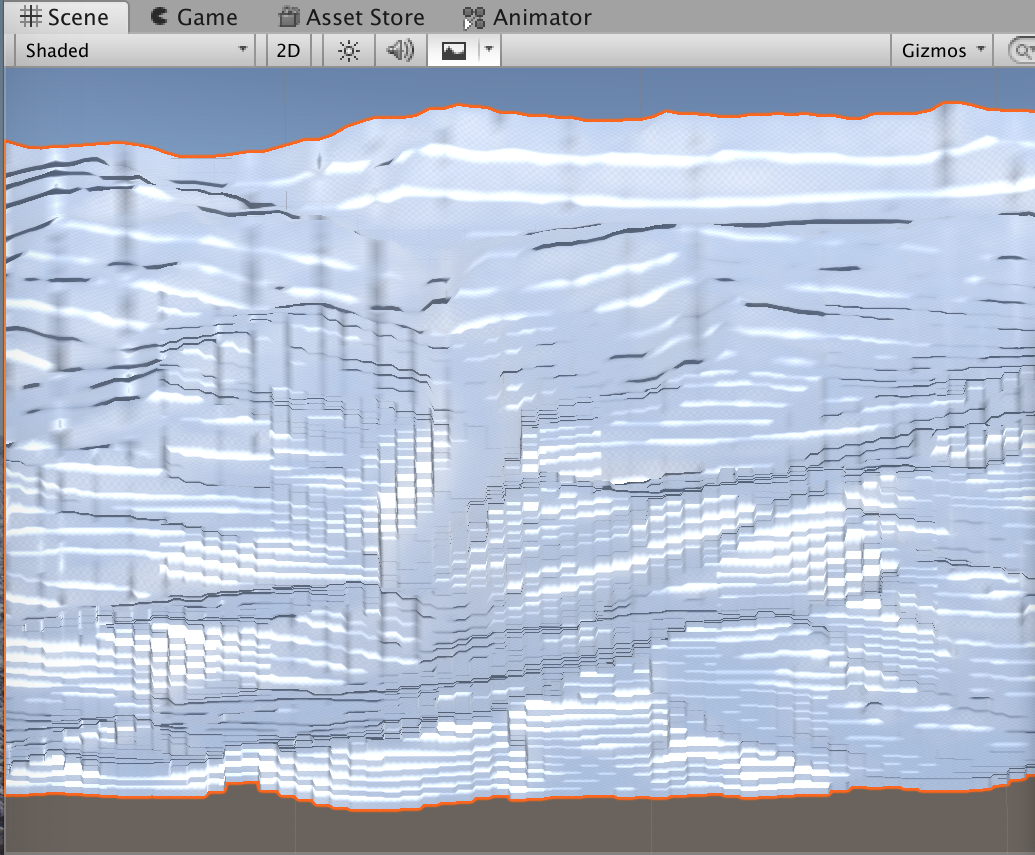
4. Working in Unity3D
4.1 Importing the heightmap
Create a new 3D project.
Add a new terrain GO.
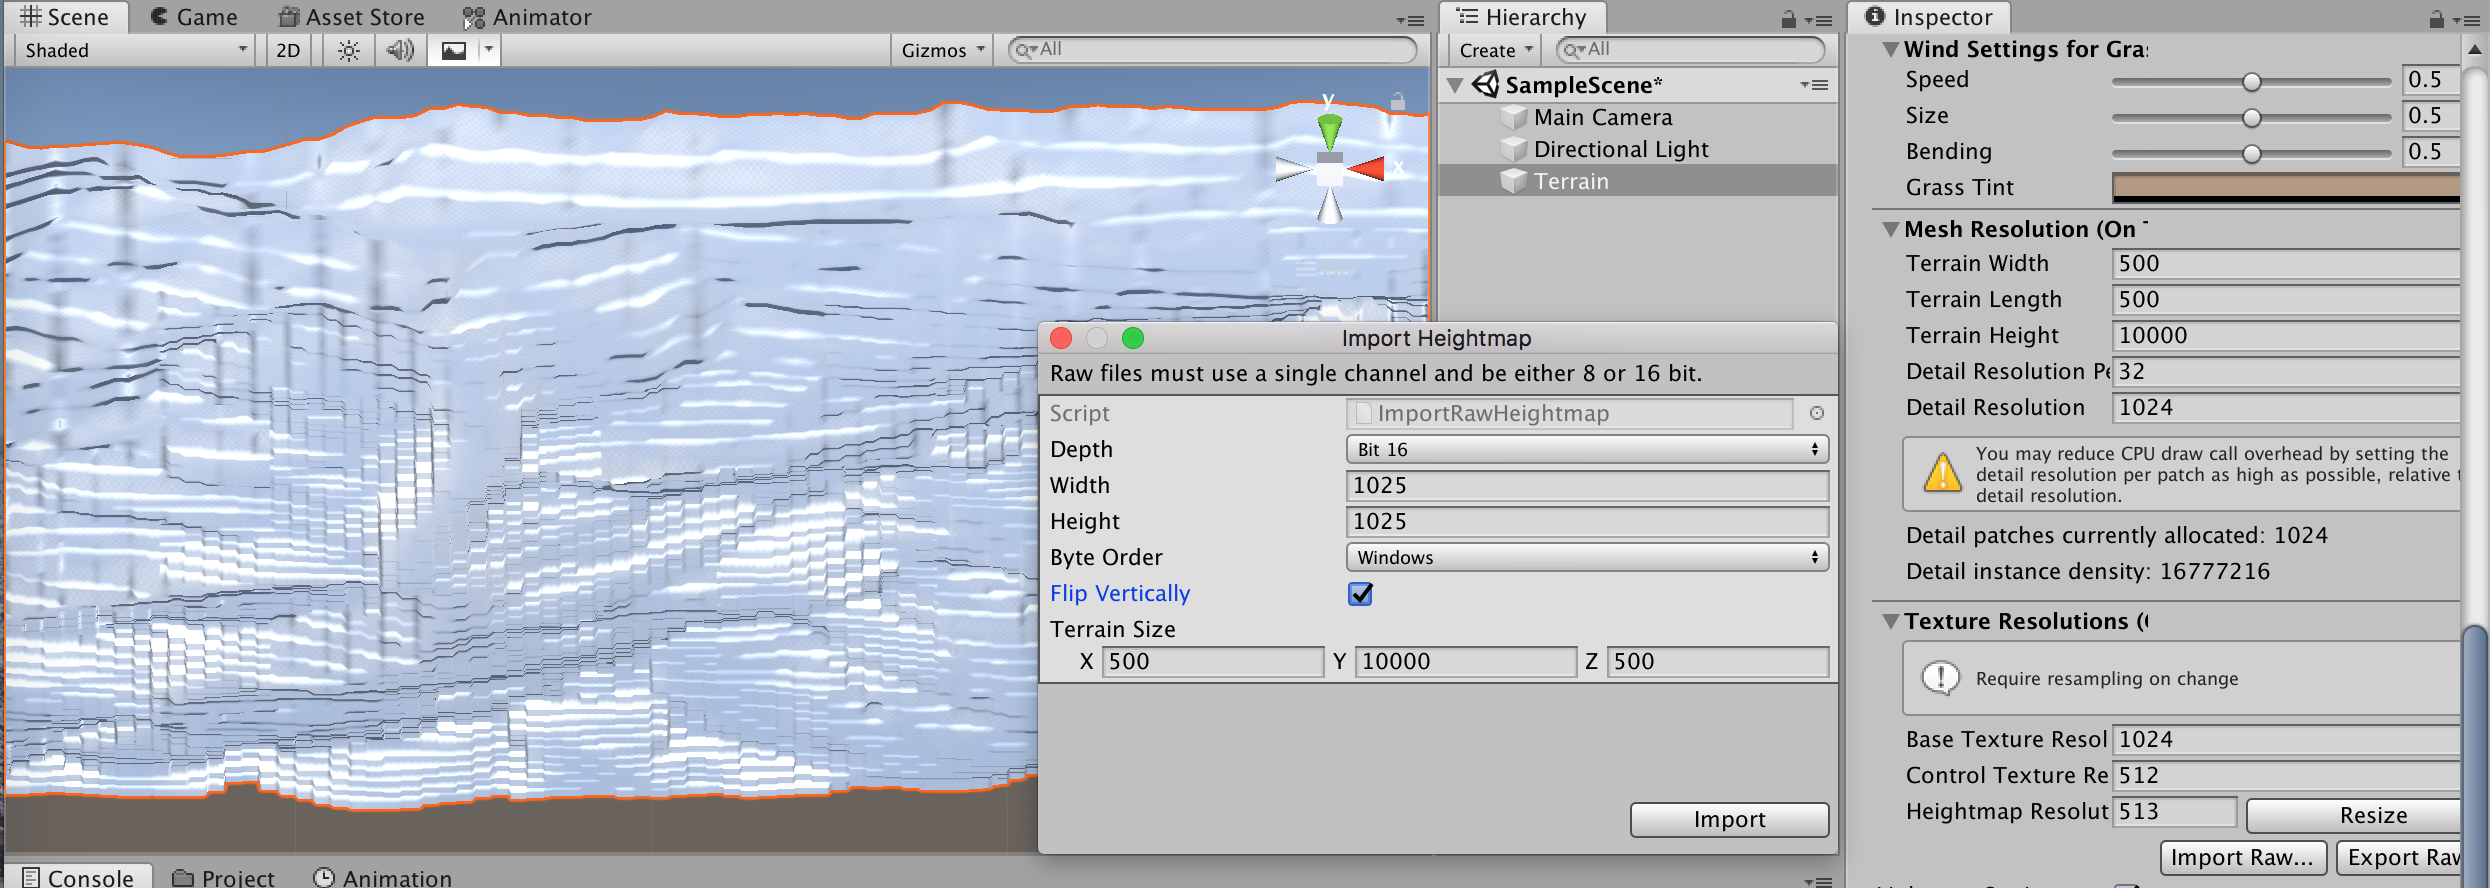
Under Terrain, click on the Settings button:
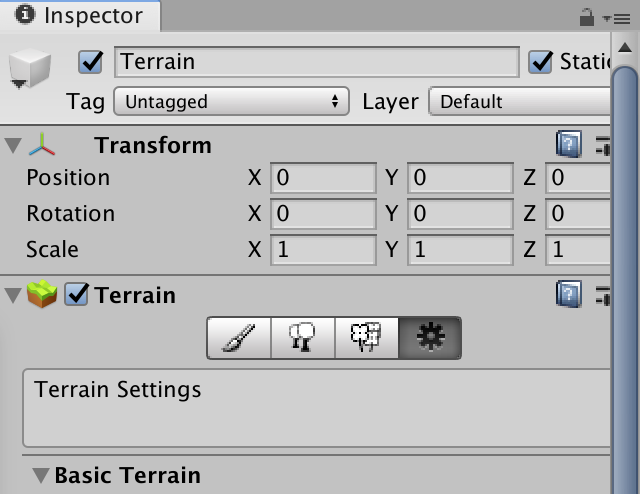
Configure the Mesh Resolution and under Texture Resolutions click the Import RAW button. Configure the import and click the Import button.
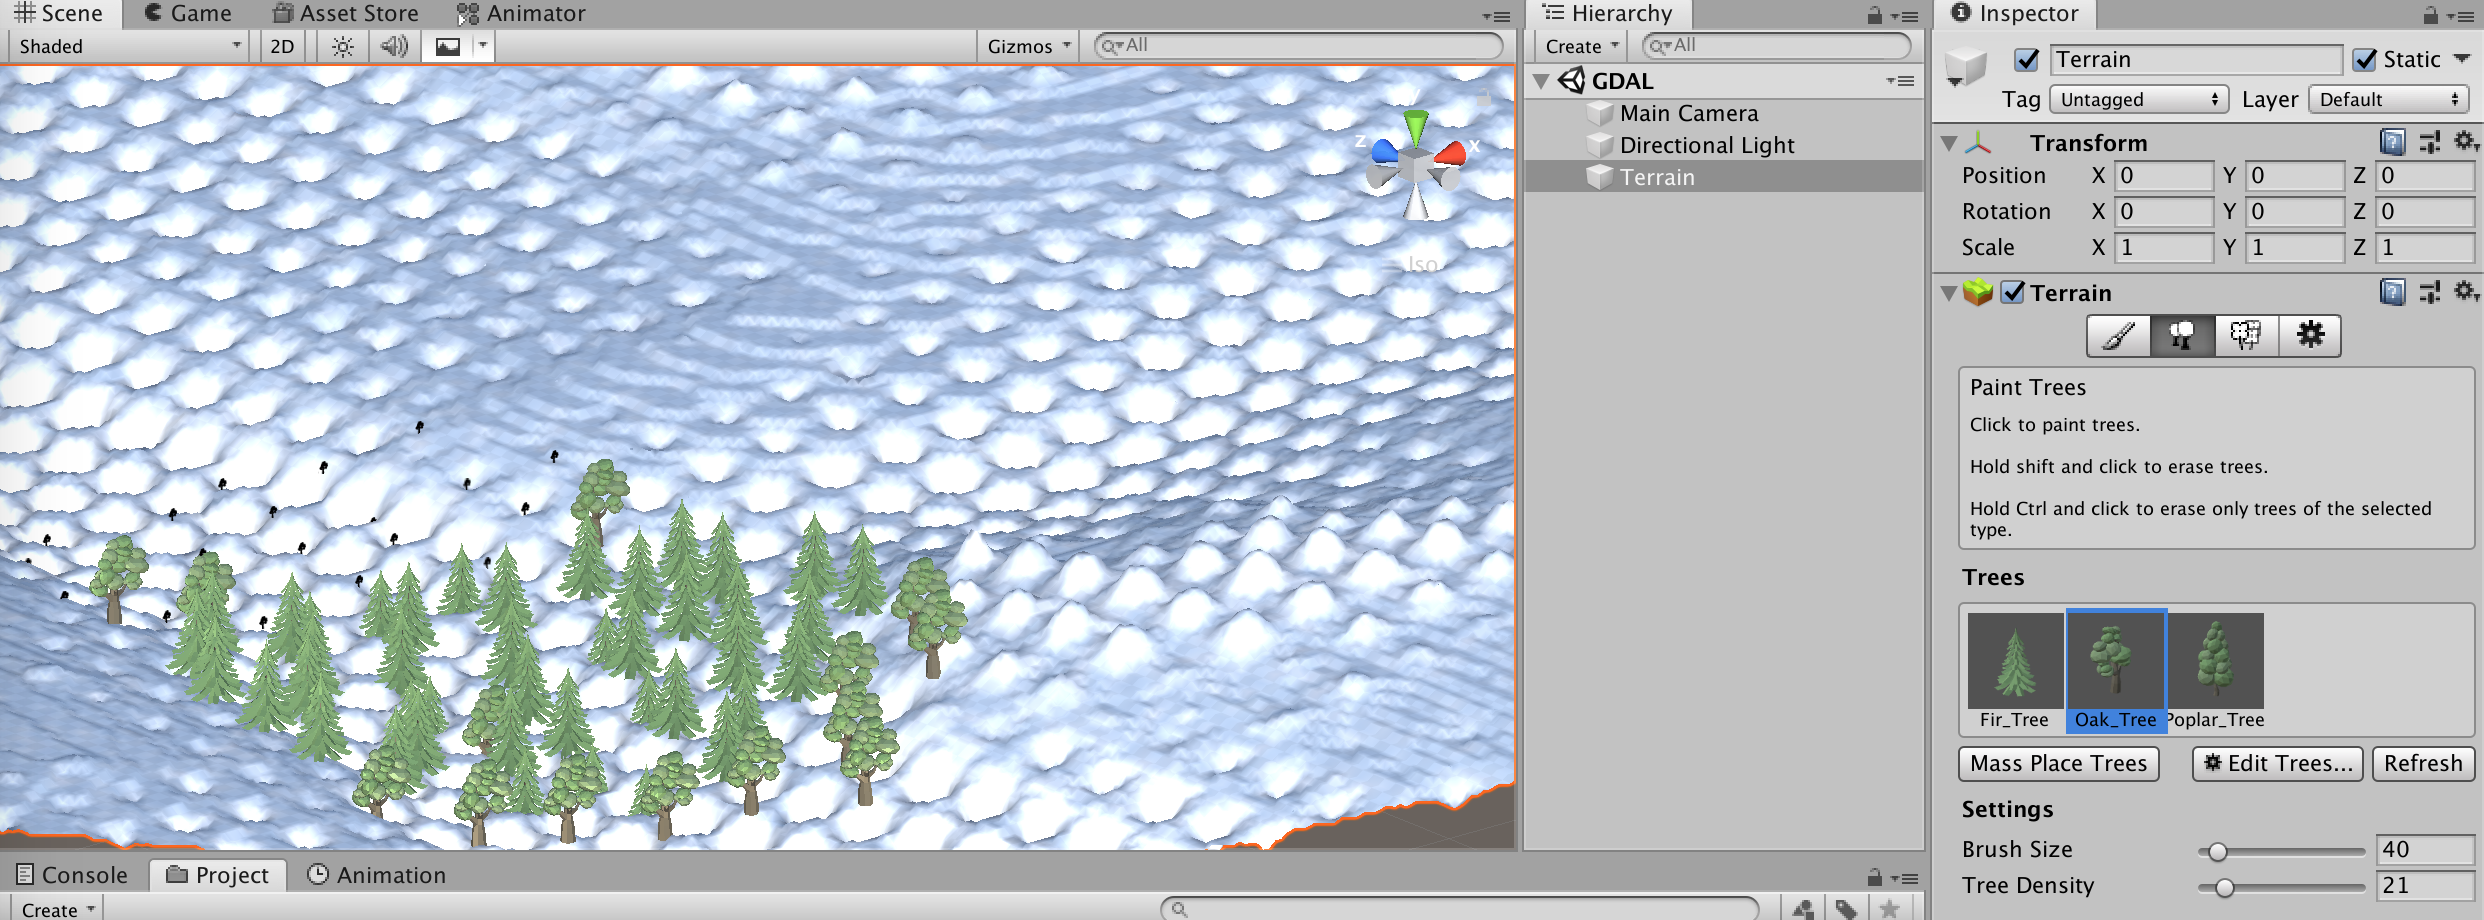
4.2 Paint details
Once the terrain looks like expected, textures and details can be added.


