Create a hidden object game with Unity
1. Objective
Create a Hidden Object Game (HOG) using Unity. This is a tutorial for Unity beginners.
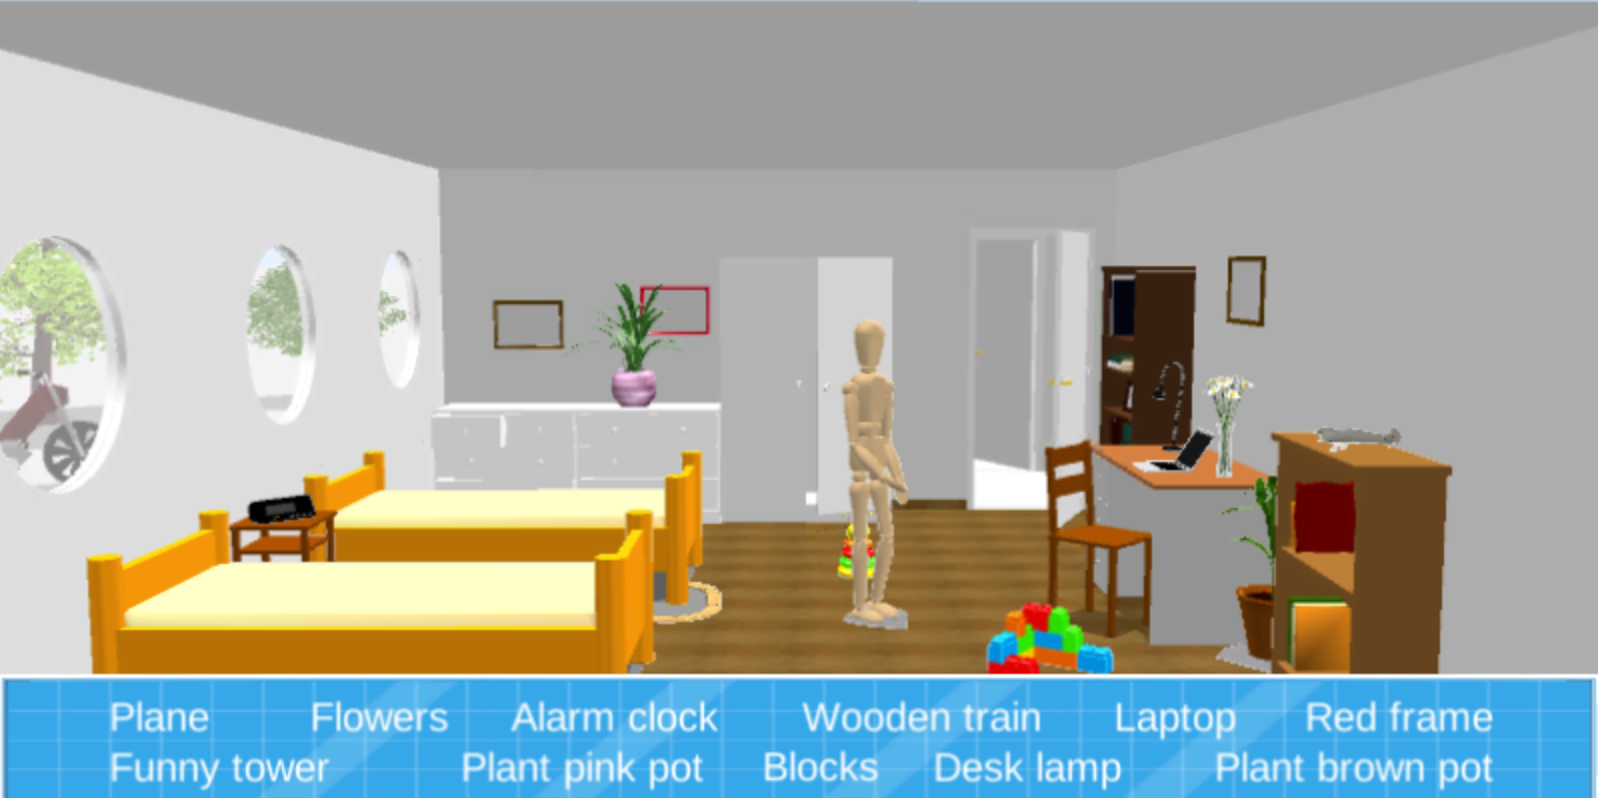
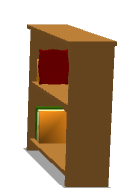
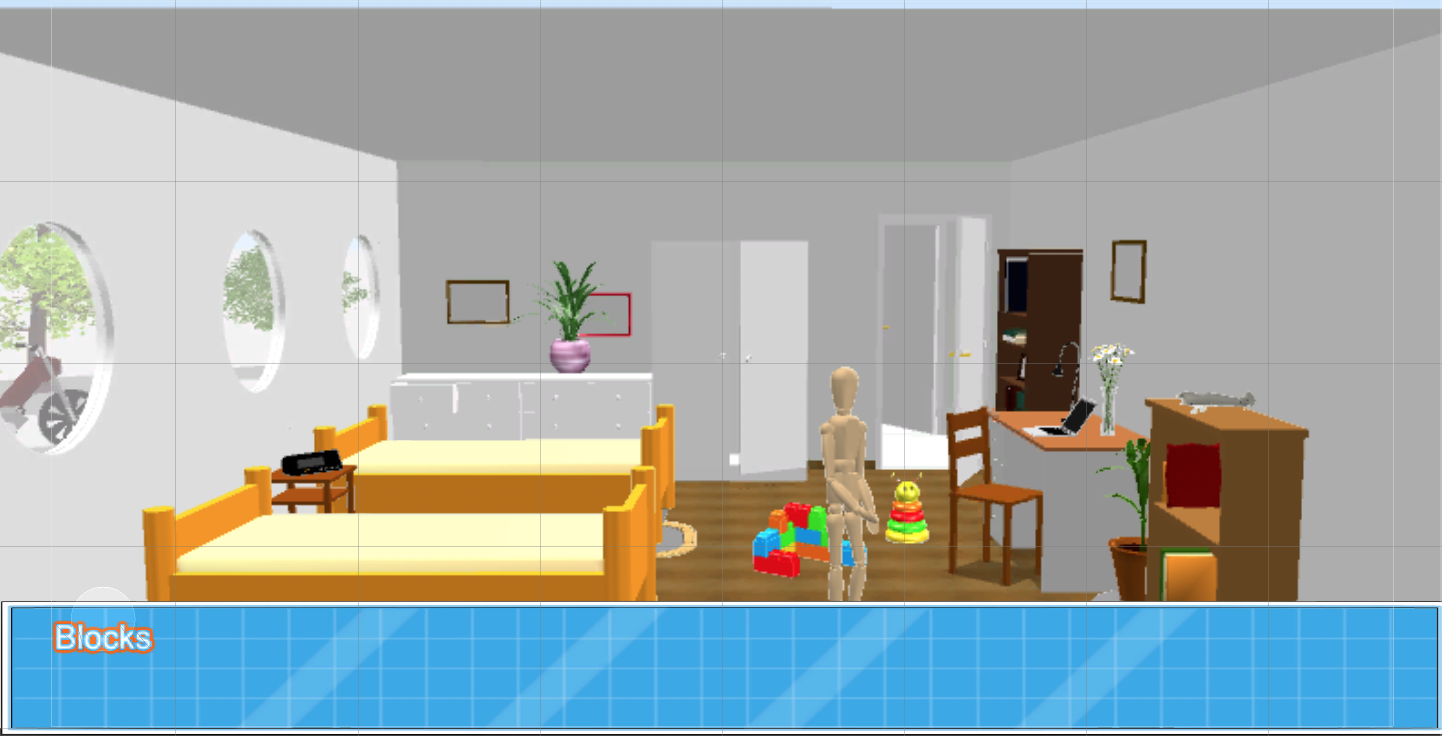
A HOG looks like the following picture or try the demo here. The objective of the game is to find all objects listed in the text box at the bottom and click on those objects to remove them.
This tutorial is based on a video by Game Design HQX (https://www.youtube.com/channel/UCly65VLuV5IXet1DoszHgvA/search?query=hidden).
2. Needed Tools
The following tools are needed:
- Unity: create the game.
- Brackets: code the C# part.
- Sweet Home 3D: create the content (room and 3D objects).
- Seashore: prepare the images.
- Some external graphics and sounds.
2.1 Unity
Unity is cross-platform game engine developed by Unity Technologies.
There’s a free personal edition. Download it from here: https://store.unity.com/products/unity-personal. Once downloaded, install it and create your login.
2.2 Sweet Home 3D
Sweet Home 3D is a free architectural design software application that helps users create a 2D plan of a house, with a 3D preview, and decorate exterior and interior view including ability to place furniture and home appliance.
Download it from here: http://www.sweethome3d.com/download.jsp
It is used to create the graphical content for the game.
2.3 Seashore
Seashore is an open source image editor. Actually, the GIMP or Adobe Photoshop will also do it.
It is used to make the white color transparent for the objects’ images.
2.4 Brackets
Brackets is a lightweight, yet powerful, modern, open source text editor. It can be found here: http://brackets.io/
It is used to write the C# code instead of using Microsoft’s Visual Studio that comes with Unity.
2.5 Free Graphics and Sounds
In the advanced gameplay, we use free add-ons gathered on the web.
2.5.1 Graphics
We need some icons from this website: http://www.iconarchive.com/.
2.5.2 Sounds
The sound effects come from here: http://soundbible.com/.
3. How-To
3.1 Pre-concept
First of all, draw on paper a pre-concept of the game. Like this, you will know which parts you need to have before implementing the whole stuff.
3.2 Prepare the graphics
As I’m not a good artist, I used Sweet Home 3D to create the graphical content for the game.
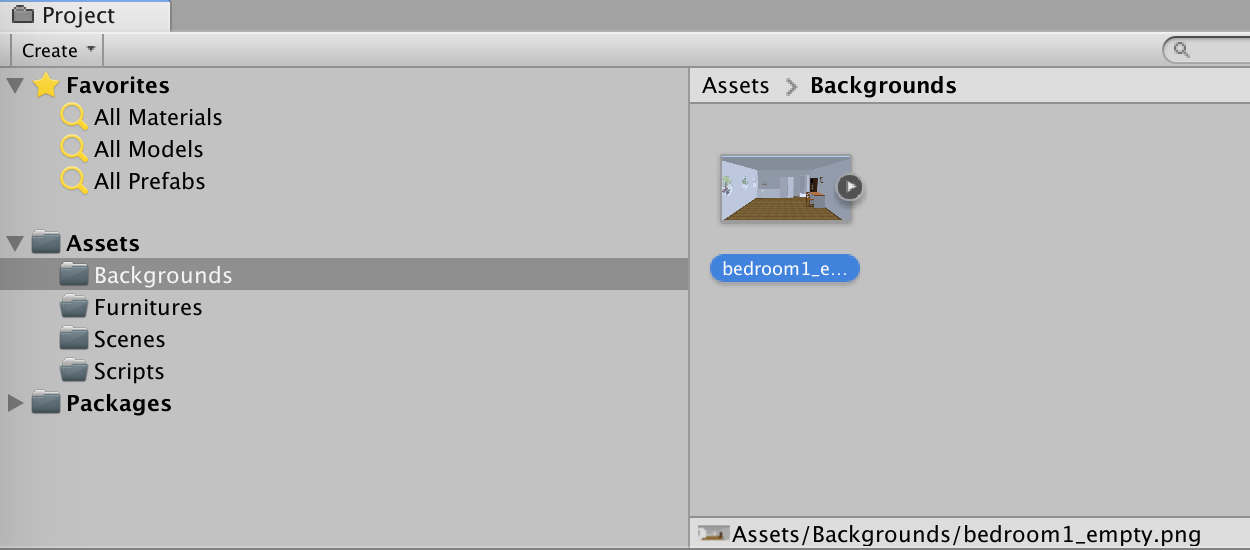
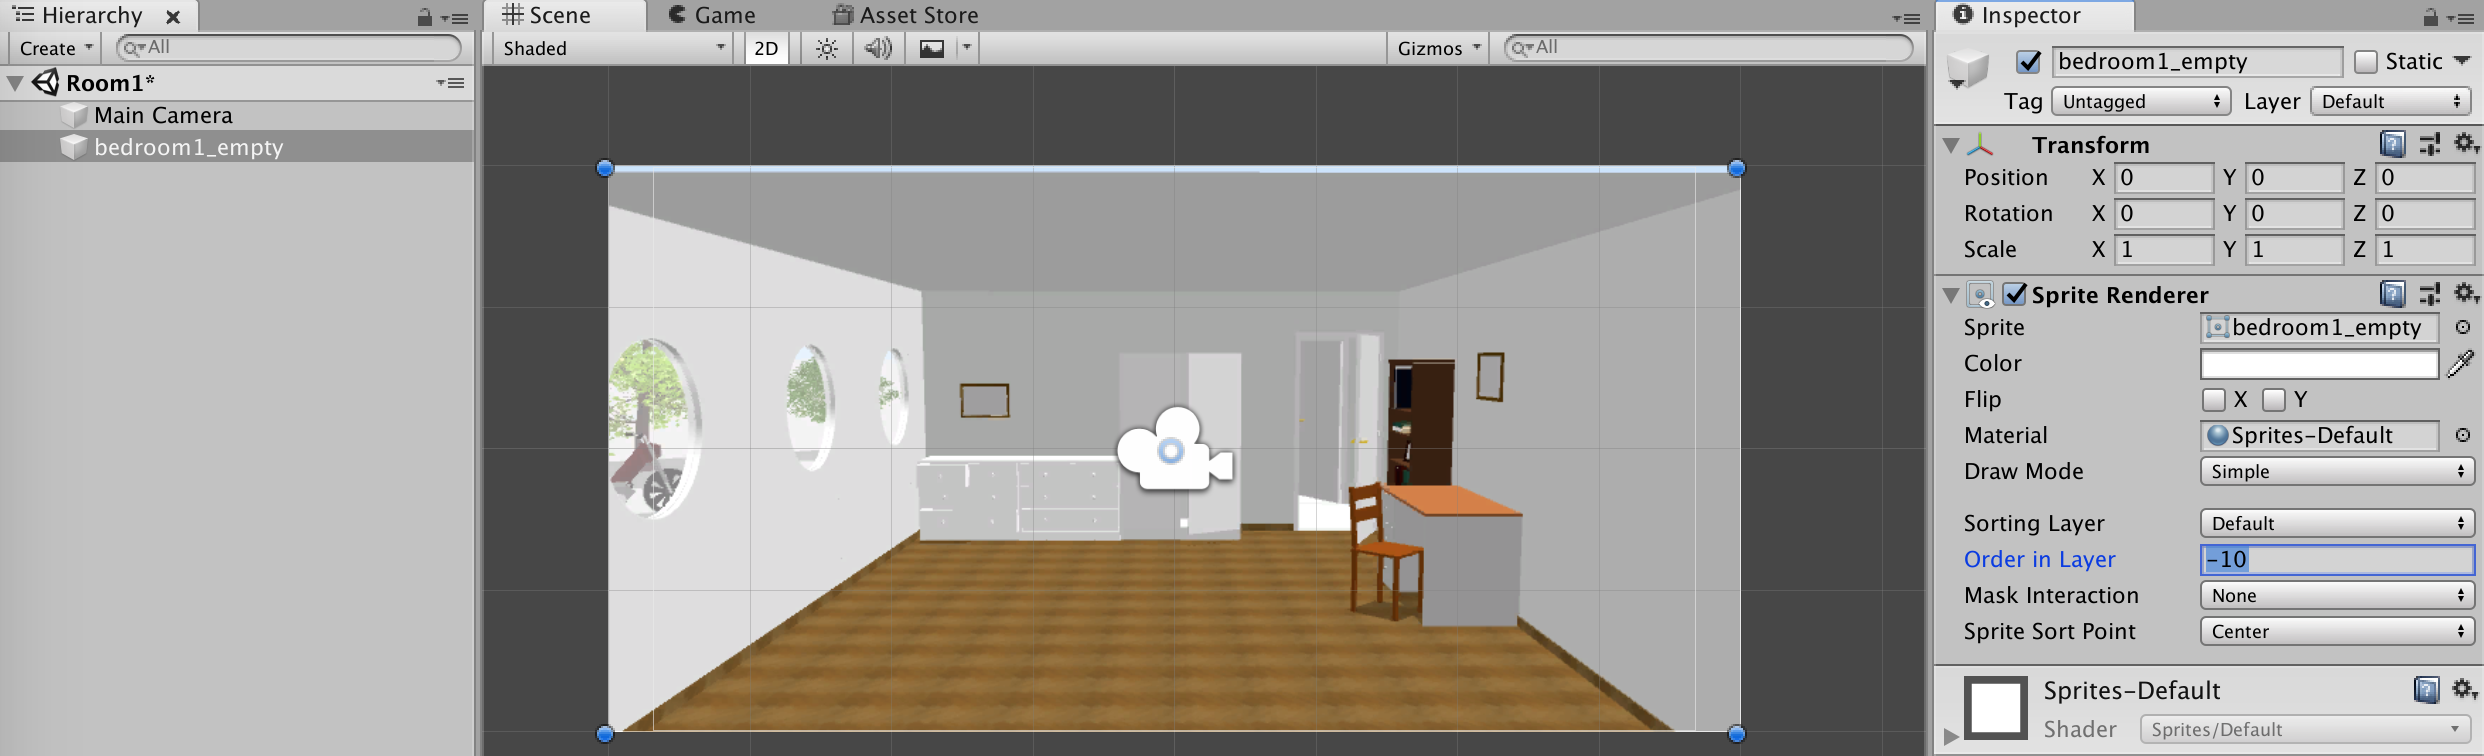
I created an empty room and exported it as a PNG file.
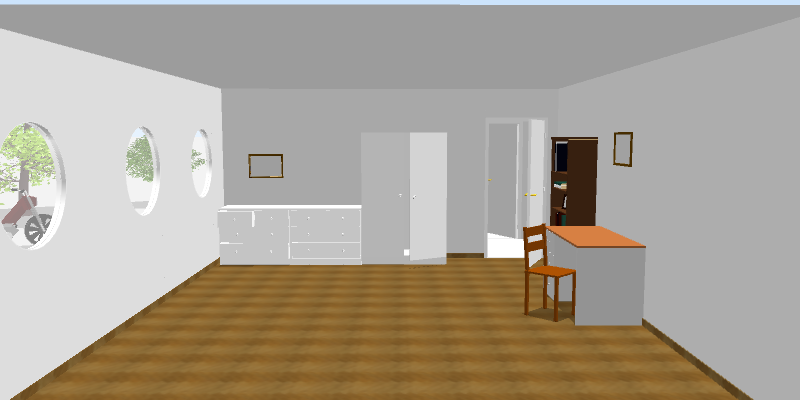
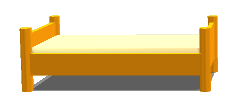
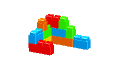
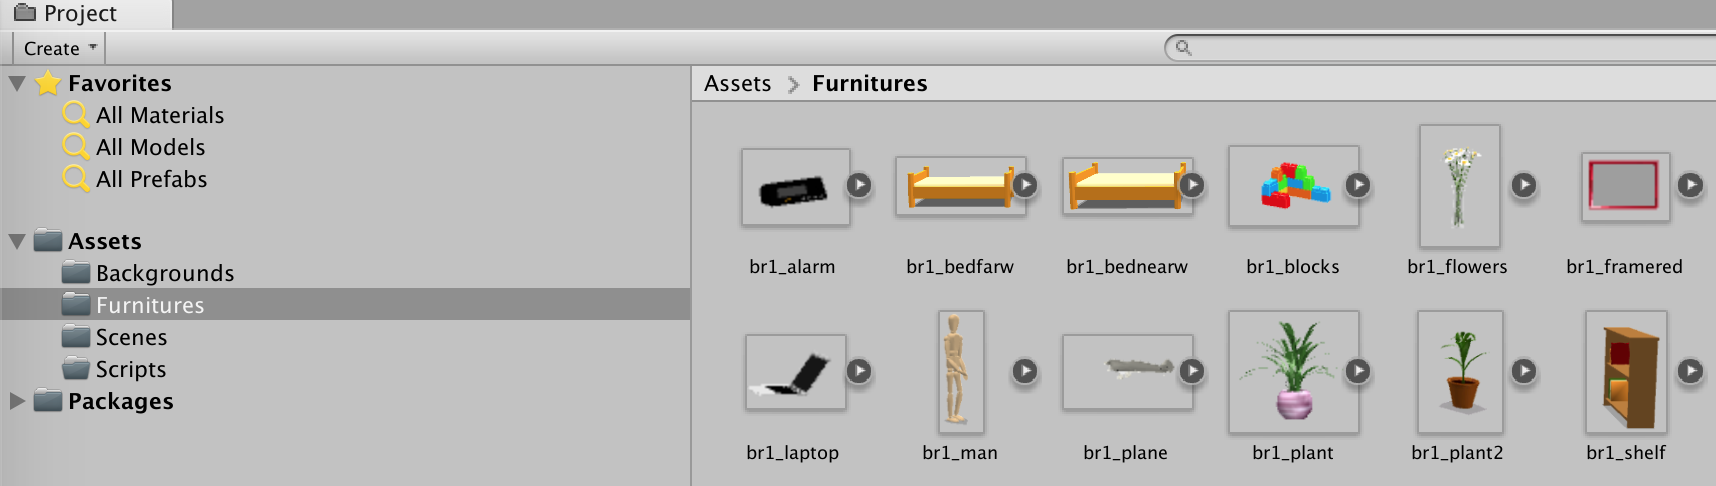
And I exported some furnitures (PNG) to have content for the room, e.g.:
Now you’ll need an image editor to make the white spaces transparent; otherwise, you’ll have white areas around your objects in Unity.
3.3 Code the game
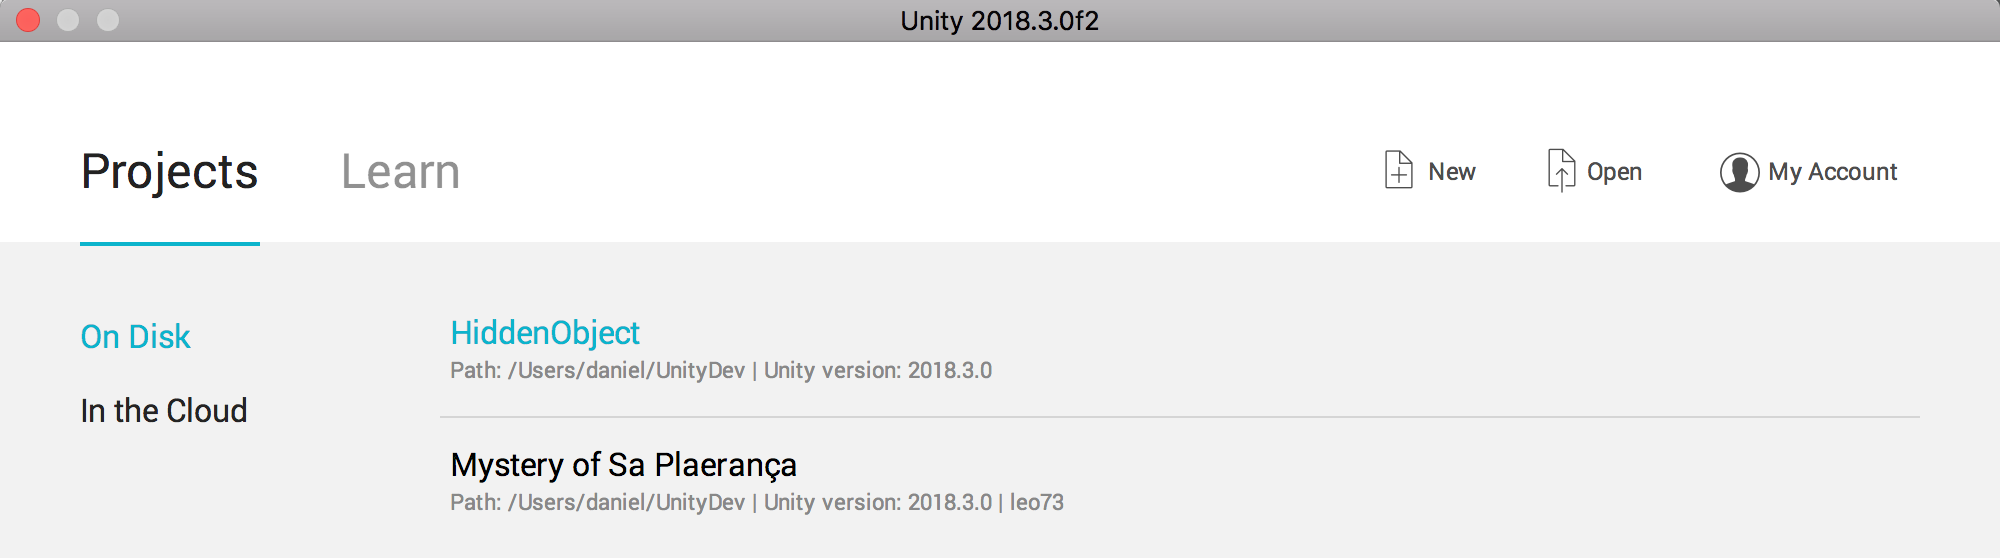
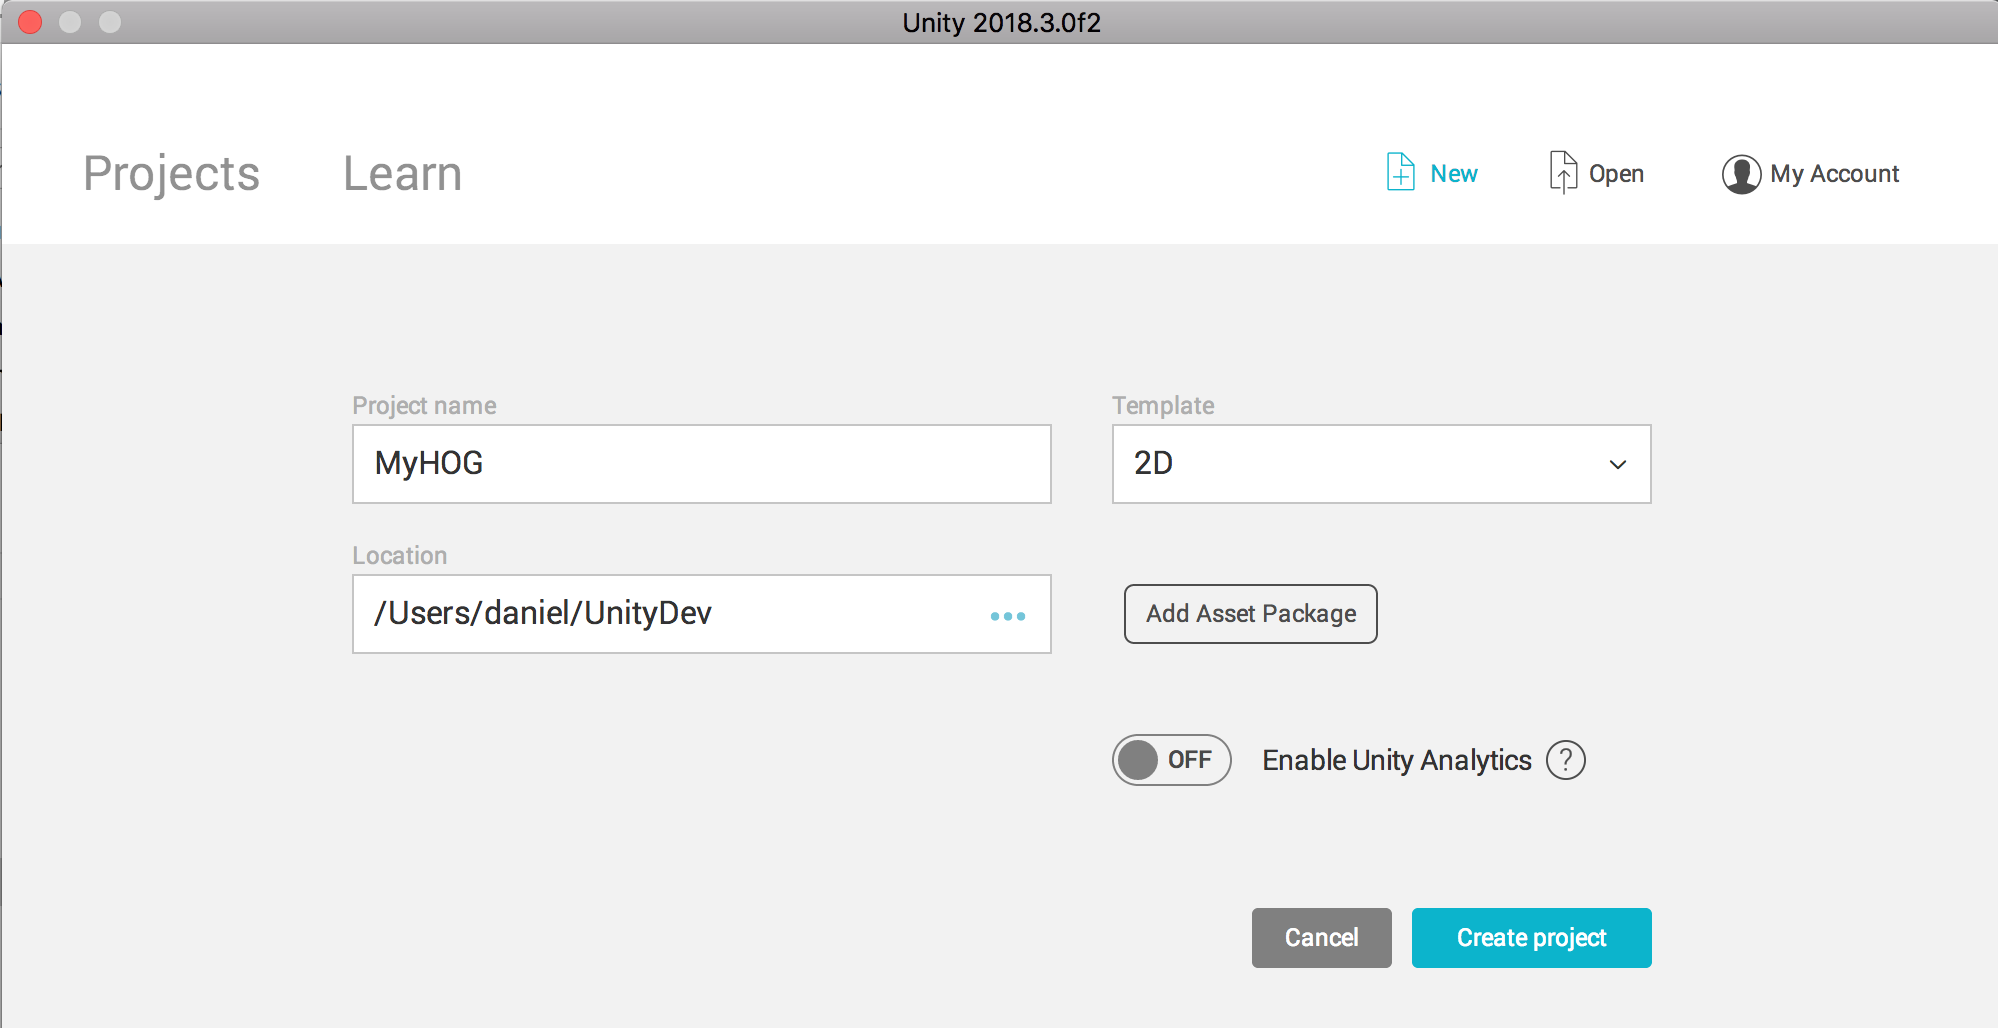
Launch Unity and create a new project on your disk.
Choose a 2D template:
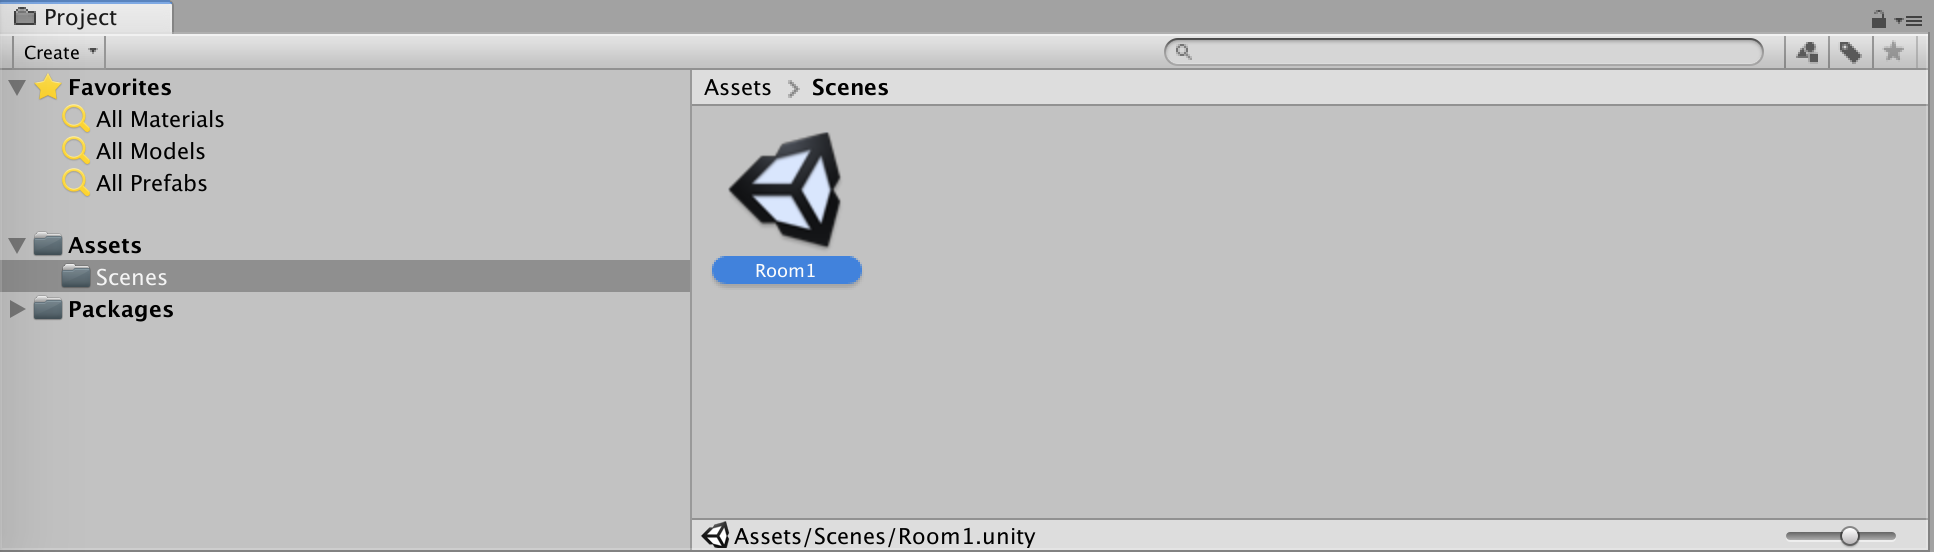
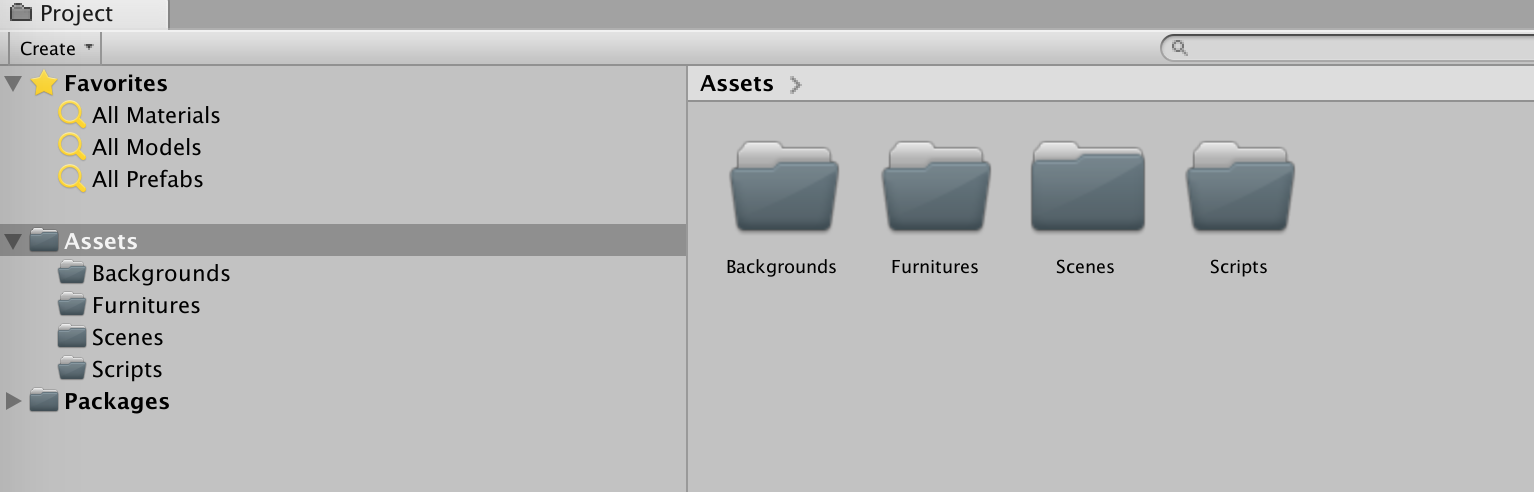
Under the Project tab > Assets > Scenes, rename the SampleScene to Room1:
Under the Project tab > Assets, create 3 new folders: Backgrounds, Furnitures, Scripts
Add the room image into Project tab > Assets > Backgrounds (by drag and drop).
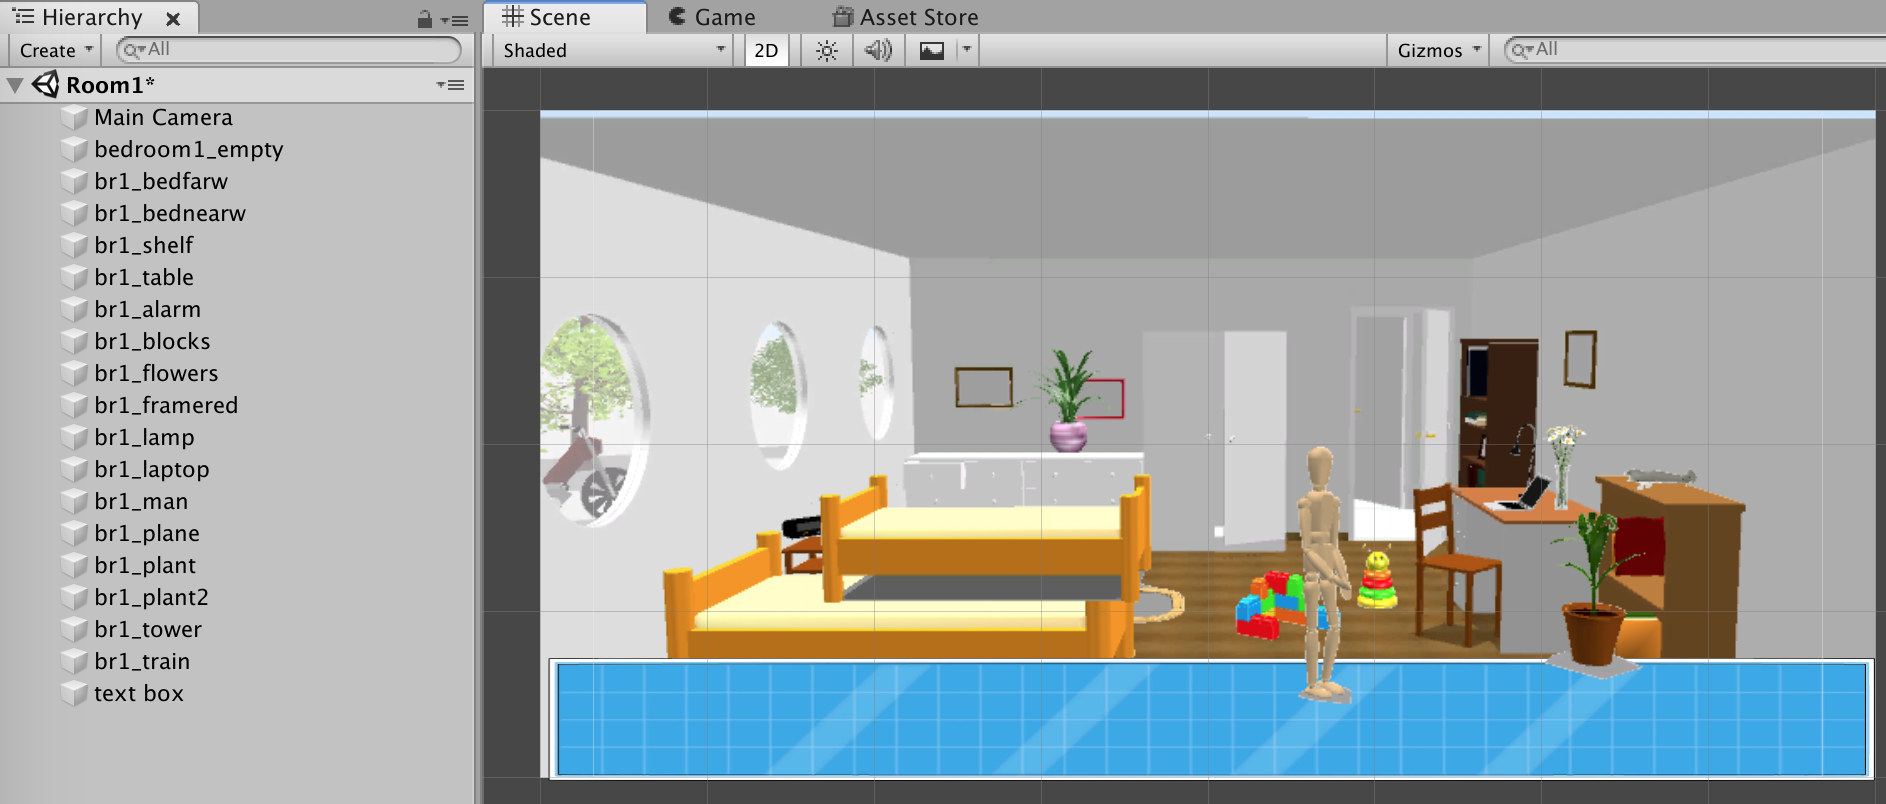
Do the same with the furnitures:
Add the background to the Hierarchy (drag and drop within Unity)
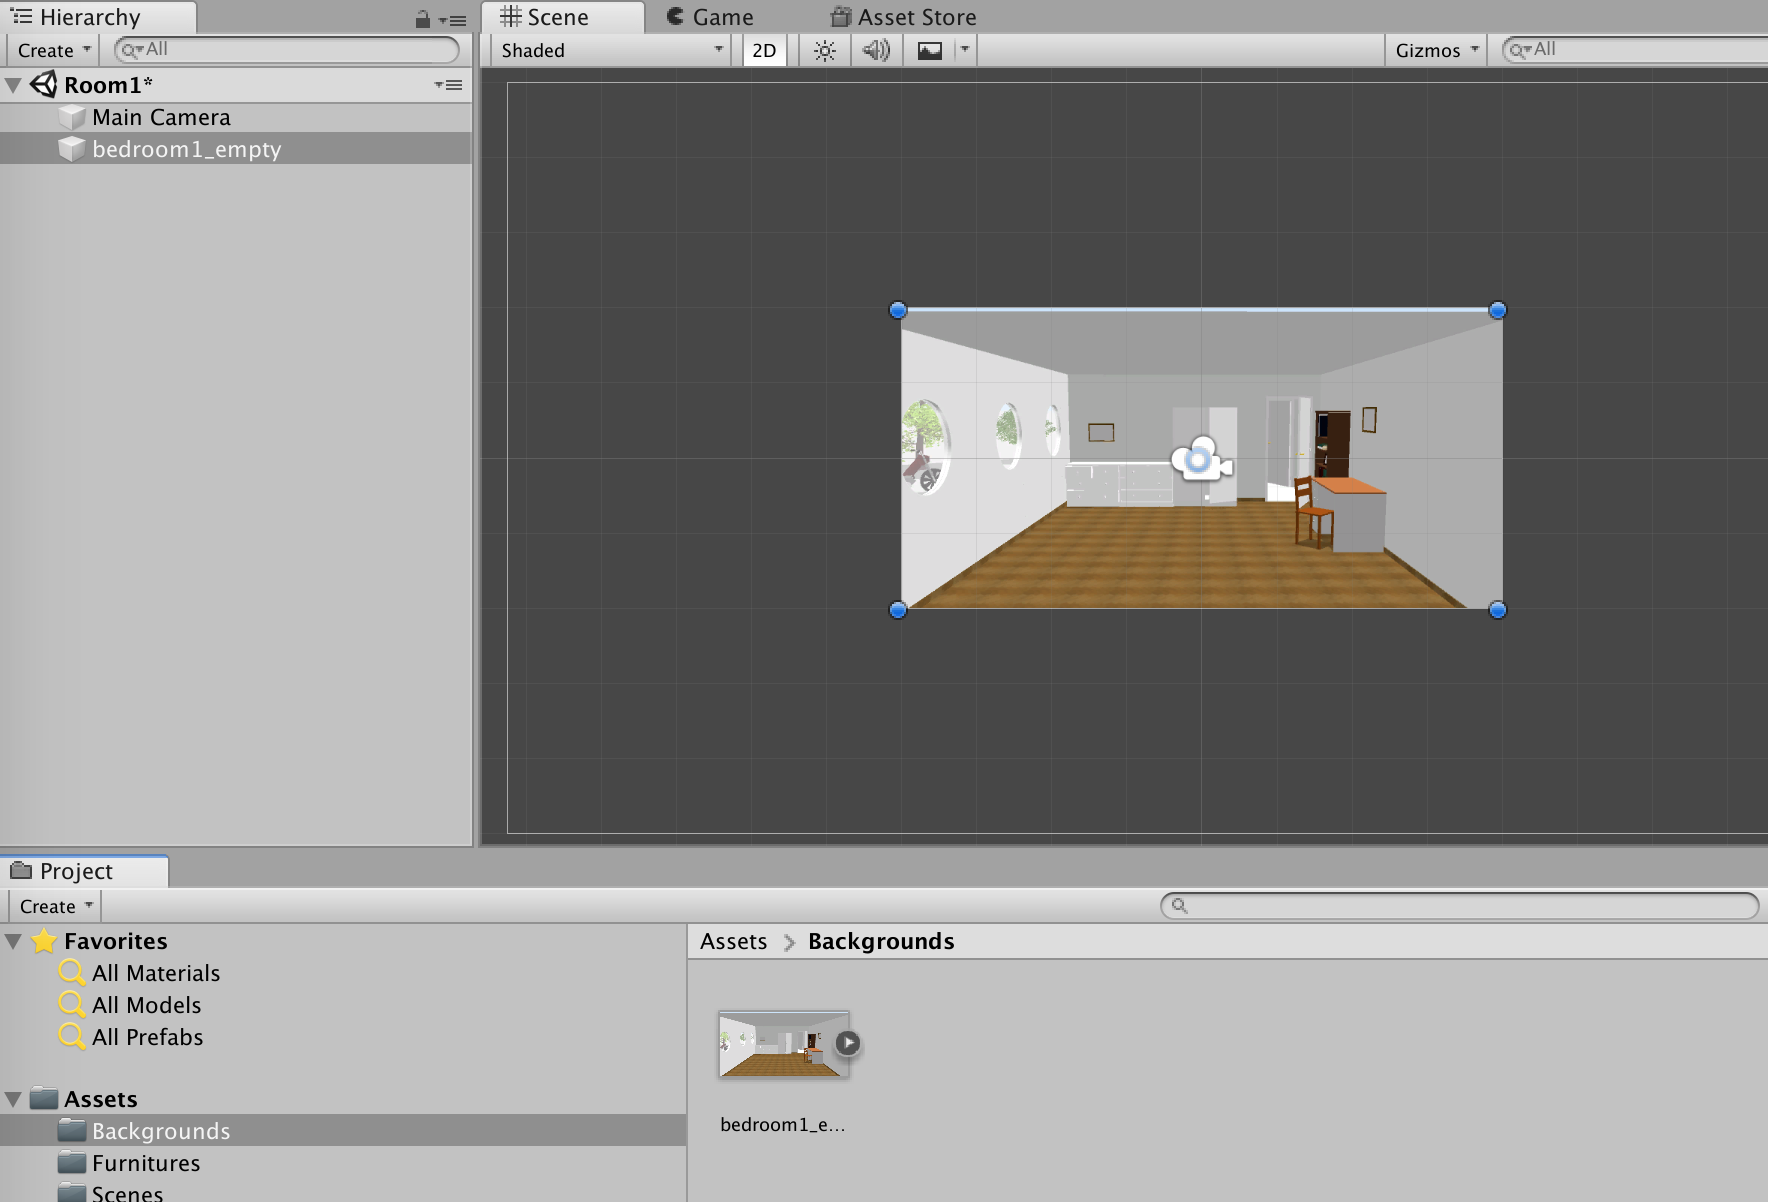
Click the background object and under Inspector change the Order in Layer to -10. We need to go to negative numbers as the order setting doesn’t exist for text objects and we need the texts at the top (if we don’t want to code this). This will allow us to have objects half hidden by others.
Add the furniture objects and place those at their position
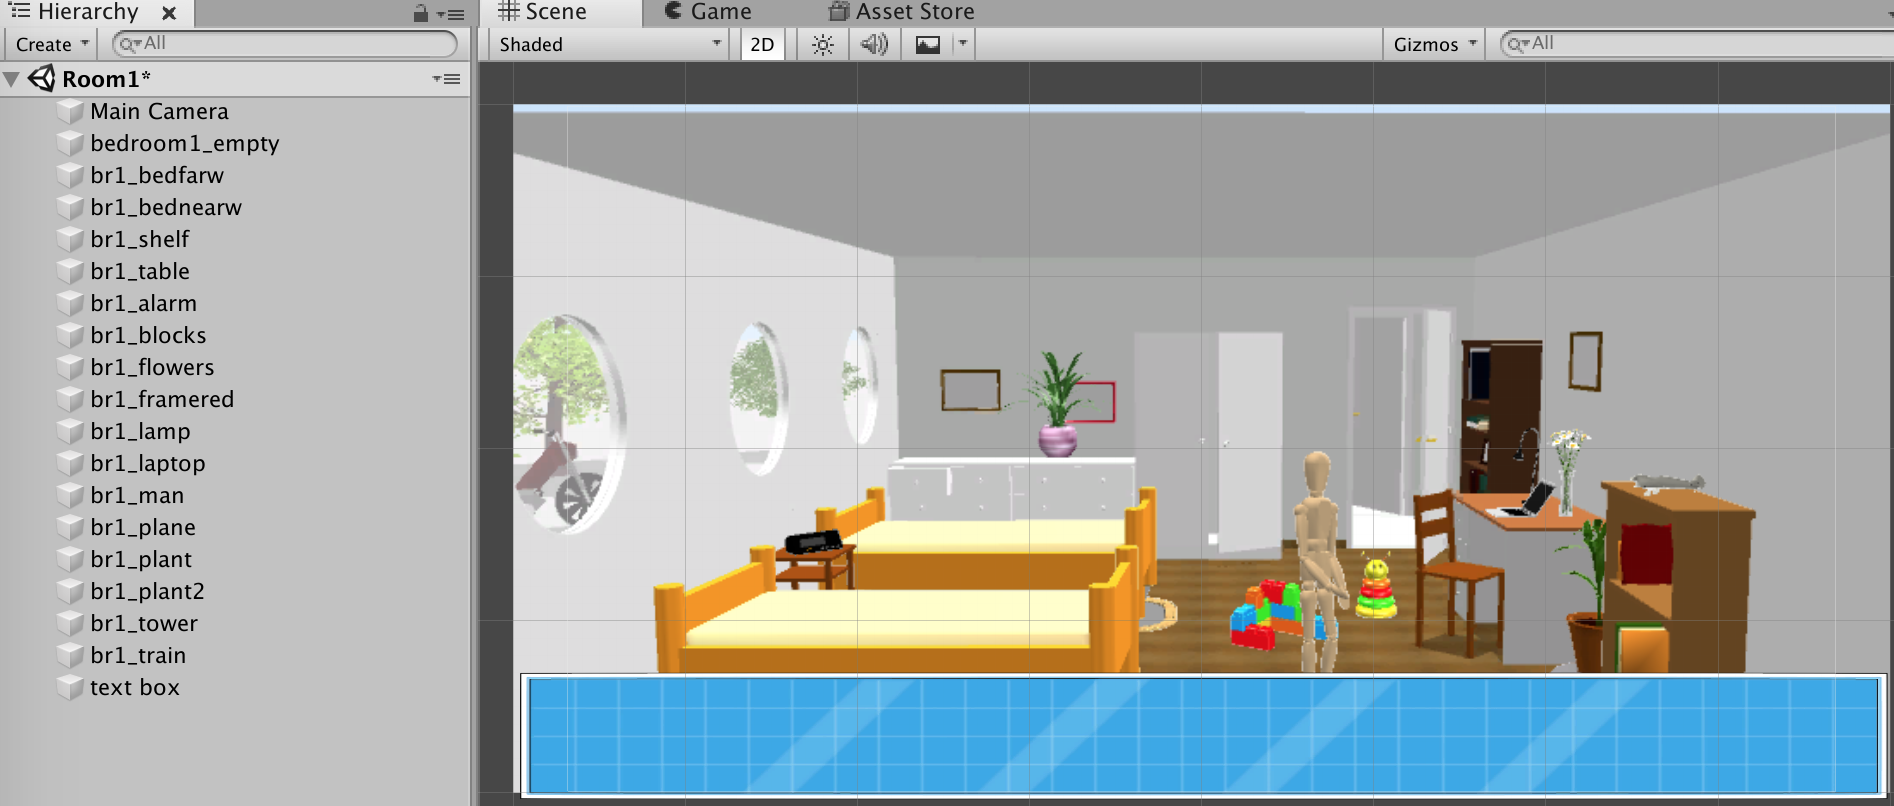
Change the Order in Layer setting for each object to rebuild the hierarchy in the image:
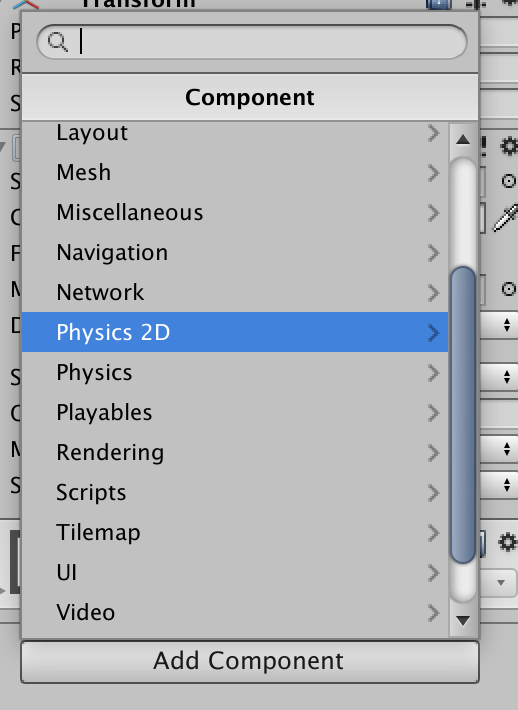
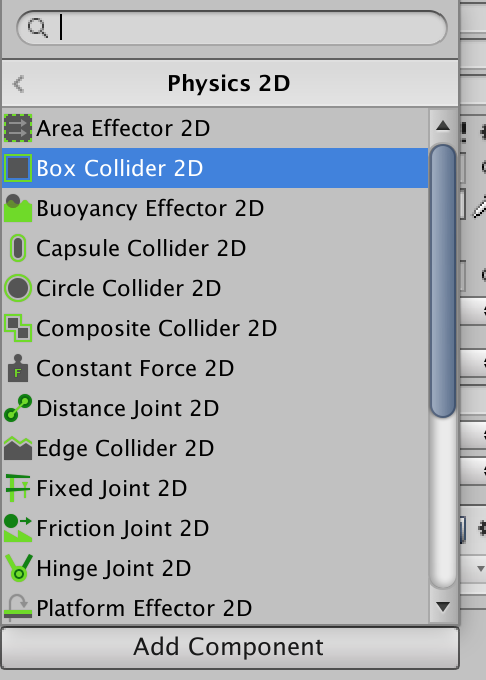
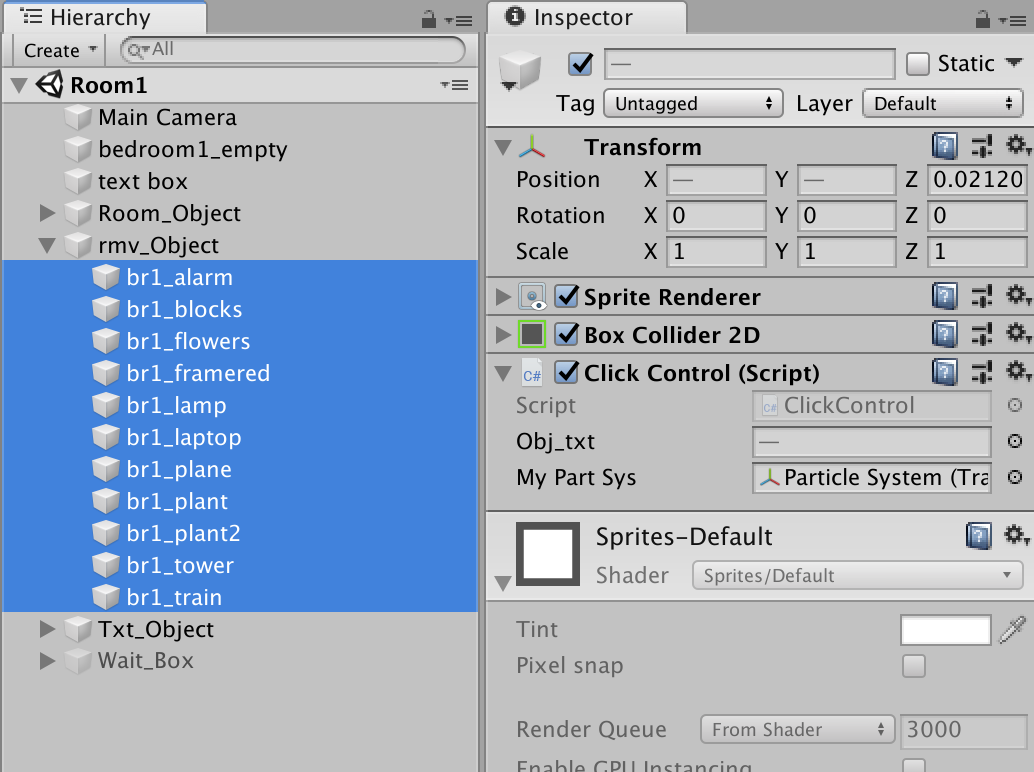
Under Hierarchy, select all objects that will be clickable
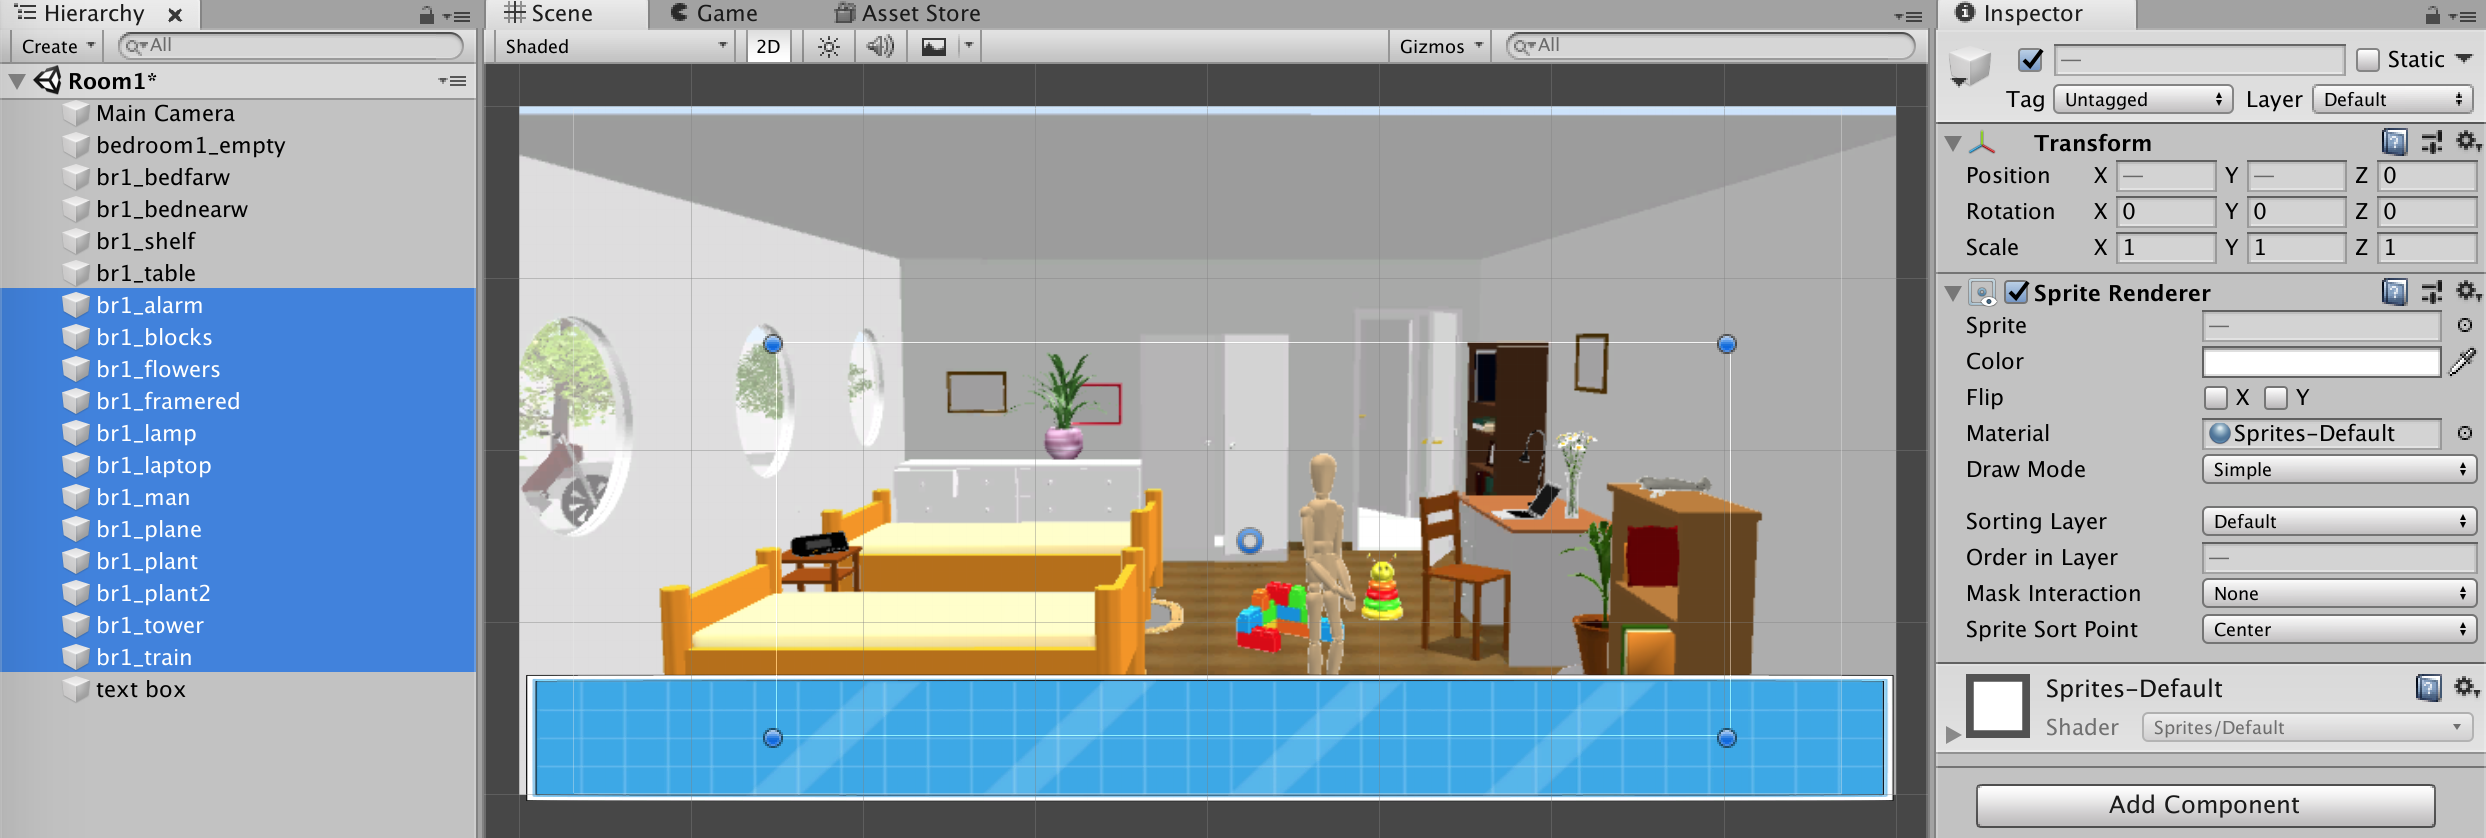
In the Inspector, click Add Component and choose Box Collider 2D. This adds a collider area around each object; this allows us to detect the mouse click on the object.
In the Box Collider, select Is Trigger
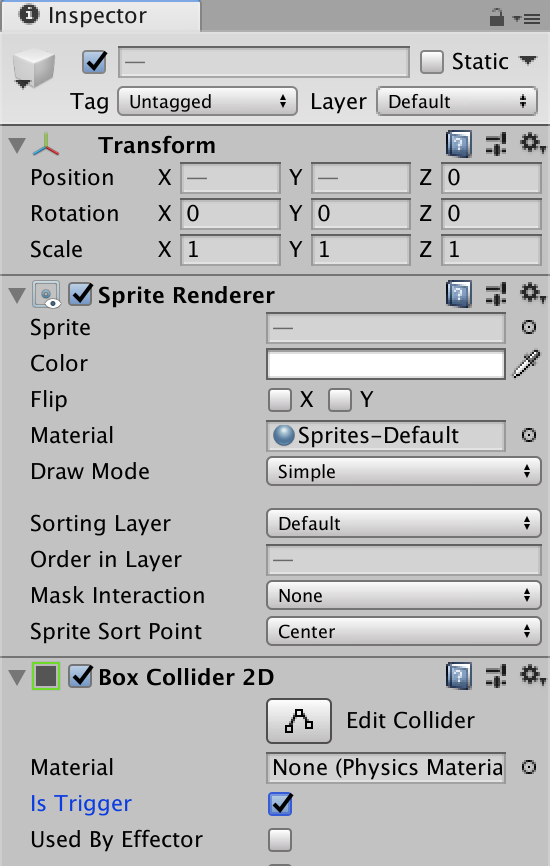
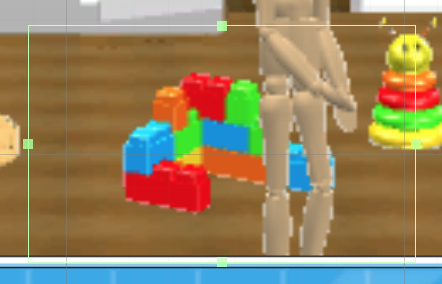
The collider area is a bit too big and needs to be resized for each object. Select an object (Hierarchy) > Edit Collider (Inspector) > resize the green box around the object.
Now we need the text objects. Hierarchy > Create > Create Empty
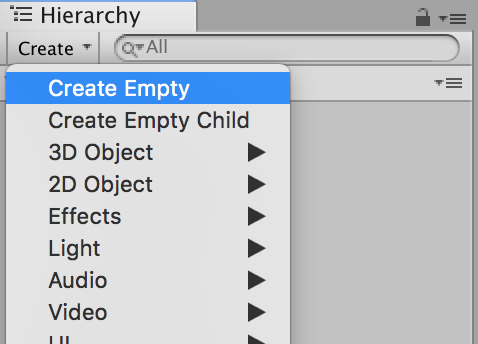
A new GameObject is added at the end of the list. Rename it to Blocks_txt.
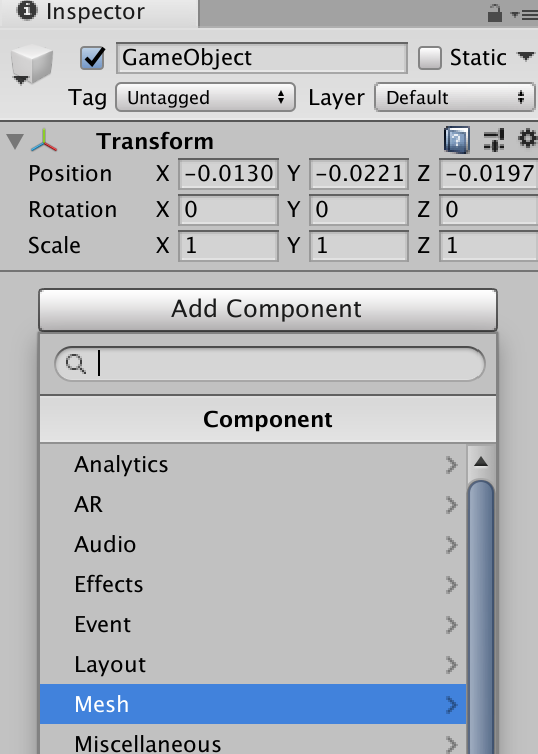
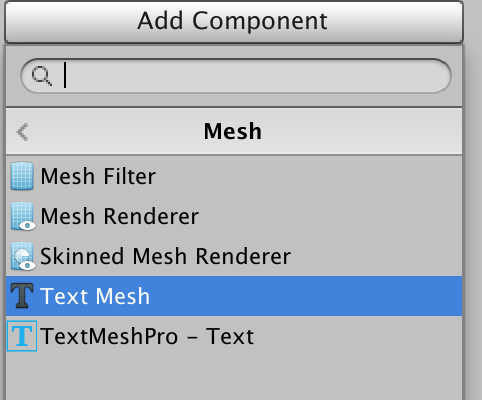
Inspector > Add Component > Mesh > Text Mesh
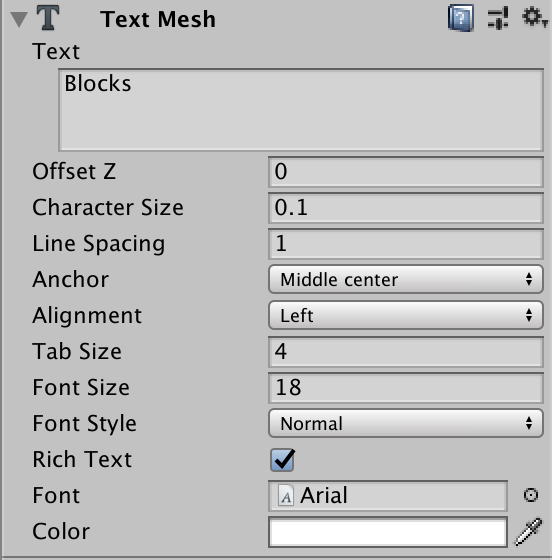
Configure the text settings. Enter the text to display. Change the Font, the Character Size and the Font Size. Change the Anchor to Middle Center.
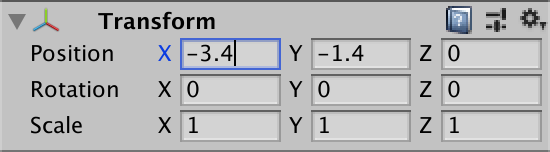
Inspector > Transform: place the text object to its correct location
Duplicate the text object (Hierarchy) to create the text for every object. Change the name, the text to display and the position.
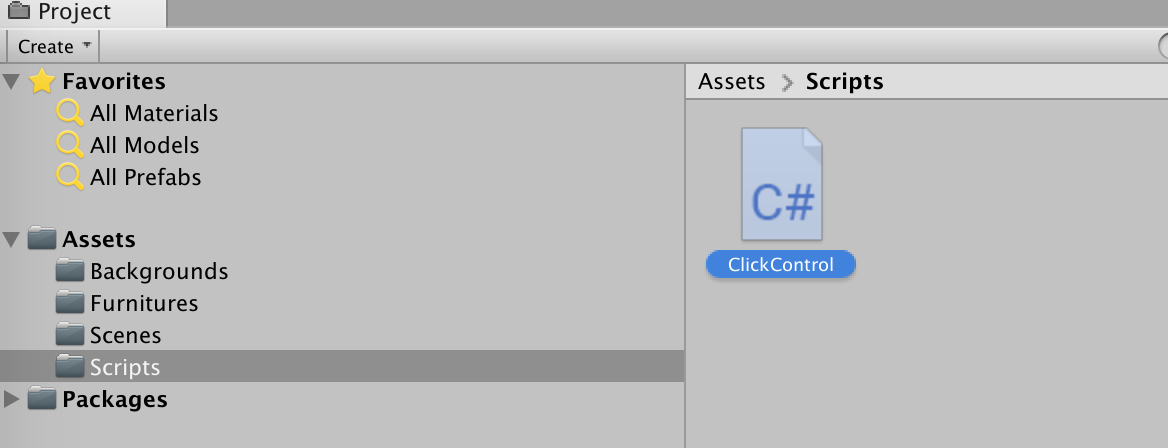
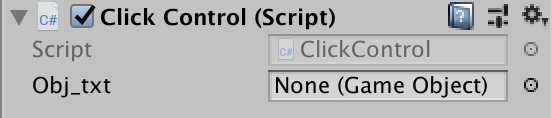
Now comes the little scripting part. In Project > Scripts, create a C# script (Context menu > Create > C# Script) and name it ClickControl.
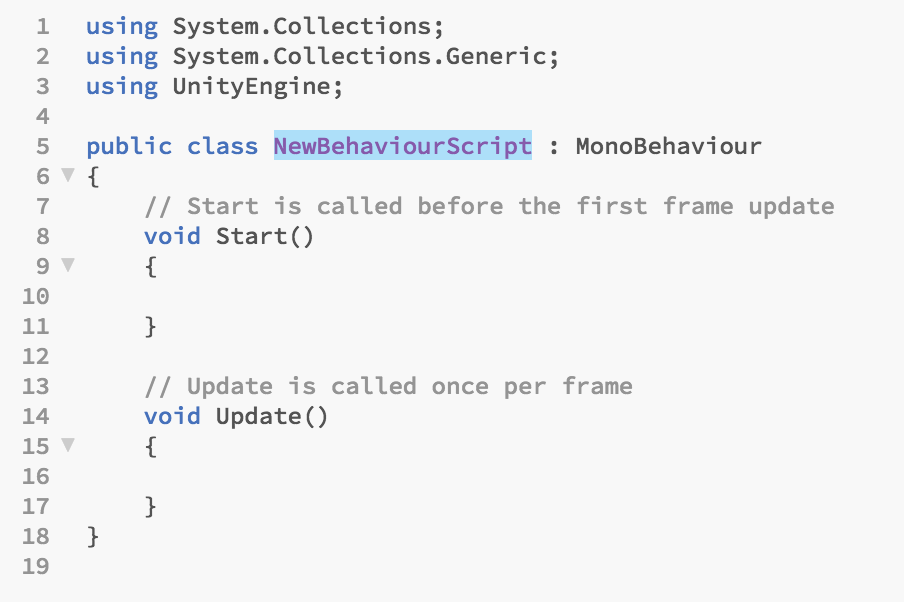
Double-clic it to enter the editor and change the public class’ name to ClickControl (Important note: the whole stuff is case sensitive).
The idea is to write a script that will be used for every object and its text.
Add some code:

public static string obj_name; public GameObject obj_txt;
void OnMouseDown() { //Link the object and the text obj_name = gameObject.name; //Debug.Log (obj_name); //Destroy the object and the text Destroy (gameObject); Destroy (obj_txt); }
Hierarchy > select all objects. Project > C# file > drag and drop > Inspector. This adds the script to the objects.
Hierarchy > select the Blocks object.
Hierarchy > Blocks text > drag and drop on Obj_txt in the ClickControl (Inspector). Now the text is linked to the object.
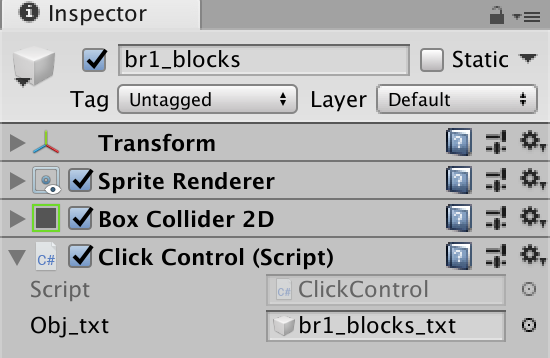
Link each text to its object.
Test the game.
4. Publish to the web
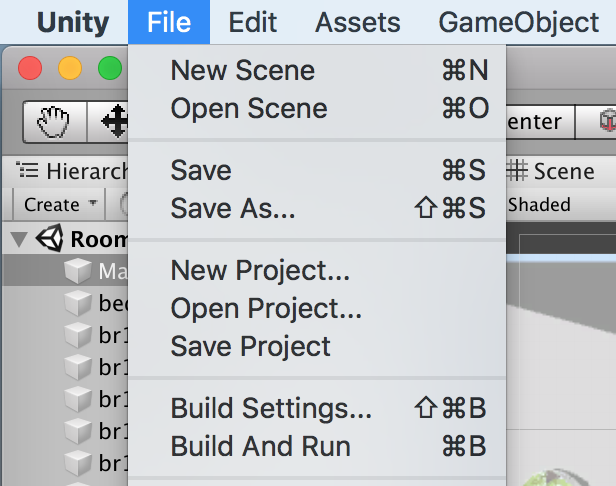
File > Build Settings
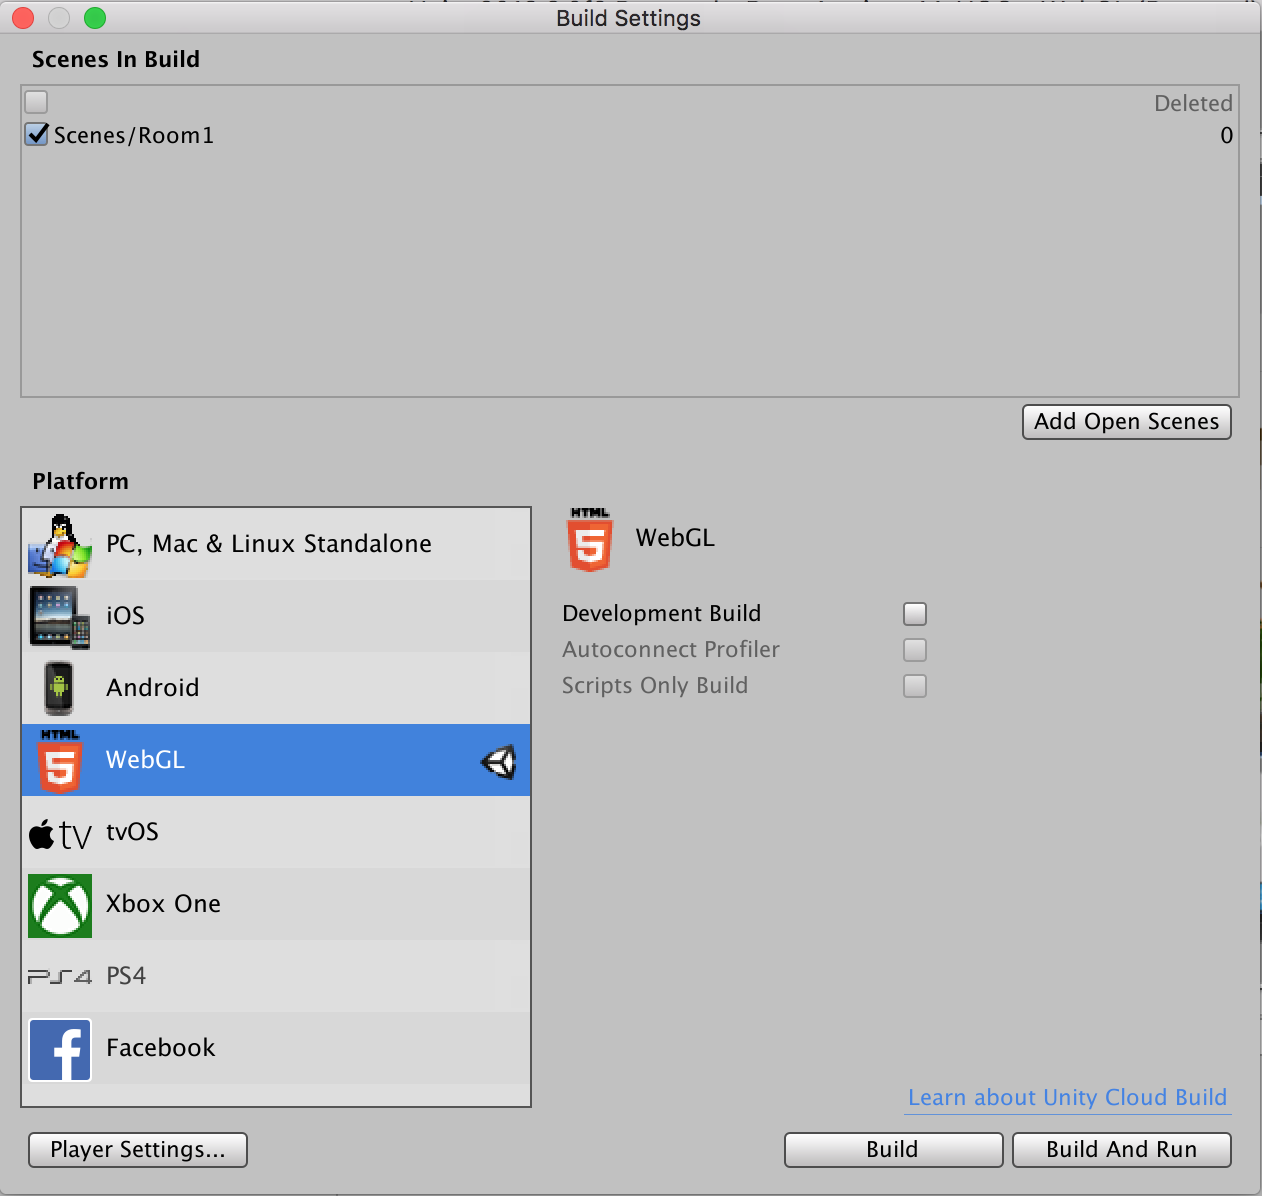
Scenes in Build > Add Open Scenes. Remove any empty scene (otherwise you'll get a compilation error).
Platform > WebGL
Player Settings
Inspector > Player Settings > Product Name, Version
Inspector > Settings for WebGL > Resolution and Presentation > Width, Height (proportional to background image size).
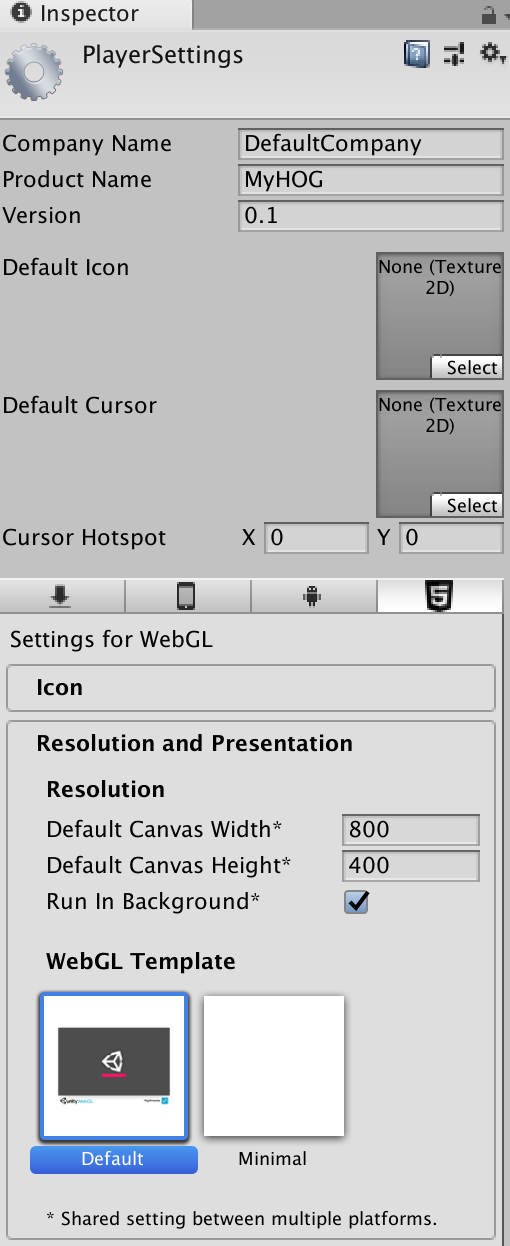
Click Build.
This implementation can be run here (opens in a new window).
5. Extend the Gameplay
5.1 Add a clicks tracking system
In a HOG, you want the player to find objects, but you don’t want that the player clicks everywhere else several times without getting some penalties. For this part, we need:
- some new GameObject
- C# code
- a sound (like a beep)
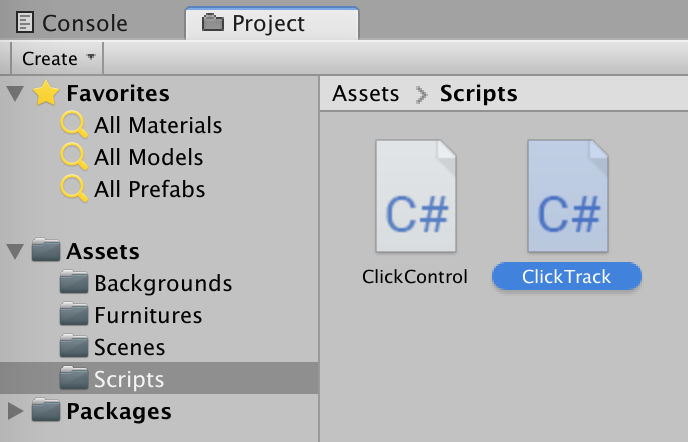
We need a new C# script. Name it ClickTrack.
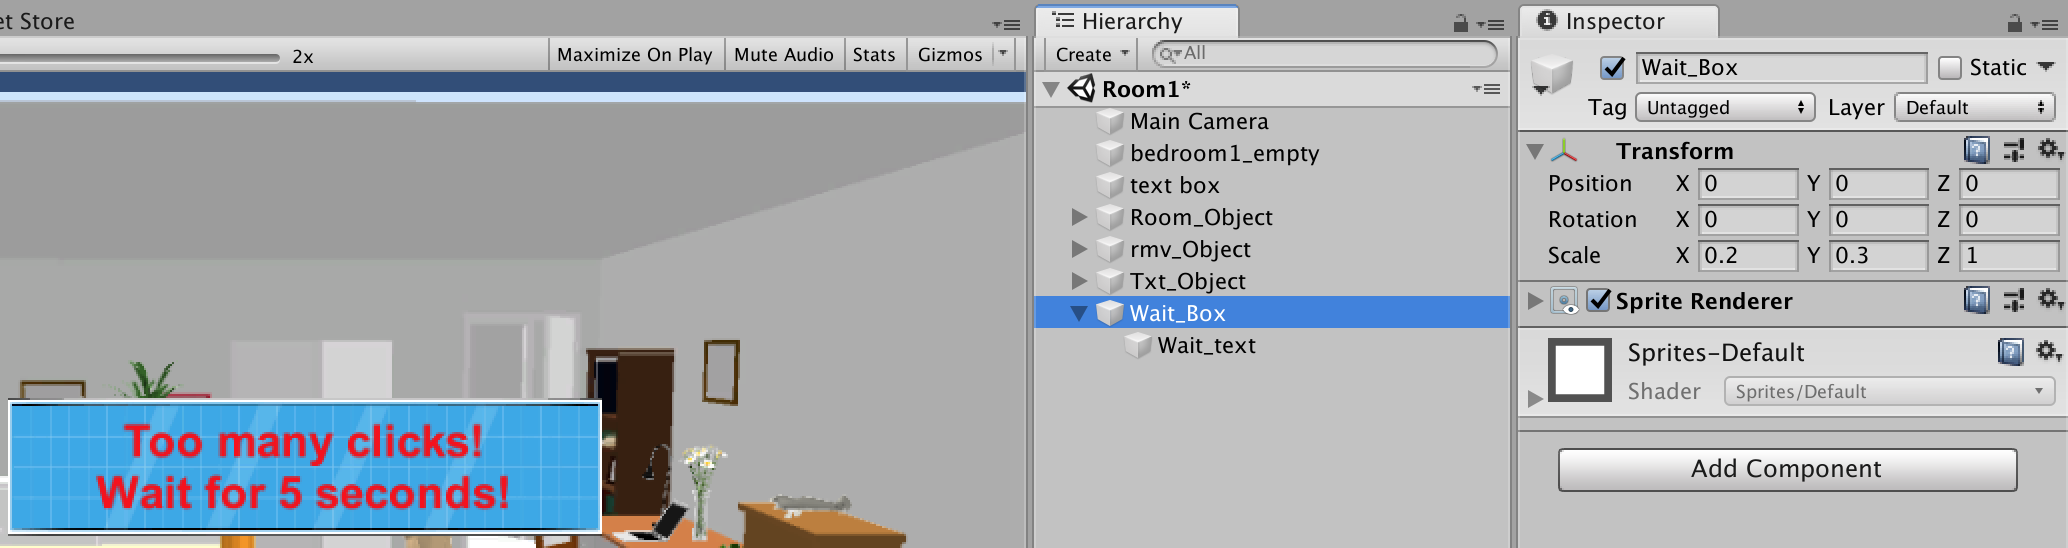
Add this script to a persistent GameObject; here we choose our bedroom.

Add a new GameObject for text box and a child GameObject for the text itself.
Add a Sounds folder to the Assets and add a sound file to this folder.

Replace the ClickTrack code by the following one.
//This is used by the tracking
public static int TotalClick = 0;
public KeyCode MouseClick;
public AudioClip bcgMusic;
public GameObject myGameObject;
// Start is called before the first frame update
void Start()
{
//hide the wait message at game startup
myGameObject.SetActive(false);
}
// Update is called once per frame
void Update()
{
//On each mouseDown we increase the clicks value
if (Input.GetKeyDown (MouseClick))
{
TotalClick += 1;
}
//If the clicks value is 5 or greater, we do an action
if (TotalClick >= 5)
{
//Debug.Log("FAIL!!!");
//reinitialize the counter
TotalClick = 0;
//play a sound
AudioSource.PlayClipAtPoint(bcgMusic, transform.position);
//wait for 5 seconds
StartCoroutine(Wait5Sec());
}
}
//this defines what happens during the wait time
IEnumerator Wait5Sec()
{
//Debug.Log("Before Wait");
//show the wait message
myGameObject.SetActive(true);
//wait for 5 seconds
yield return new WaitForSeconds(5.0f);
//hide the wait message
myGameObject.SetActive(false);
//Debug.Log("After Wait");
}
In the code created in the previous chapter (ClickControl), we need to reinitialize the counter when a known object is clicked. At the end of the MouseDown void, add the following line:
ClickTrack.TotalClick = 0;
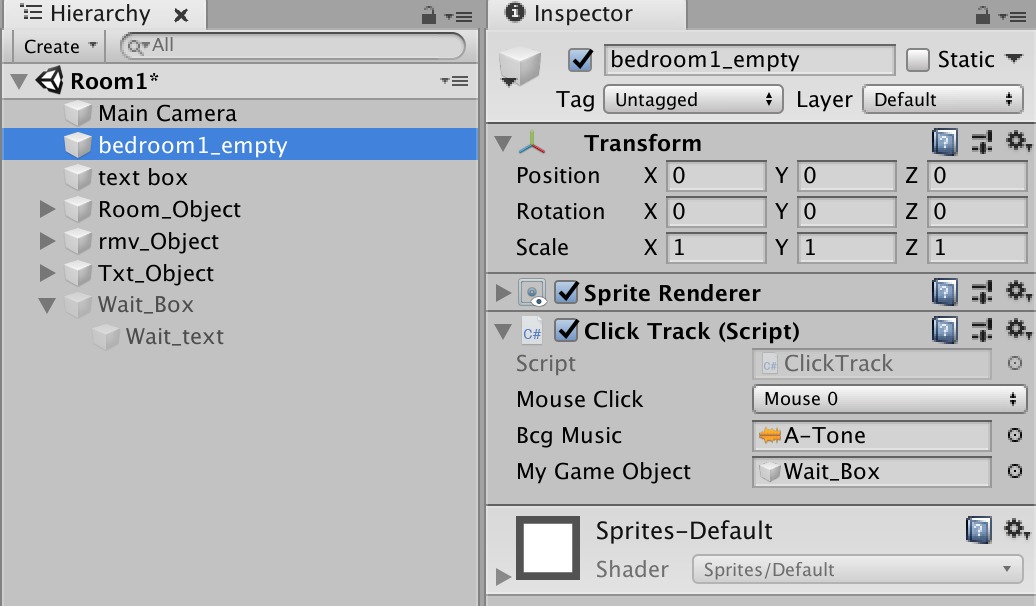
Now we need to assign some values for the variables defined in the script. In the GameObject, under Click Track (Script), do the following:
- set Mouse Click to Mouse 0
- drag and drop your sound file to Bcg Music
- drag and drop the Wait_Box to My Game Object
Hit Play to test your game!
5.2 Animate the Objects
If an object is found, we want to play a small animation over the deleted text.
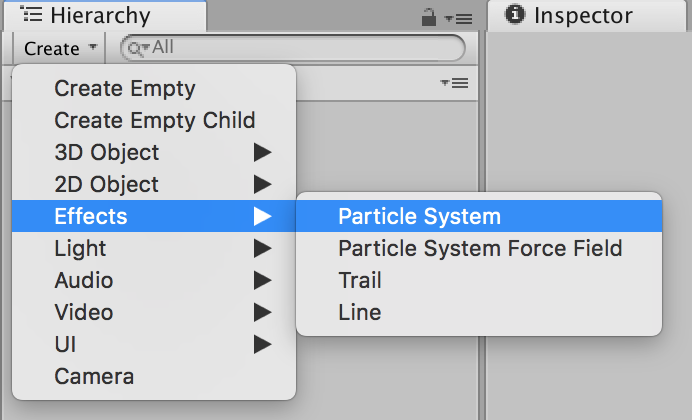
In Hierarchy, create a Particle System.
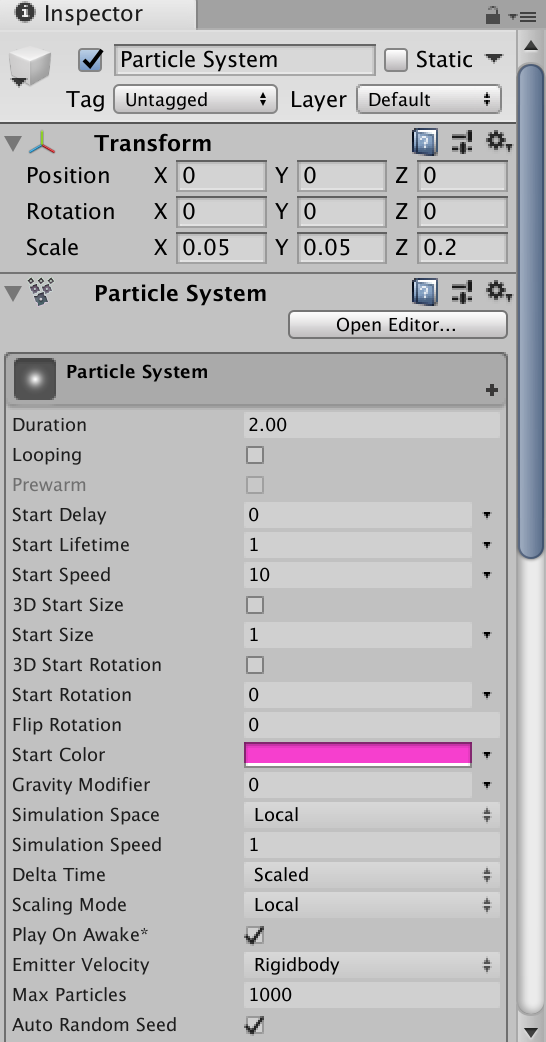
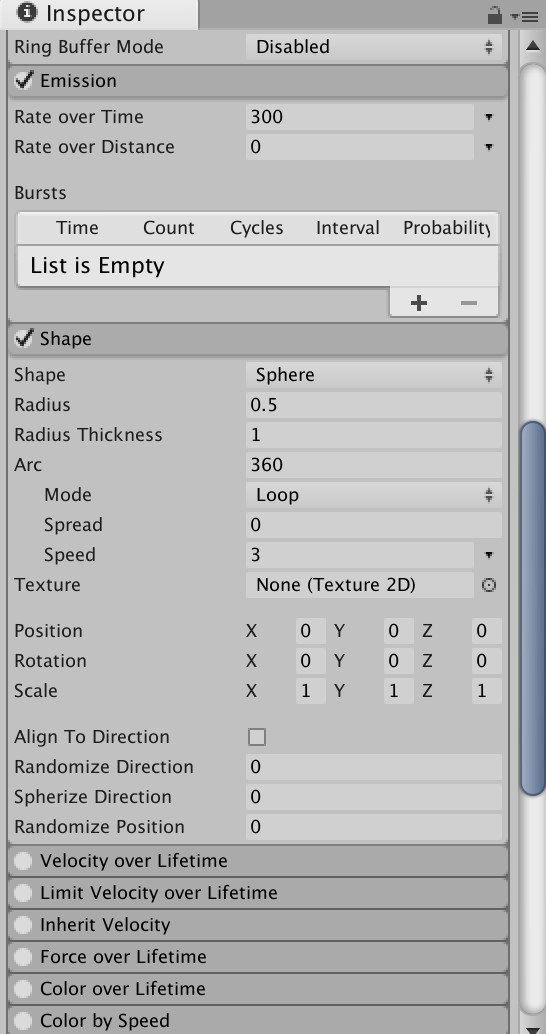
In the Inspector, configure your particles as you like to see those.
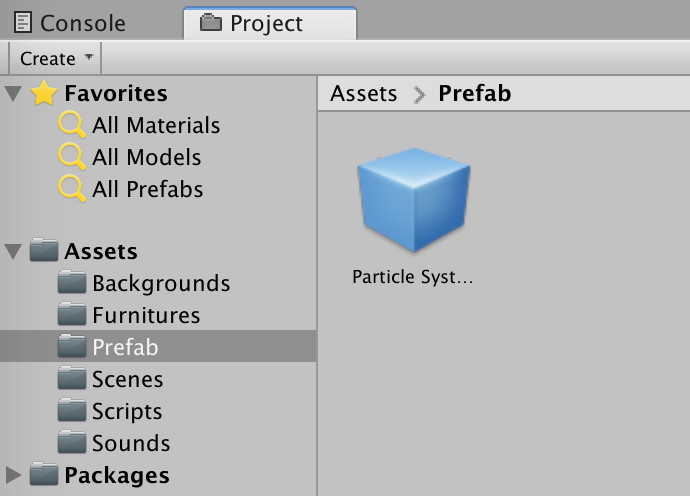
In Project > Assets create a new folder named Prefab. Drag your particle system into Prefab and delete the gameObject from the Hierarchy.
The particles should fire when a gameObject is clicked. So we need to change the ClickControl script.
Open the script and add the following:
//used to add the particles to each object
public Transform MyPartSys;
And add the following in the OnMouseDown:
//this runs the particles animation
Instantiate(MyPartSys, obj_txt.transform.position, MyPartSys.rotation);
Back in Unity, select all removable gameObject and add the particles prefab to My Part Sys under the script part in the Inspector.
Hit Play to test your game!
5.3 Add a Hint Button
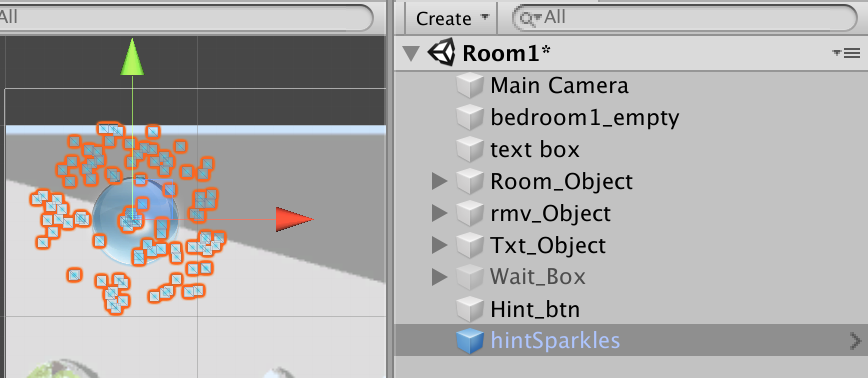
If the player gets stuck, it will be a good idea to help him somehow. For this, we create a hint button. But we don’t want that the hint button is always available; it needs some time to be ready to use. To achieve this, we play with the alpha channel (transparency) on the button image and add some sparkles as soon as the button is ready.
We add an orb image, Hint_btn, and a sparkle system, hintSparkles, to the Hierarchy.
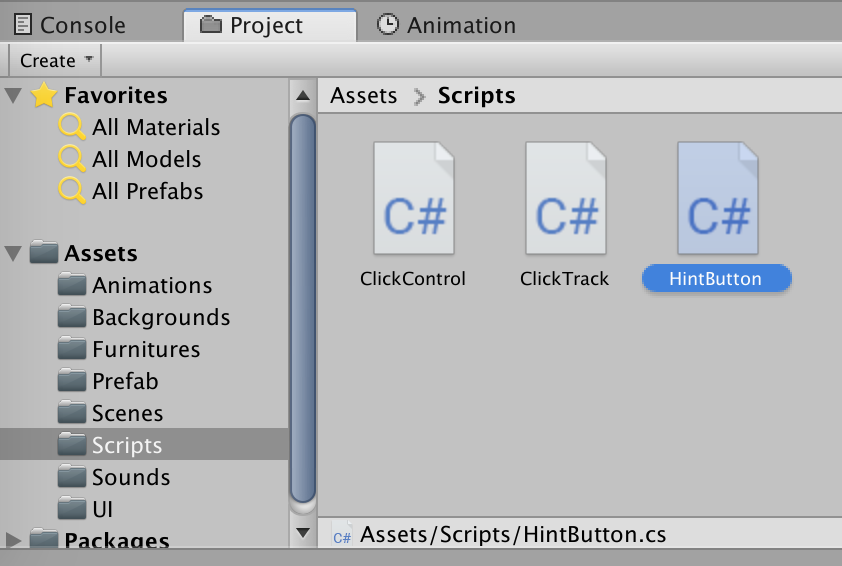
We add a new C# script, HintButton.
In the HintButton script, add the following variables:
//used for the hint btn
public float myAlpha = 0;
public float colortimer = 0;
public static string hintready = "n";
public static string hintused = "n";
//used to show/hide the particles to the hint btn
public GameObject MyPartSys;
In the Start part, add the following script.
//at start, hide the hint button
GetComponent<SpriteRenderer>().color = new Color(0, 0, 0, myAlpha);
//at start, hide the hint sparkles
MyPartSys.gameObject.SetActive(false);
In the Update section, add the following script.
colortimer += Time.deltaTime;
//Debug.Log("colortimer = " + colortimer);
if (( colortimer >= .5) && (myAlpha < 1))
{
myAlpha += 0.05f;
//Debug.Log("********* myAlpha: " + myAlpha + " *************");
colortimer = 0;
}
GetComponent<SpriteRenderer>().color = new Color(1,1,1, myAlpha);
if (myAlpha >= 1)
{
hintready = "y";
//this shows the particles animation
MyPartSys.gameObject.SetActive(true);
}
We need also to reinitialize the values after a mouse down event. So add this code after the update section.
private void OnMouseDown()
{
if (hintready == "y")
{
hintused = "y";
myAlpha = 0;
//after using a hint, hide the hint button
GetComponent<SpriteRenderer>().color = new Color(0, 0, 0, myAlpha);
//this hides the particles animation
MyPartSys.gameObject.SetActive(false);
}
}
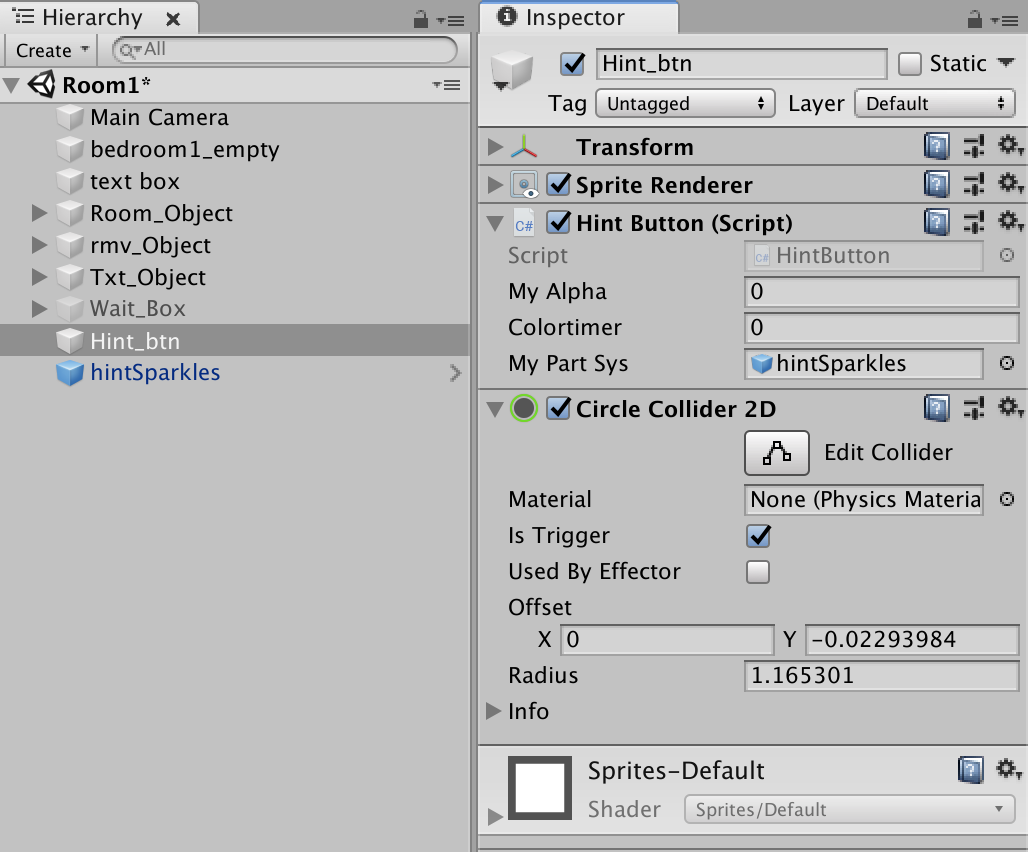
We add the script to the Hint_btn.
Hint_btn gets also a Circle Collider 2D component. This collider allows us to click on the Hint Button.
Add the hintSparkles to Hint Button (Script) > My Part Sys.
Now we need some code to highlight the objects after we clicked the hint button. This code must be added to the ClickControl script that we used in a previous chapter.
Add this variable to the ClickControl script:
public int randNumb = 0;
And this code to the Update section. The idea is to color the hinted object in red.
//Hint button behavior
if (HintButton.hintused == "y")
{
randNumb = Random.Range(1, 12);
if ((gameObject.name == "br1_alarm") && (randNumb == 1))
{
GetComponent<SpriteRenderer>().color = new Color(1, 0, 0);
HintButton.hintused = "n";
}
if ((gameObject.name == "br1_blocks") && (randNumb == 2))
{
GetComponent<SpriteRenderer>().color = new Color(1, 0, 0);
HintButton.hintused = "n";
}
if ((gameObject.name == "br1_flowers") && (randNumb == 3))
{
GetComponent<SpriteRenderer>().color = new Color(1, 0, 0);
HintButton.hintused = "n";
}
if ((gameObject.name == "br1_framered") && (randNumb == 4))
{
GetComponent<SpriteRenderer>().color = new Color(1, 0, 0);
HintButton.hintused = "n";
}
if ((gameObject.name == "br1_lamp") && (randNumb == 5))
{
GetComponent<SpriteRenderer>().color = new Color(1, 0, 0);
HintButton.hintused = "n";
}
if ((gameObject.name == "br1_laptop") && (randNumb == 6))
{
GetComponent<SpriteRenderer>().color = new Color(1, 0, 0);
HintButton.hintused = "n";
}
if ((gameObject.name == "br1_plane") && (randNumb == 7))
{
GetComponent<SpriteRenderer>().color = new Color(1, 0, 0);
HintButton.hintused = "n";
}
if ((gameObject.name == "br1_plant") && (randNumb == 8))
{
GetComponent<SpriteRenderer>().color = new Color(1, 0, 0);
HintButton.hintused = "n";
}
if ((gameObject.name == "br1_plant2") && (randNumb == 9))
{
GetComponent<SpriteRenderer>().color = new Color(1, 0, 0);
HintButton.hintused = "n";
}
if ((gameObject.name == "br1_tower") && (randNumb == 10))
{
GetComponent<SpriteRenderer>().color = new Color(1, 0, 0);
HintButton.hintused = "n";
}
if ((gameObject.name == "br1_train") && (randNumb == 11))
{
GetComponent<SpriteRenderer>().color = new Color(1, 0, 0);
HintButton.hintused = "n";
}
}
Hit Play to test your game!
5.4 Have an object multiple times
If you have twice or three times an object, the attached text should show the number of objects in the scene. Here we’ll add some teddybears.
Add a new text object. Place it on the list of objects. Change the text to “3x Bears” (that’s the amount of bears in the beginning).
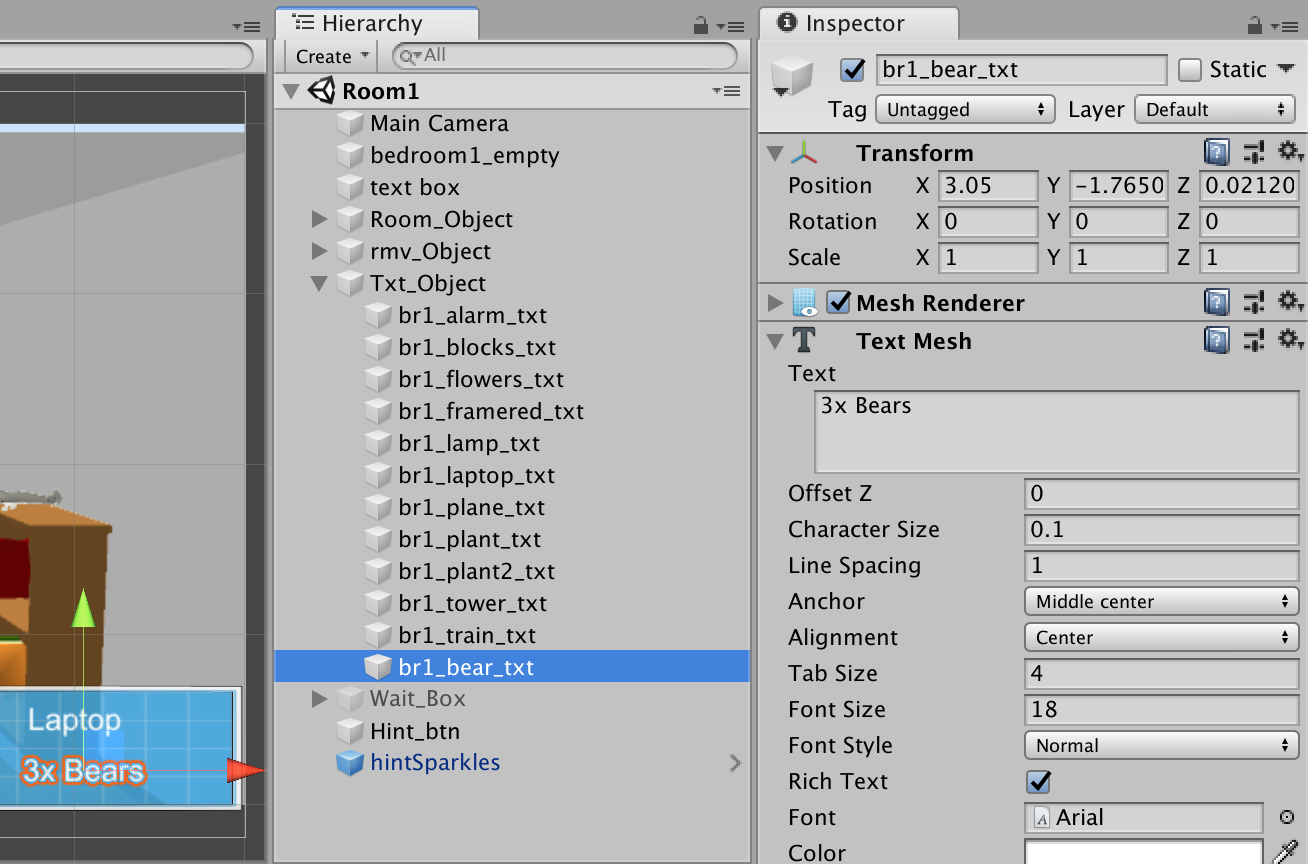
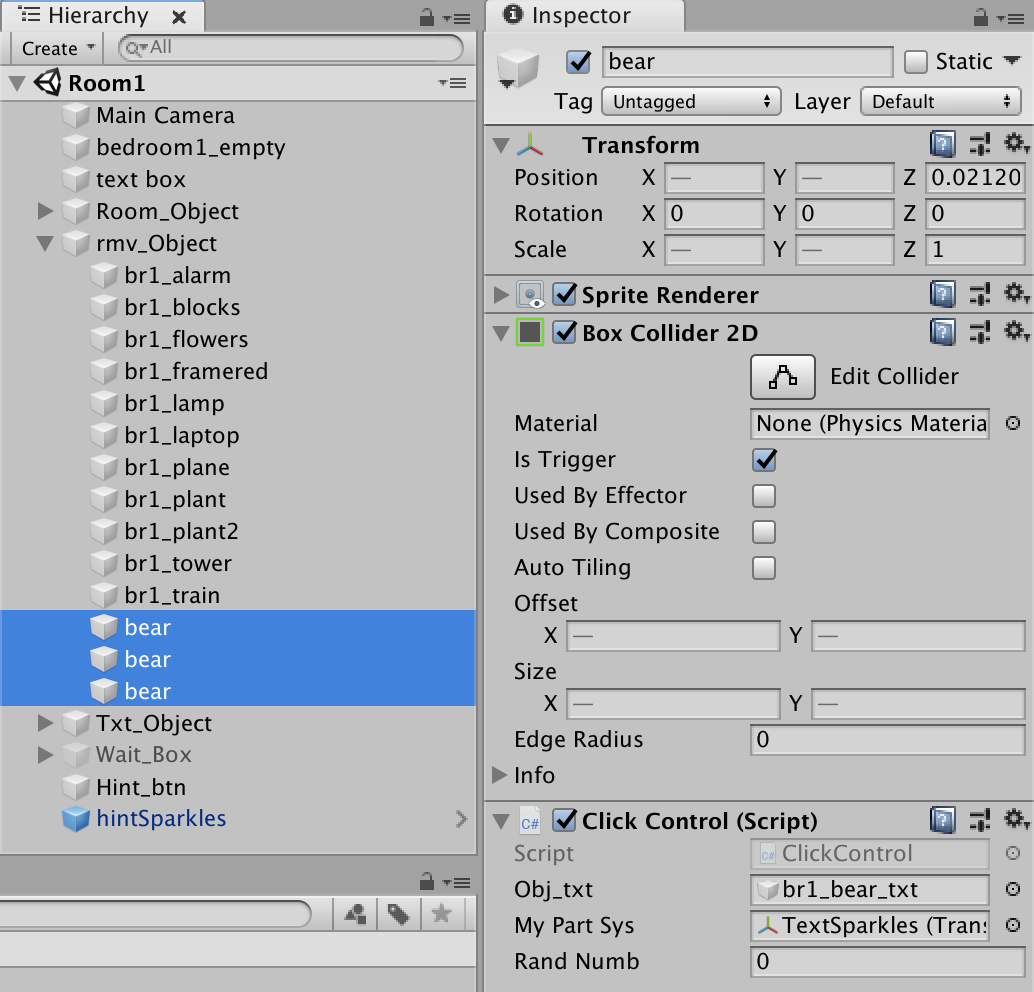
Add 3 bears to the hierarchy. Give all three objects the same name.
Select the 3 objects, add them the ClickControl script and a Box Collider 2D.
In the script part, add the text object newly created and the text sparkles.
Open the ClickControl script and add the following variable. The value here must be the amount of bears in your game.
//used to count the bears (multiple objects)
public static int remainBear = 3;
In a previous chapter, we saw how to destroy GameObjects and their texts. Now we should destroy the text only when all bears have been found. But the text should be modified when we click on a bear.
Therefore we need to adapt the OnMouseDown section.
Replace this:
Destroy(gameObject);
Destroy(obj_txt);
By that:
//if a bear is clicked, and we have more than 2 bears, remove the object and change the text
if ((gameObject.name == "bear") && (remainBear > 2))
{
remainBear -= 1;
obj_txt.GetComponent<TextMesh>().text = remainBear + "x Bears";
Destroy(gameObject);
}
//if a bear is clicked, and we have 2 bears, remove the object and change the text
//this step is needed to change the text from "2x bears" to "bear"
else if ((gameObject.name == "bear") && (remainBear > 1))
{
remainBear -= 1;
obj_txt.GetComponent<TextMesh>().text = "Bear";
Destroy(gameObject);
}
//for the last bear (and every other object), proceed as normal
else
{
//Destroy the object and the text
Destroy(gameObject);
Destroy(obj_txt);
}
Hit Play to test your game!


